
KB User's Guide - Home Tab - Upload Profile Photo
Upload a Profile Photo
To upload a Profile photo, please follow this navigation: open the KB Admin Tools > Home tab > MyProfile link. This will lead to the My Profile screen and a table called Profile Options. The image below shows the Add / change / delete profile photo link circled in red within the Profile Options table.

If you wish to upload a photo in your own files (e.g. your own hard drive, network files, etc.) please follow the directions below:
- Click on the Add / change / delete profile photo link. The User Profile Photo Uploader pop up box will appear.
- Click on the Browse or Choose File button and select a
*.jpg,*.pngor*.gifphoto of yourself.
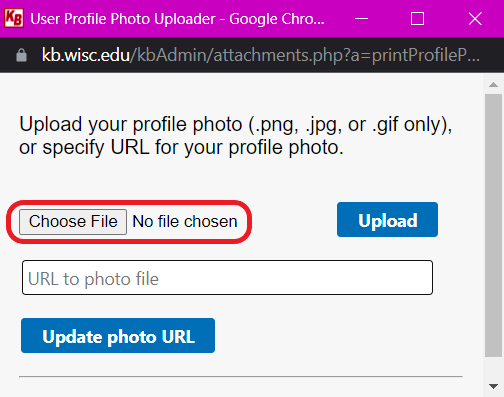
- Click on the Upload button. A message will appear, "Profile photo has been successfully uploaded / updated.". Click on the Close button.
- The image selected will appear in the Profile Options table.
Delete a Profile Photo
If you would like to delete the photo in your profile, please follow the directions below:
- Click on the Add / change / delete profile photo link. The User Profile Photo Update pop up box will appear.
- Click on the Delete profile photo button (circled in red in the image below).
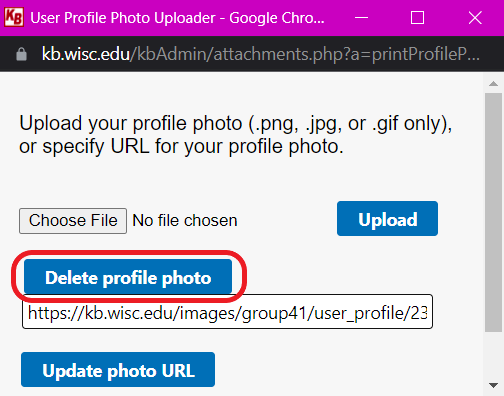
- A pop up box will appear asking, "Are you sure you want to delete the profile photo?" Select the OK or Cancel button.
- Upon Clicking the OK button, you will receive a confirmation message of the photo deletion.
- From here, if you wish to add another photo, please refer to the steps above in the Upload a Profile Photo section.
Upload a URL to a Photo
If you have a photo of yourself that is accessible via URL without password authentication (for example, a profile photo from a social networking site such as Linkedin or Facebook), please follow the steps below. If you have a local profile photo in place, the URL you provide will be ignored.
-
Click on the Add / change / delete profile photo link. The User Profile Photo Uploader pop up box will appear.
-
Enter the URL into the text box provided.
-
Click on the Update photo URL button which is circled in red in the image below.
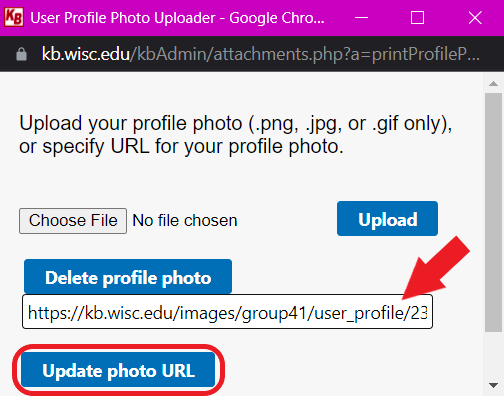
- A message will appear, "Profile photo URL has been successfully updated". Click on the Close button.
- Your URL image will appear in the Profile Options table.
Delete a URL to a Photo
If you would like to delete the URL photo, please follow the steps below.
- Click on the Add / change / delete profile photo link. The User Profile Photo Update pop up box will appear.
- Delete the URL within the text box field.
- Click on the Update photo URL button.
- The message, "Profile photo URL has been successfully updated" will appear. Click on the Close button.
- The image section of the Profile Options table will be empty.
Who Else Can See My Profile Photo?
Users who can access the internal site(s) or KB Admin Tools spaces where your documents are published or shared are able to view a pop-up window with your profile information.

This pop-up can be accessed in the following ways:
Internal Site
When viewing a specific document, you will see a clickable NetID link in the Owner field of the document information section found at the bottom of your document. A red arrow is pointing to the linked NetID in the Owner field.
Clicking on the linked NetID leads to a User Profile pop up window. In the image below, Bucky Badger's User Profile shows his: Default Group, UserID, First, Middle, Last name, Email, Phone and Subject Area in addition to his User Profile image.
KB Admin Tools
A clickable link will be found in the Owner field when viewing document and news item lists across various pages of the KB Admin Tools.