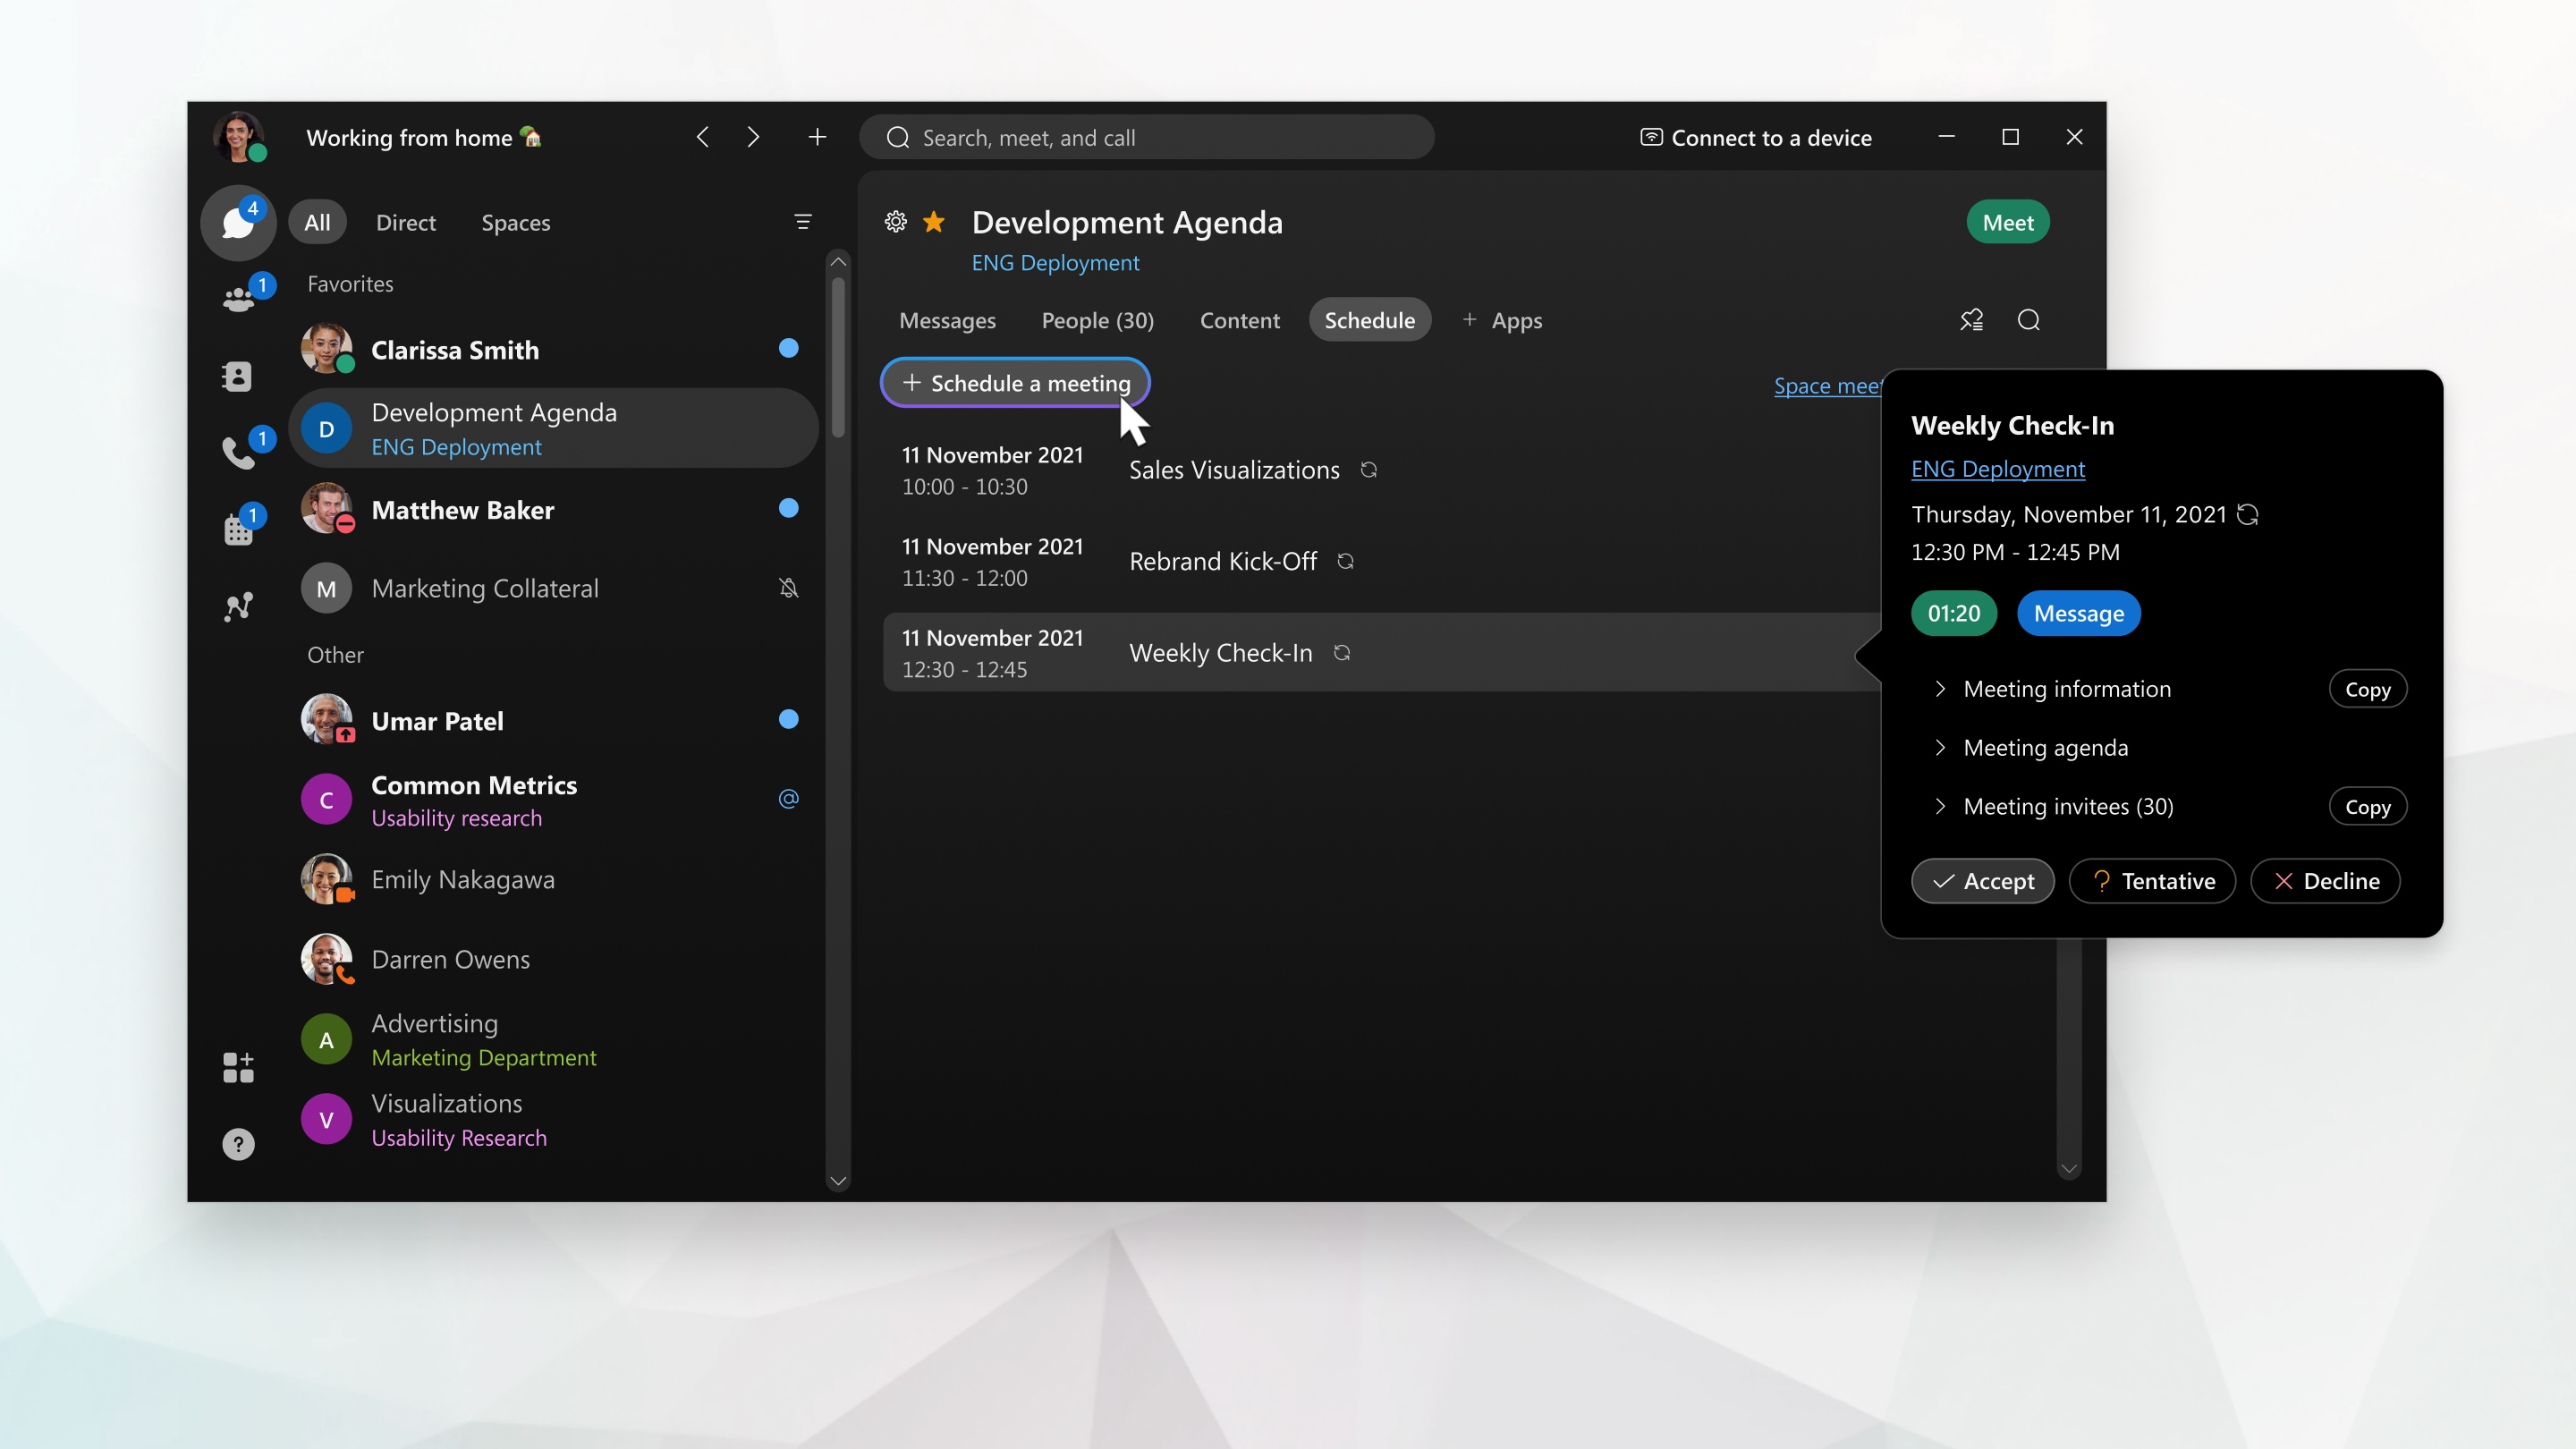
Webex App - Adding a Webex Meeting from your Webex Group Space
Getting Started
Each space created in the Webex App has it's own meeting URL. You can see this by clicking on the Schedule Tab in the menu bar of the Webex Teams space. Click on Space Meeting Information.
| 1 |
In the space, click Schedule.
|
| 2 |
Select Schedule a meeting. Webex opens a calendar invite in Microsoft Outlook that automatically includes email addresses for everyone in the space, the space name as the subject, and "@webex:space" in the Location field. The invite will also include a link to join the meeting, Join by phone options, and a video address so people can join from any standards-based video system. |
| 3 |
Specify the date, time, and other details you need to include. |
| 4 |
Add a Cisco Webex room or desk device by selecting on Windows or Scheduling or Room Finder and then Add Room on the Mac and then add the room or desk devices you want to include. This is the same address you use when reserving the meeting room. This makes a Join button appear on the device 5 minutes before the meeting starts.
|
| 5 |
Send the meeting invite. |

- This is not using the Webex Productivity Tools that connects your Outlook Desktop Client to your Webex account or the Webex Scheduler. Webex is just launching Outlook and pre-populating an invite with the space details.
- Everything described above works the same for external (non-UW) Webex App users that are members of the space.
- Non-Webex App users can also join the meeting using the link in a browser or entering the meeting number in the Webex Meetings Desktop App.
- As long as at least one UW Webex user is a member of the space the meeting capabilities will persist- even if the original creator leaves the space or their account is deleted.
- Once the meeting is started, the toll number can be used to join the meeting.
-
All members in the space can schedule and start a meeting in the space. There is no dedicated host. This can be done by selecting the Schedule a Meeting link.
