Accessing local resources with Citrix Workspace on Windows
When using Citrix, you can access your local hard drive to save files. This can be done by downloading Citrix Workspace, but does not work with the web client. Here is a guide on how to access files saved locally when using Citrix Workspace.
IT IS IMPORTANT TO KNOW WHERE YOU ARE SAVING YOUR FILES! THE DEFAULT LOCATION FOR XENAPP IS ON YOUR CAE FILESPACE. MAKING CHANGES TO THE DEFAULT LOCATION CAN RESULT IN SAVING ON THE XENAPP SERVER DESKTOP. THIS WILL RESULT IN THE LOSS OF YOUR FILES!
If you would like to change the option to save your work from XenApp to your local drive on a Windows computer, follow the directions below. UNTIL YOU ARE SURE that you are saving to the correct location double check that the files are where you want them to be before exiting the program. You can install workspace by following this KB article: https://kb.wisc.edu/cae/page.php?id=34016
1. Log into https://remote.engr.wisc.edu/ with your CAE username and password.
2. Launch a program. For this example, Maple is used.
Note: You will need to have your account configured to launch apps in Citrix Workspace. For directions to do that, please see https://kb.wisc.edu/cae/110906
If prompted with a Security Warning about an online application trying to access information on devices attached to your computer, we suggest permitting use, this ensure that Citrix will be able to save files correctly on all connected storage devices.

3. When the program opens, go system tray in the lower right corner of the screen(the ^). Right click on Citrix Workspace, and click "Connection Center".

4. This will bring up your Connection Center settings. Next, click Preferences (highlighted in yellow).

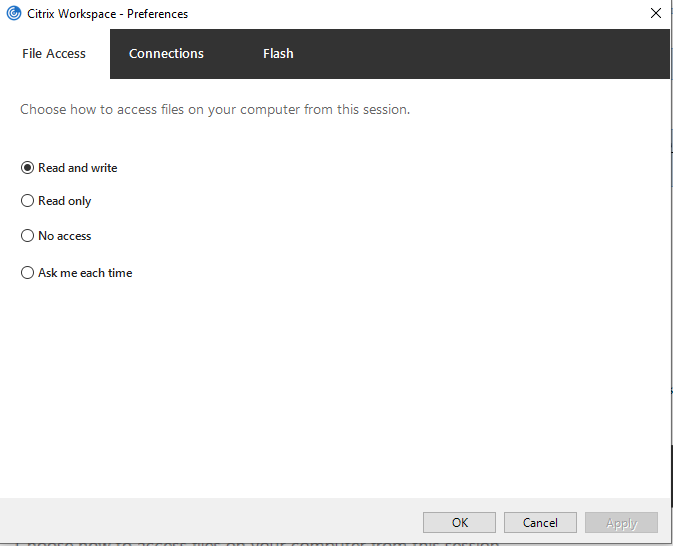
5. When your preferences have opened, navigate to File Access and make sure that "Read and write" access is selected.

That should allow Citrix to access files that you have saved on your local hard drive.
6. To access/open files, click "File" on the top left on "Open." Then open the "This PC" option on the left hand side.
If prompted with a security warning about an online application attempting to access files on your computer, you must permit all. This gives Citrix a final OK that you want the application you are running to access files.

You should now see an icon for you computer's Hard drive. It should be listed as something like "Local Disk (C: on YourComputerName). Drive letter may be different depending on how your computer is set up. DANGER: There is another Local Disc (C:), which we have "X'd" out. That is the drive on the XenApp server. DO NOT SAVE YOUR WORK THERE! It will most likely be lost forever if you do. We can't disable, rename or hide it and many students have lost their work by saving there.
.png)
