
Wireless Lavalier Kit
Wireless Lavalier Kit
Kit Contents
- (1) Lavalier Case
- (1) Countryman B3 Mic
- (1) Mic Clip
- (1) Sennheiser ME 2-II Mic
- (1) Mic Clip
- (1) Countryman B3 Mic
- (1) Sennheiser G4 Receiver
- (1) Sennheiser G4 Transmitter
- (1) 1/8" Plug to XLR Plug
Countryman B3 Mic with clip
.jpg "b3-mic")
Sennheiser ME 2-II Mic with clip
.jpg "me-mic")
Sennheiser G4 Receiver

Sennheiser G4 Transmitter

1/8" Plug to XLR Plug Adapter

Setup and Use of Wireless Lavalier Kit
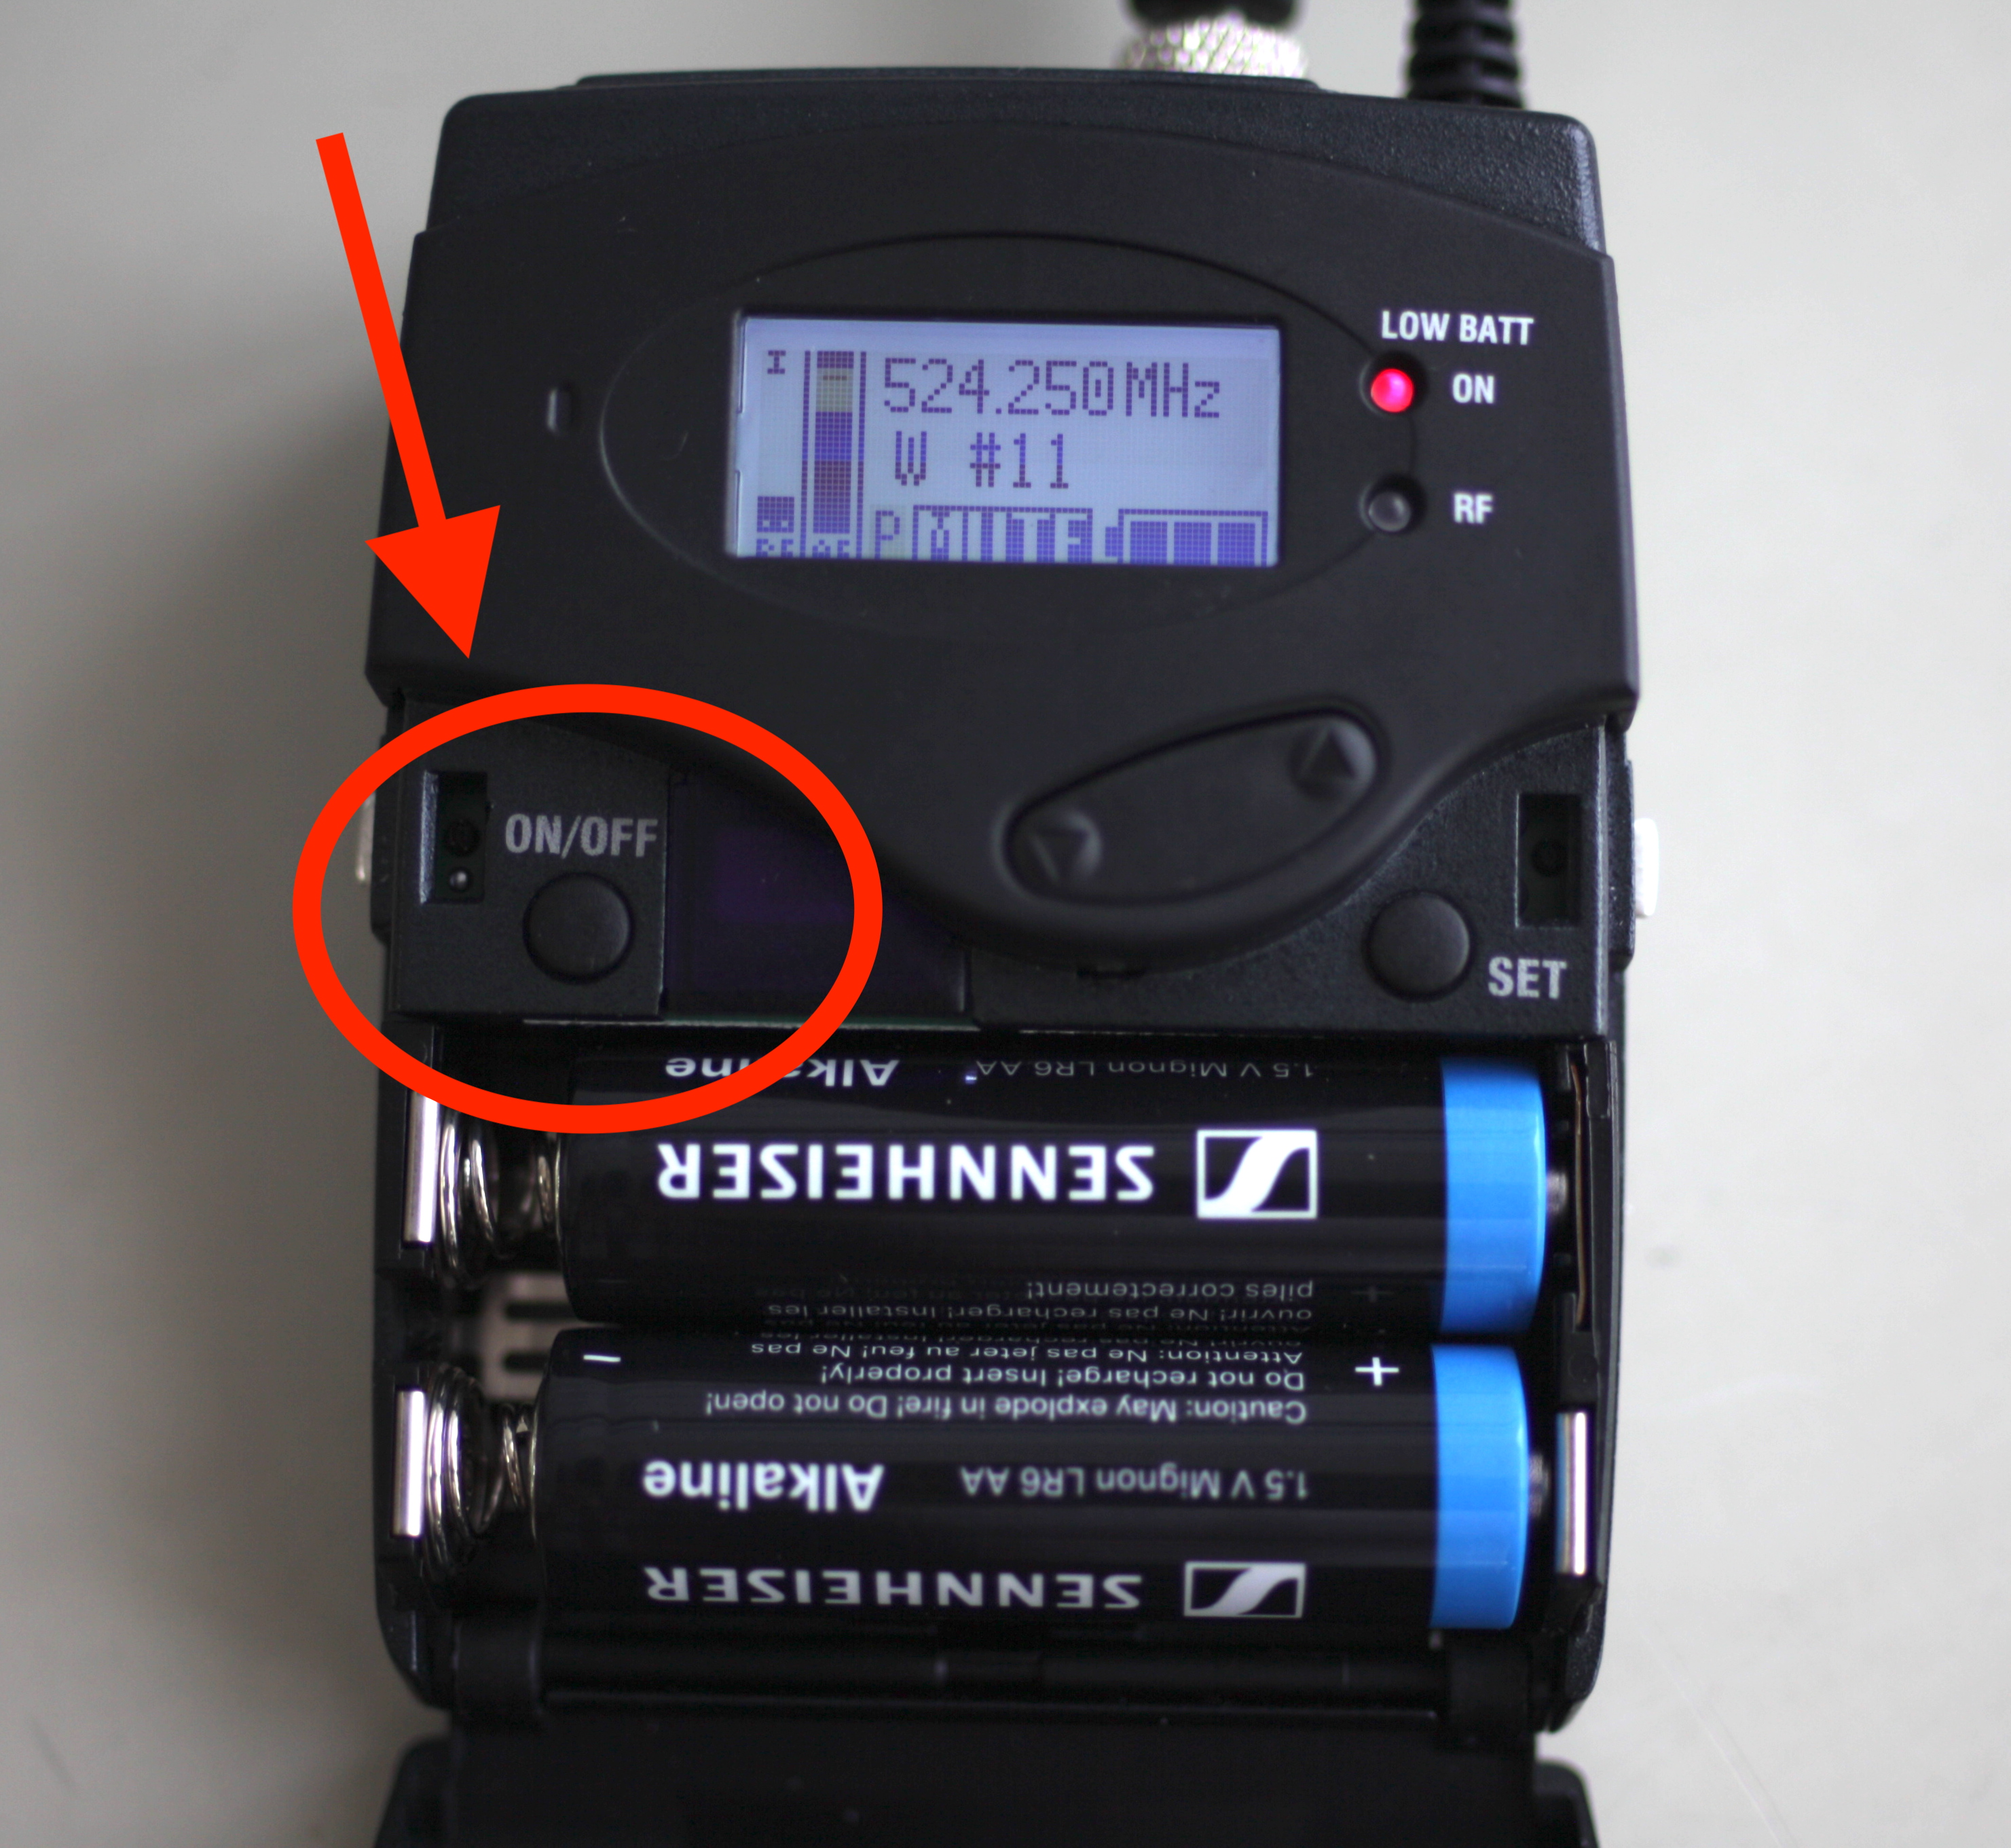
- Open both the transmitter and receiver by using the buttons on the side of each device.

This will reveal the battery compartment and menu buttons.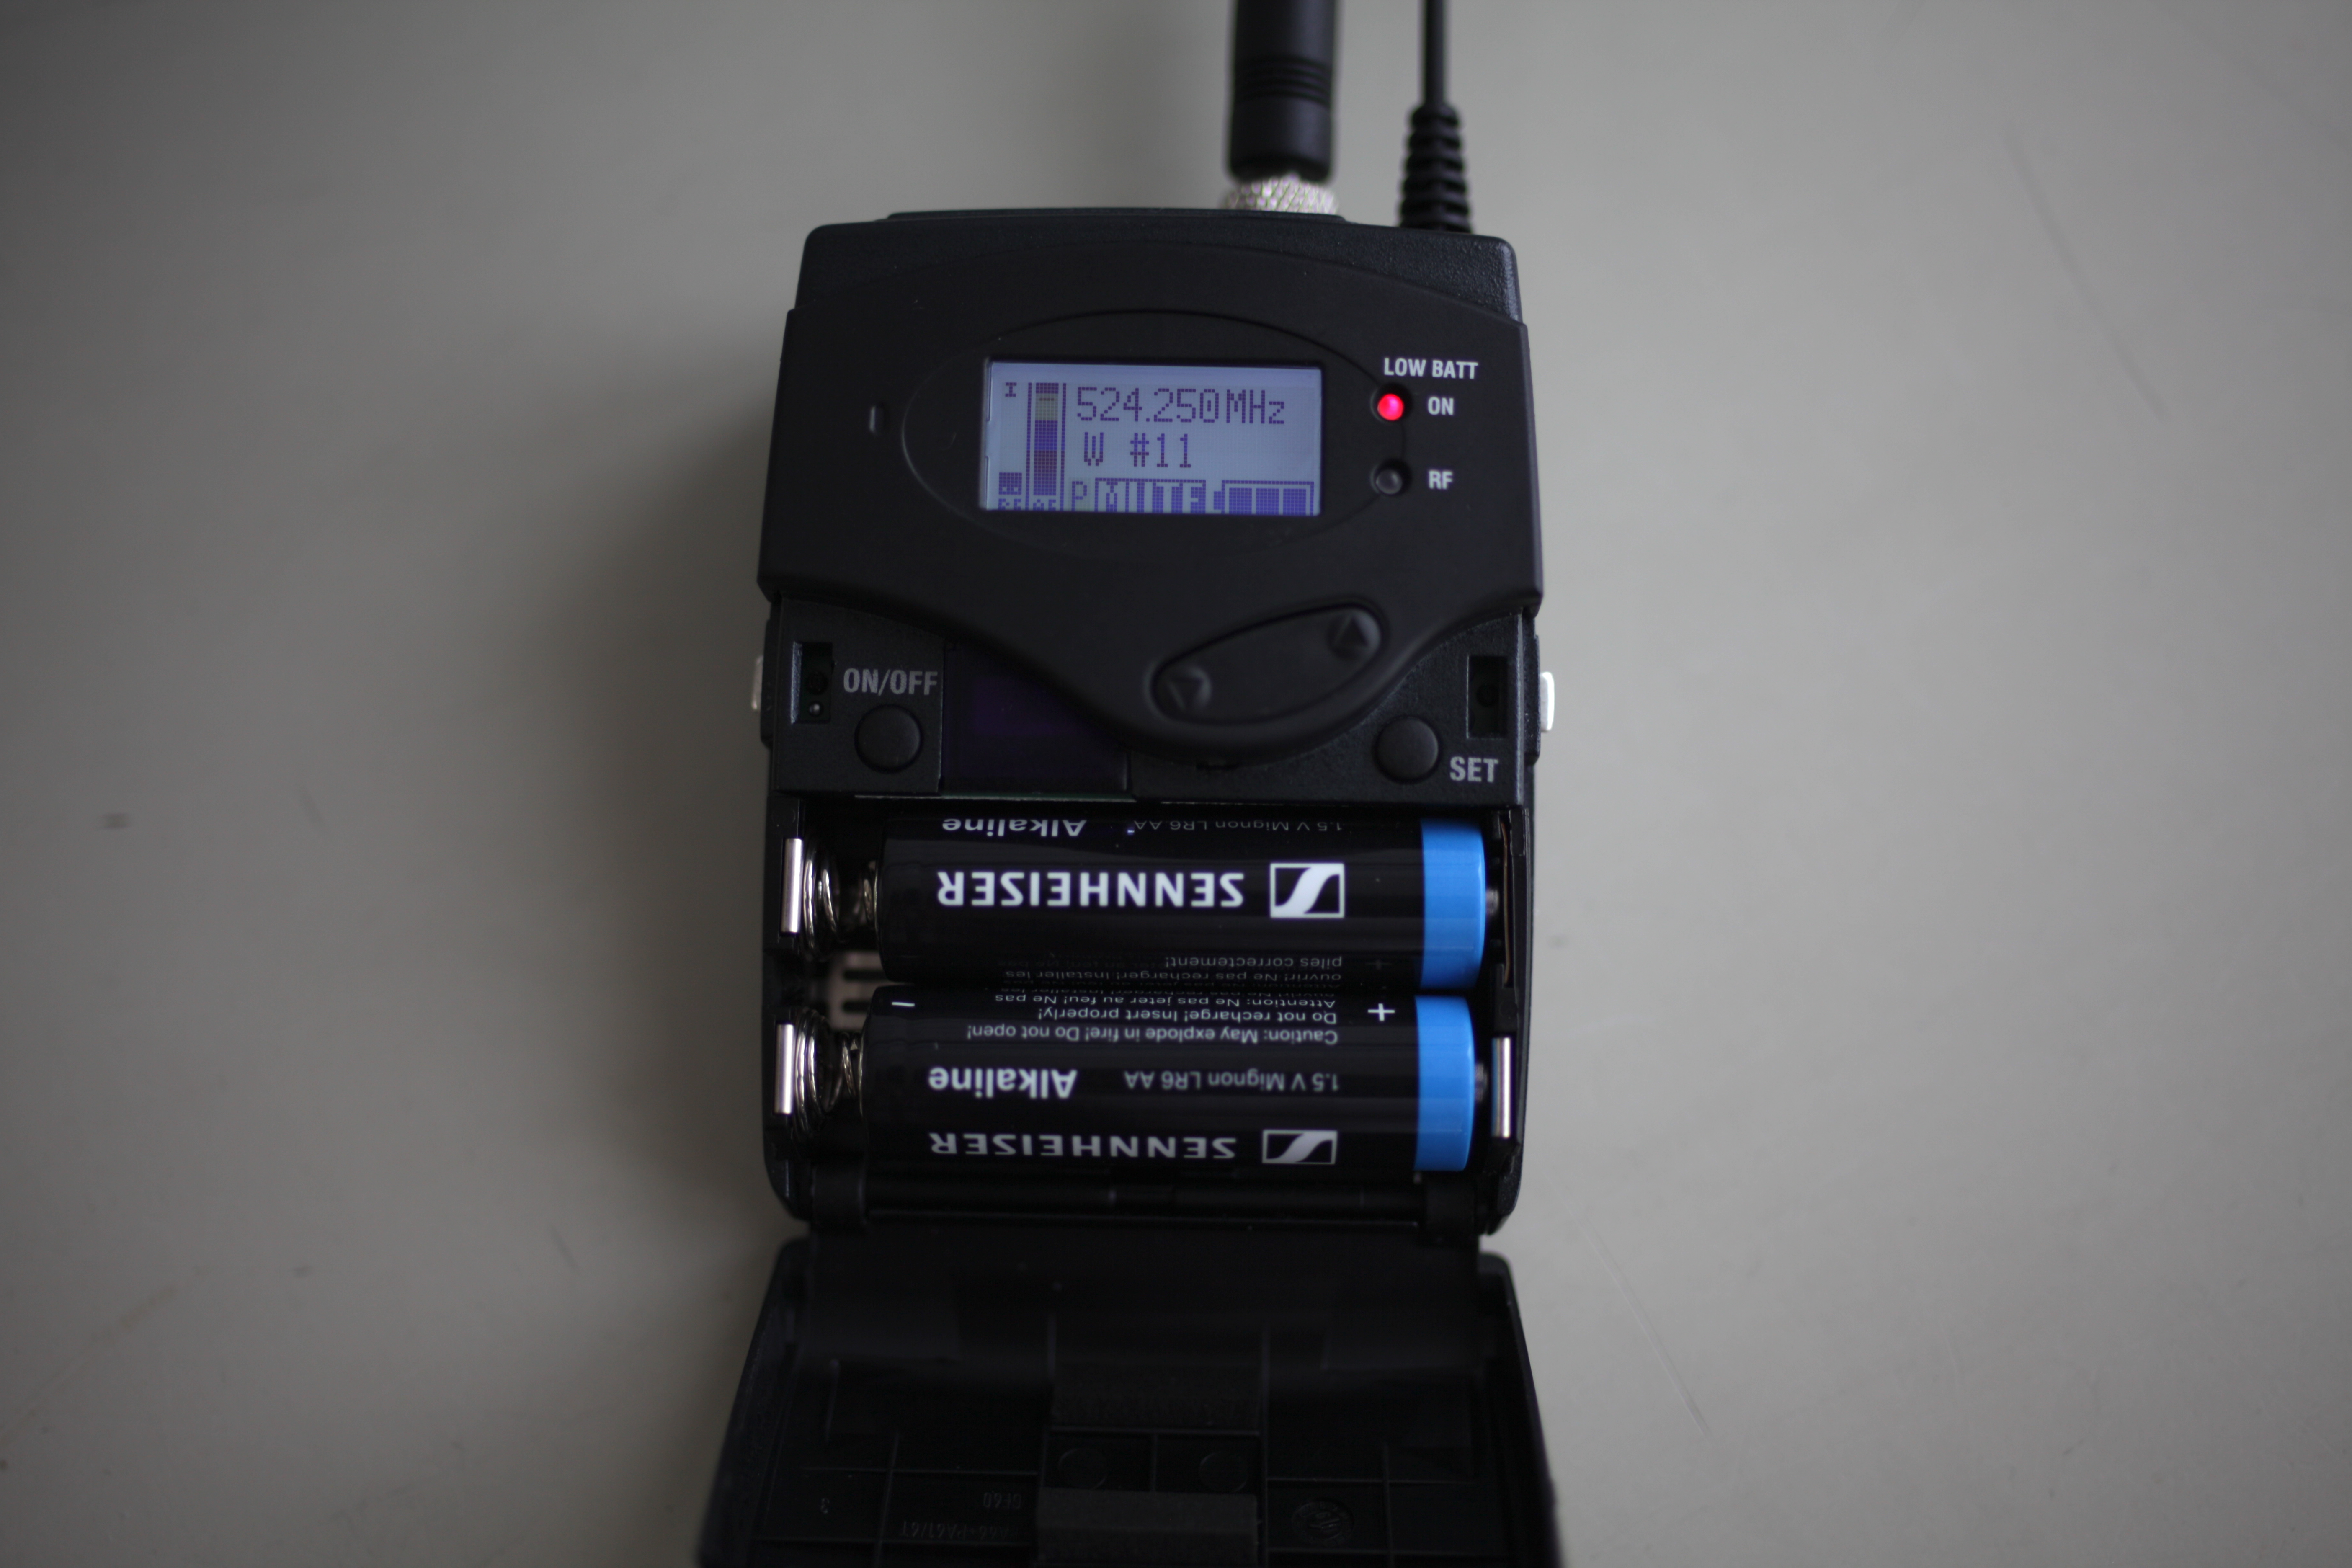
- Hold the On/Off Button to turn on each device.
- Once powered on, observe the top of the display to make sure the frequency matches on both devices.

If the frequencies do not match, use the "Set" button to open up the menu, and use the arrow buttons to maneuver to "Frequency Preset," and change accordingly.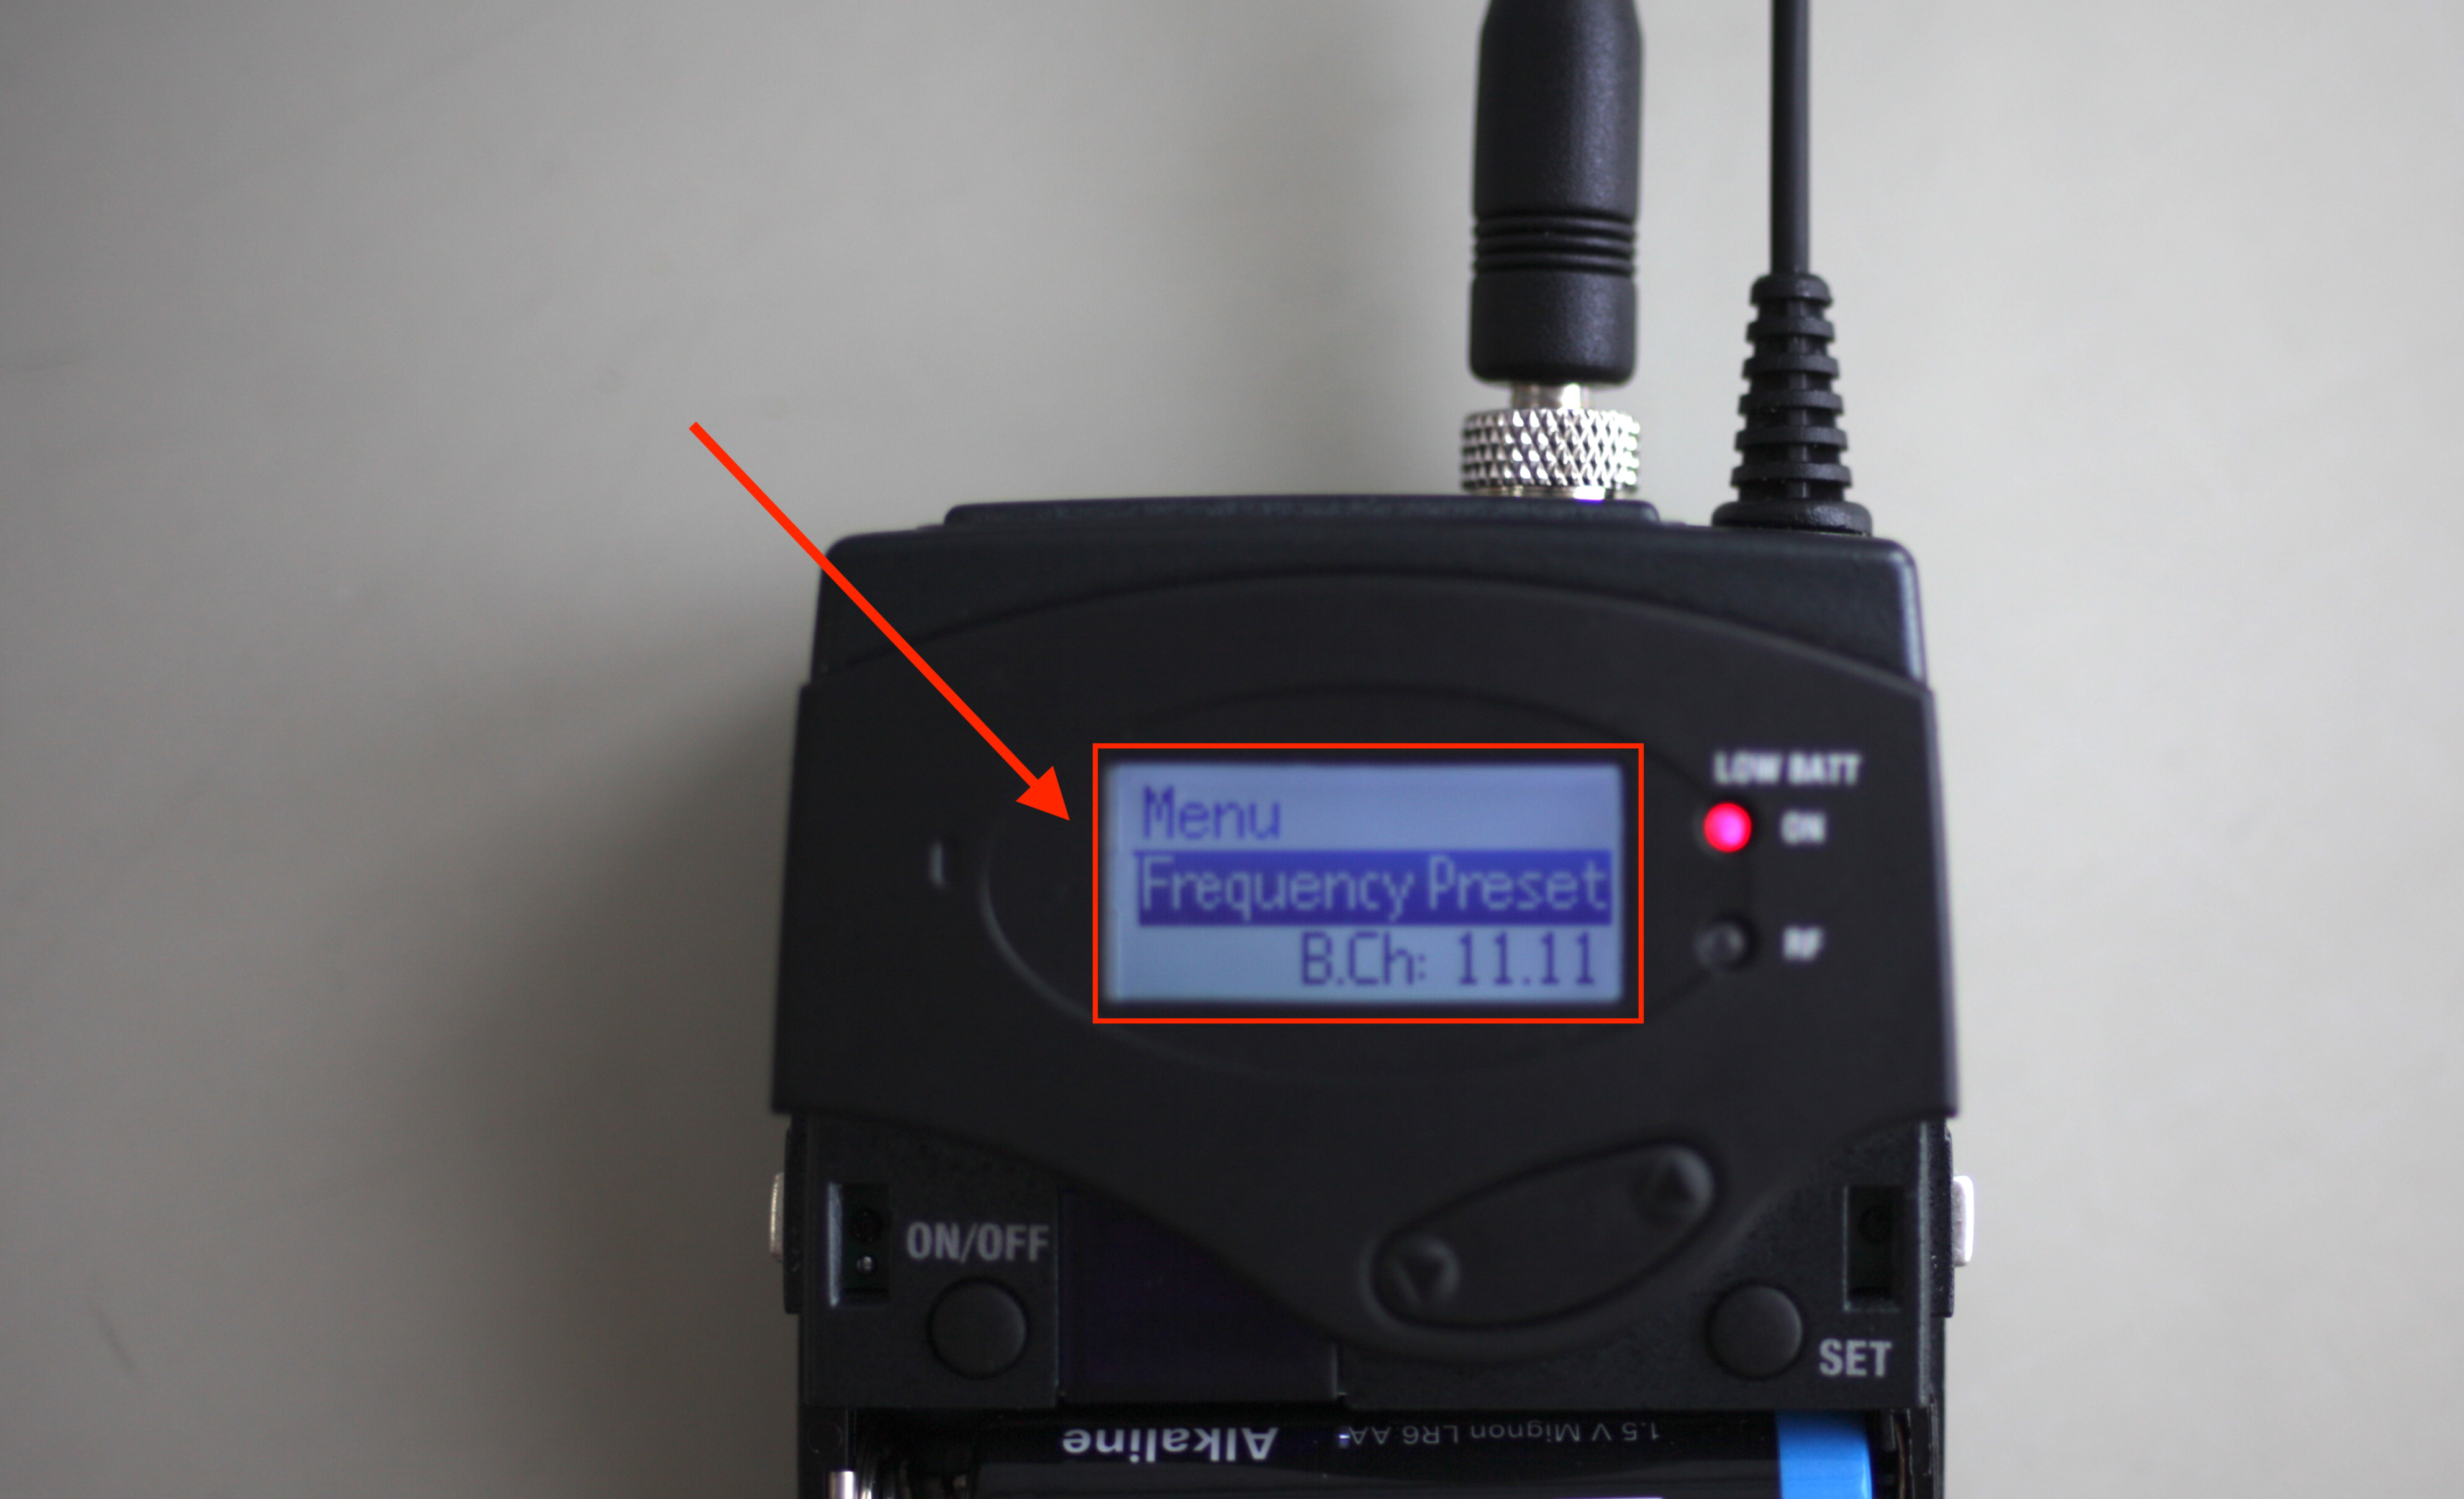
- Connect the 1/8" to XLR Adapter to the Receiver's "AF Out" port via the 1/8" plug end. Make sure to tighten the connector lock in order to secure the cord to the receiver.

- Then, plug the XLR plug end into your camera or sound recording device. Note which channel you are plugging into. Secure the Receiver to your camera or sound recording device.

- Connect your microphone to the Transmitter's "Mic/Line" port. Make sure to tighten the connector lock in order to secure the cord to the transmitter.

- Secure the microphone to your subject.

(Good practice for lavalier placement is somewhere on the chest that hides the microphone, around 6 inches below the mouth if possible, and somewhere with minimal rubbing with skin or fabric. If needed, you can use supplies from the Lavalier Accessories Kit to aid this process. The kit has tape to help secure a mic and reduce rubbing interference). To reduce interference from the microphone wire bouncing around, you can create a loop in the wire, and tape the wire together at the intersection.
The transmitter should then be secured to the subject's belt or put in their pocket. The lavalier accessory kit has a band to use as well. - Make sure your camera or sound recorder is set to Line level for the lavalier mic. If this isn't set correctly, you won't be able to pick up your audio correctly.
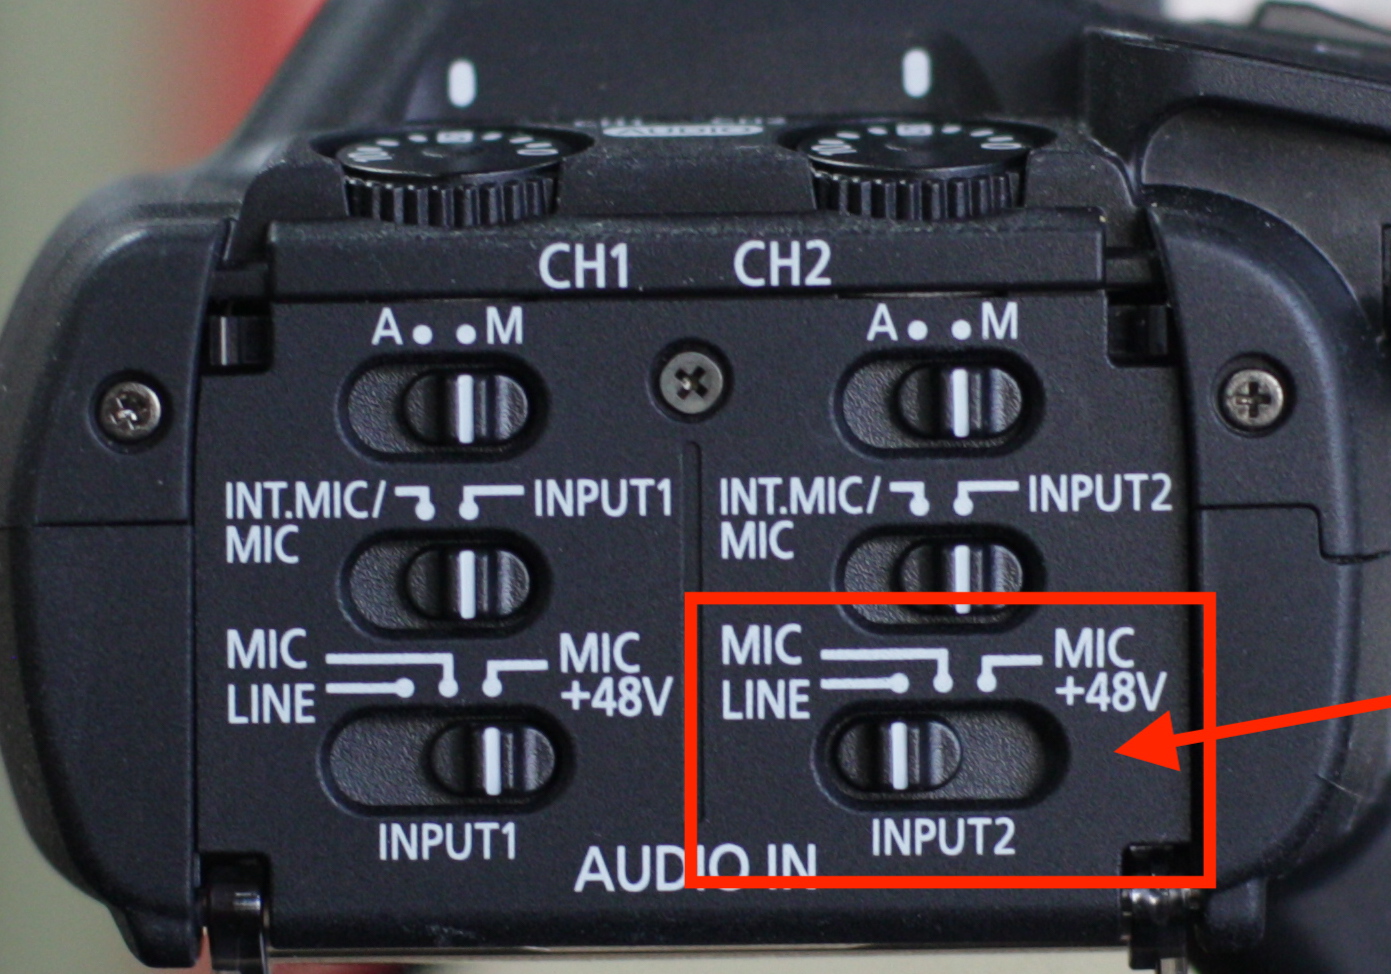
- Double check both the Transmitter and Receiver decibel settings. The Transmitter should have a Sensitivity of -12dB. The Receiver should have an AF Out of 0dB.
- If everything has been set properly, you should be able to see input on the channel that your lavalier is plugged into.
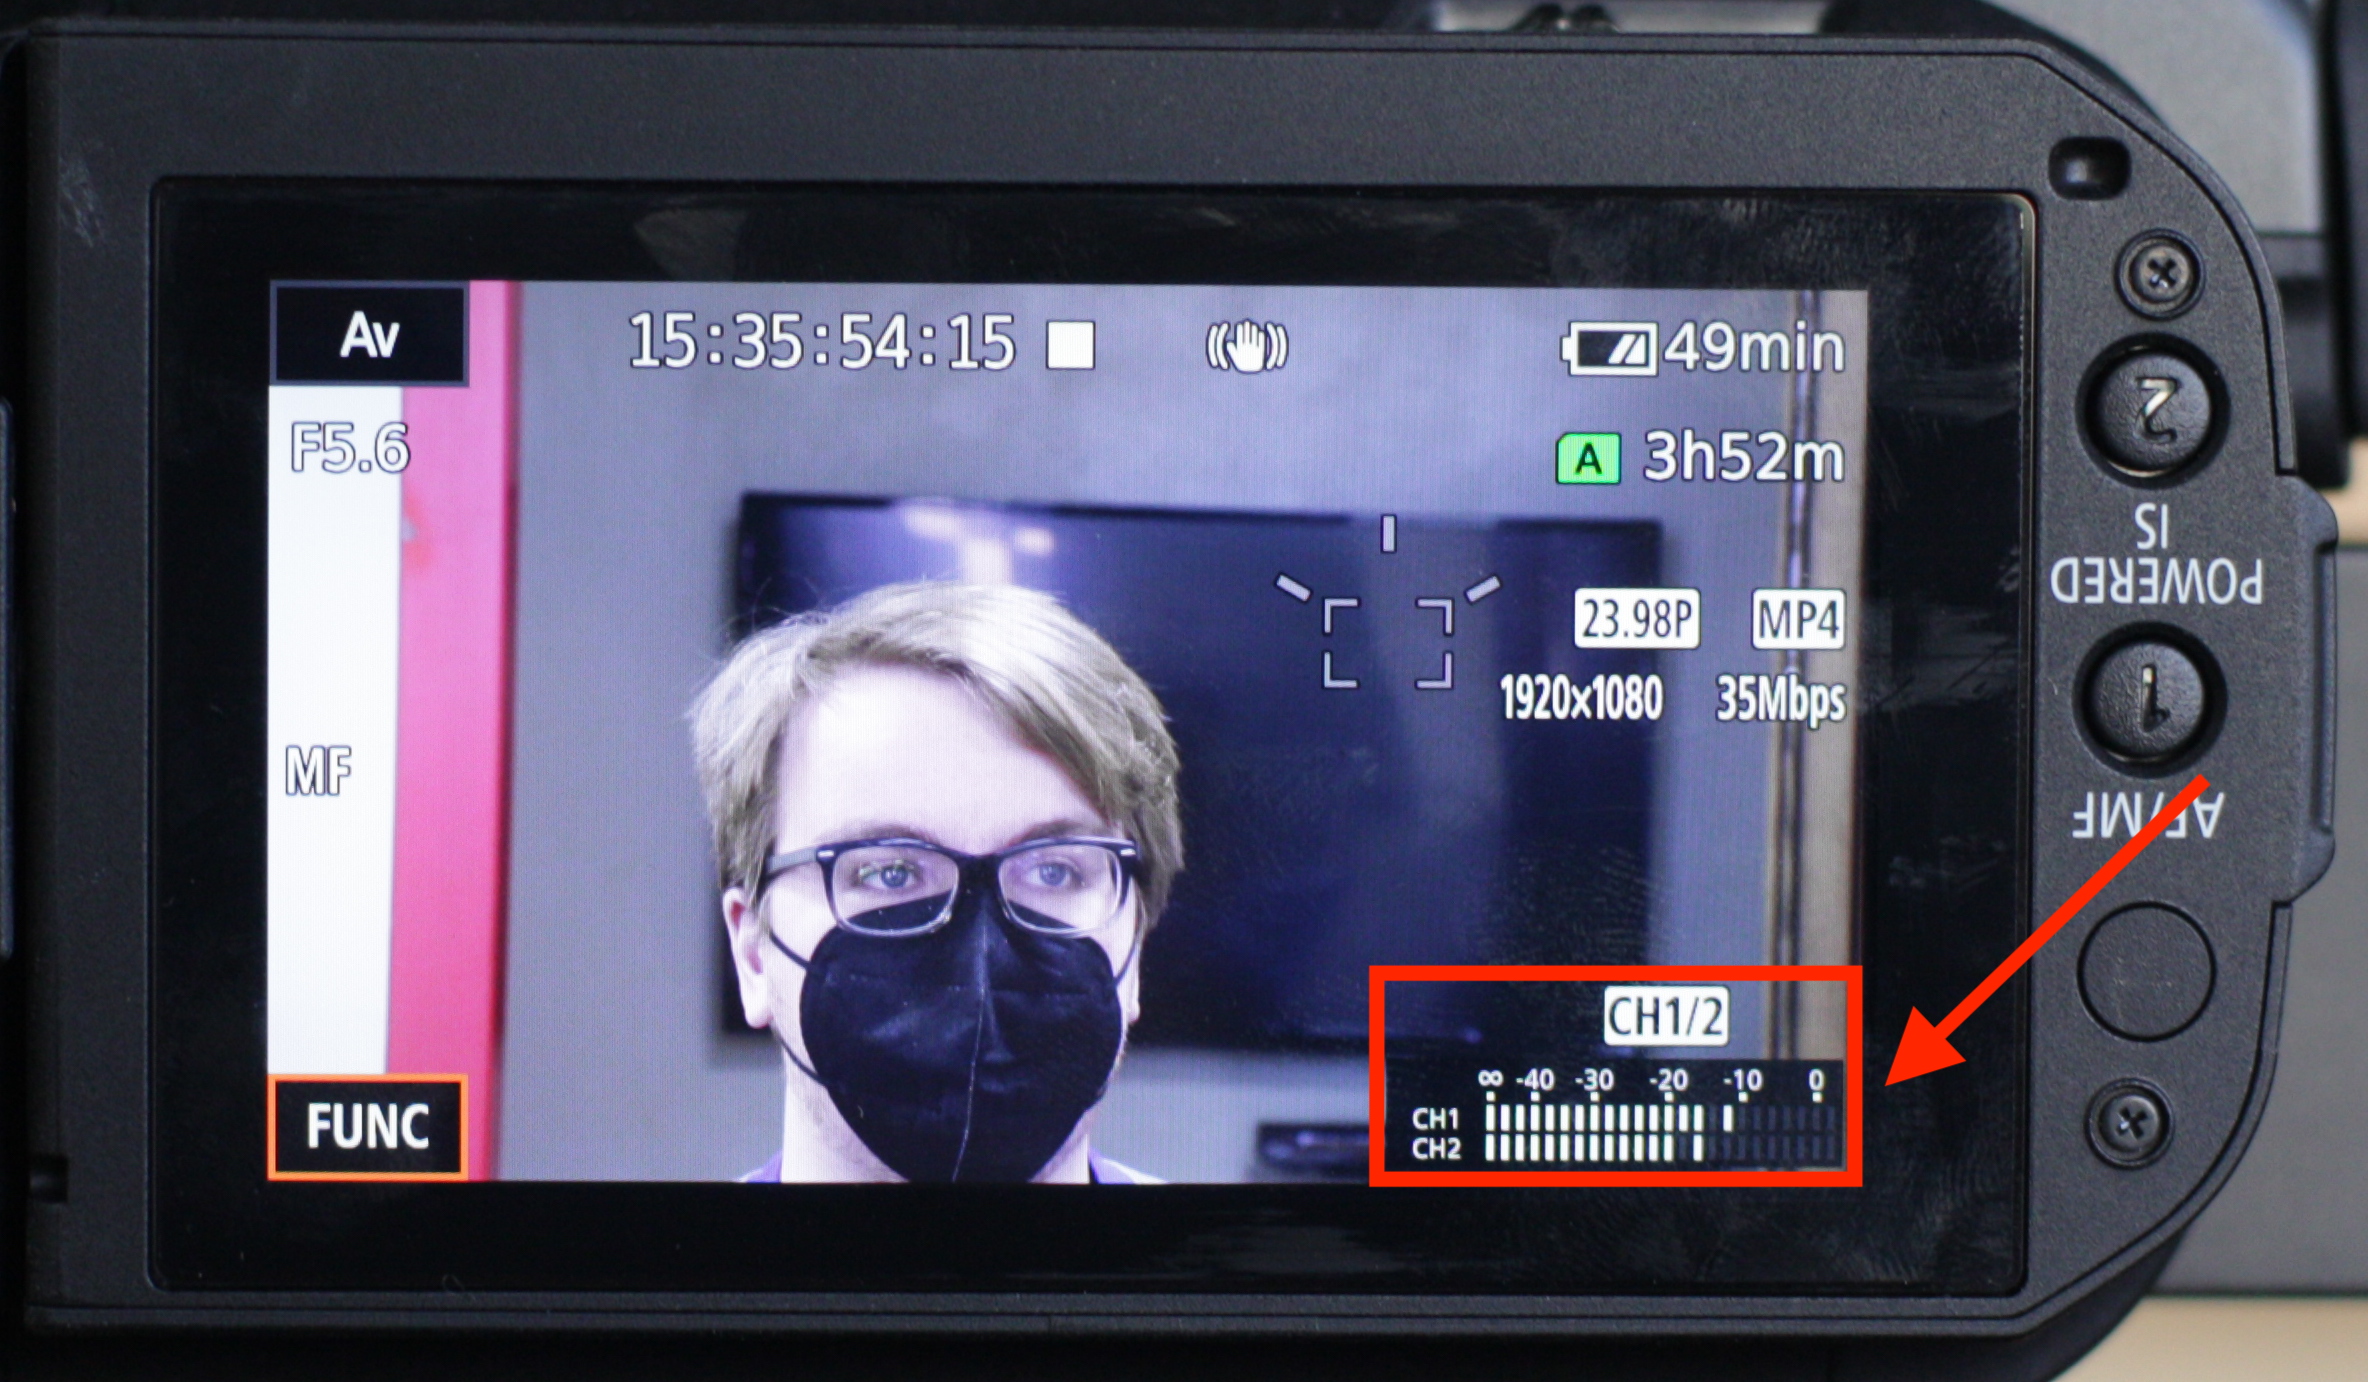
- If you are unable to see proper input in the specified channel, repeat these steps and make sure everything is plugged in correctly and you have the right settings for each device.
Troubleshooting
Resetting the Sensitivity and AF Out
- The wireless transmitter's "sensitivity" should be set to -12dB.

- The wireless receiver's "AF Out" should be set to 0dB.
