[100] Zoom Q8 Camcorder
Instructions on how to use the Zoom Q8 Camcorder
Table of Contents
- Kit Contents
- Powering the Camera
- Formatting the SD Card
- Attaching and Using the Mini-Tripod
- Setting Audio Inputs
- Adjusting Audio Level
- Zooming In/Out
- Making a Recording
- Playing Back a Recording
- Ingesting & Uploading Your Recordings
Kit Contents
- Camera Bag
- Camera
- A/C Adapter
- 8 GB SD Card
- Li-Ion Battery
- Battery Charger
- USB to USB Mini Cable

Powering the Camera
- The slot for the battery is located on the right side of the camera. Slide open the slot and insert the battery face up, with the arrows pointed toward the front lens of the camera. Once inserted, reattach the cover for the battery slot.


- The SD slot is located on the bottom of the camcorder under a small hatch with the letters SD etched on it. Insert the card into this slot if you have not done so already.


- Turn on the camera by holding down the small green power button located on the left side of the camera, under the view screen.

Formatting the SD Card
- Once the camera is on, touch the button on the top right of the viewfinder screen that looks like a gear. This is where you will access settings and format the SD card

- On the next screen, press the button labeled "Setting"

- On the settings screen, press the number 2 on the left side of the screen to go to the second page of settings.

- On the second page, select "SD Card", then select "Format". Select "Yes" when it asks if you are sure.


Attaching and using the mini-tripod:
- The screw on the top of the mini tripod corresponds with a screw hole on the bottom of the camera. Carefully screw the tripod into the bottom of the camera to attach it.


- To adjust the angle of the camera on the tripod, press the red button below the head of the tripod. It can be stiff, so it may require two hands.


- When the button is depressed, the tripod head will swivel freely. When you release it, the tripod head will remain in whatever position you leave it.

Setting Audio Inputs
- Flip up the swivel arm for the microphones. This will point them in the direction of whatever you are filming.


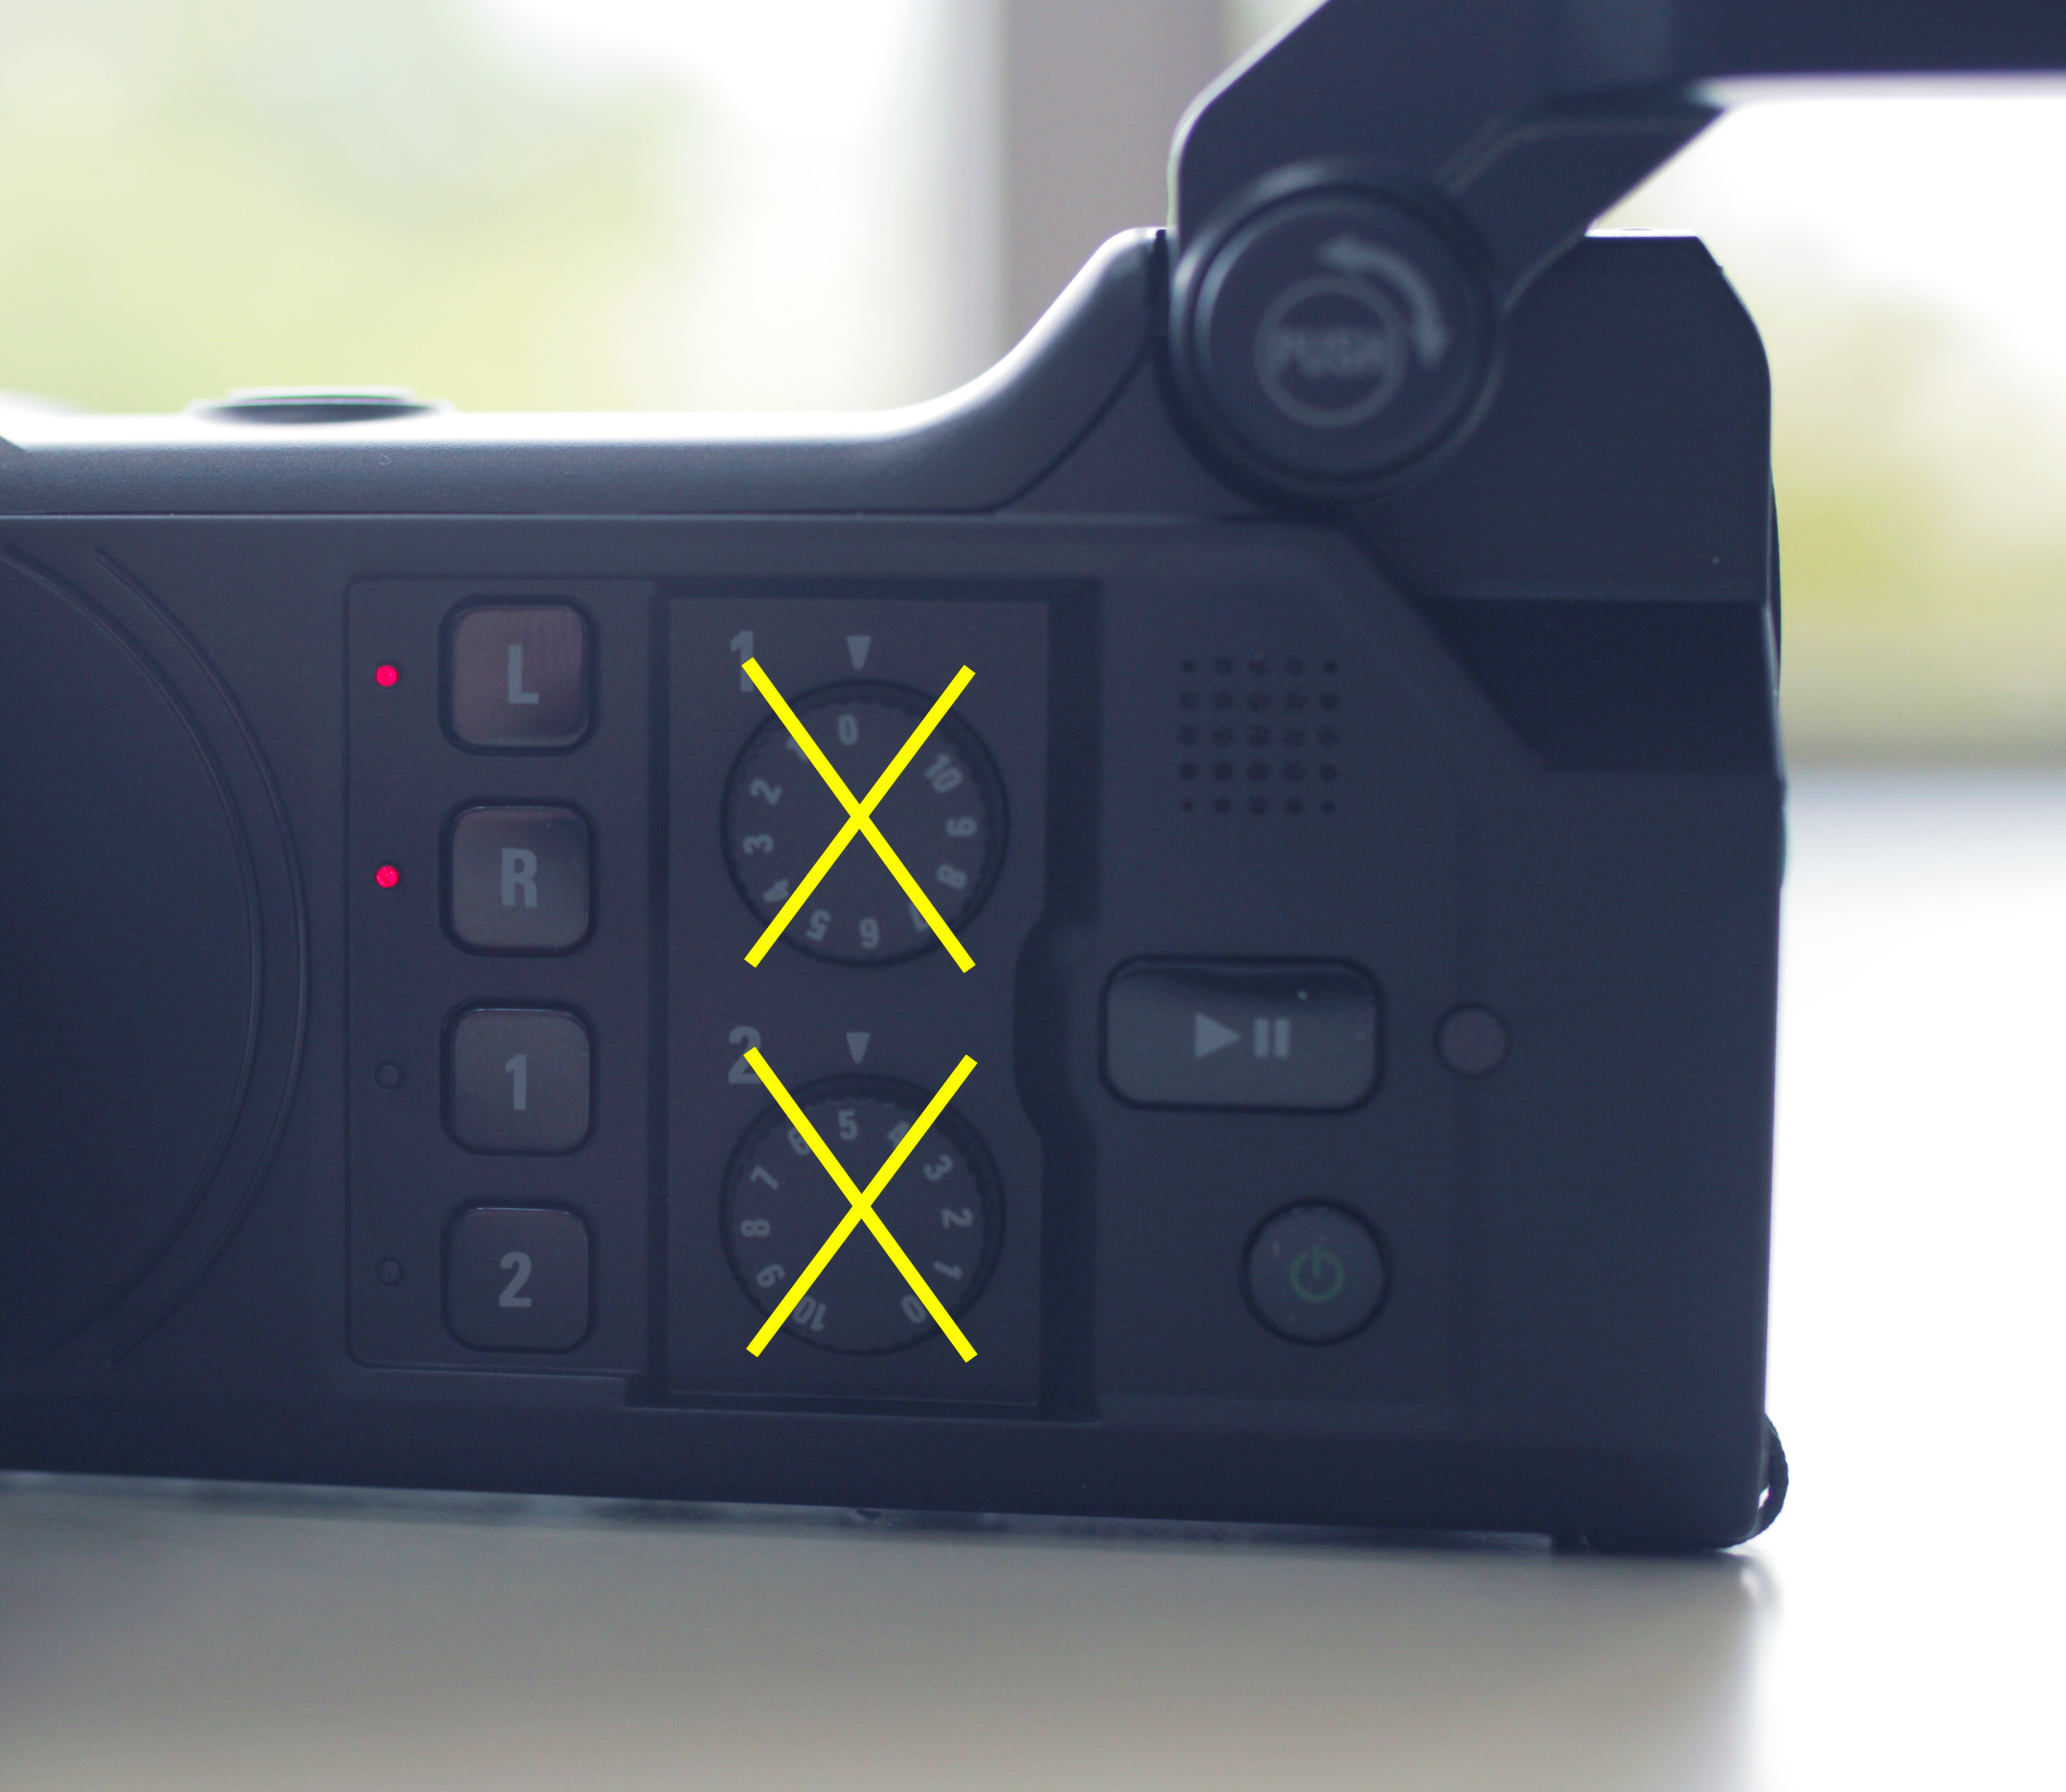
- Press the L button on top of the 4-button column on the side of the camera. The L and R buttons will light up, indicating that the camera's built-in microphones are working.

Adjusting Audio Level
- Setting your audio levels properly ensures that your footage won't be too quiet, but also not distorted.
- Don't use the 1 and 2 dials on the side of the camera to adjust your audio levels.
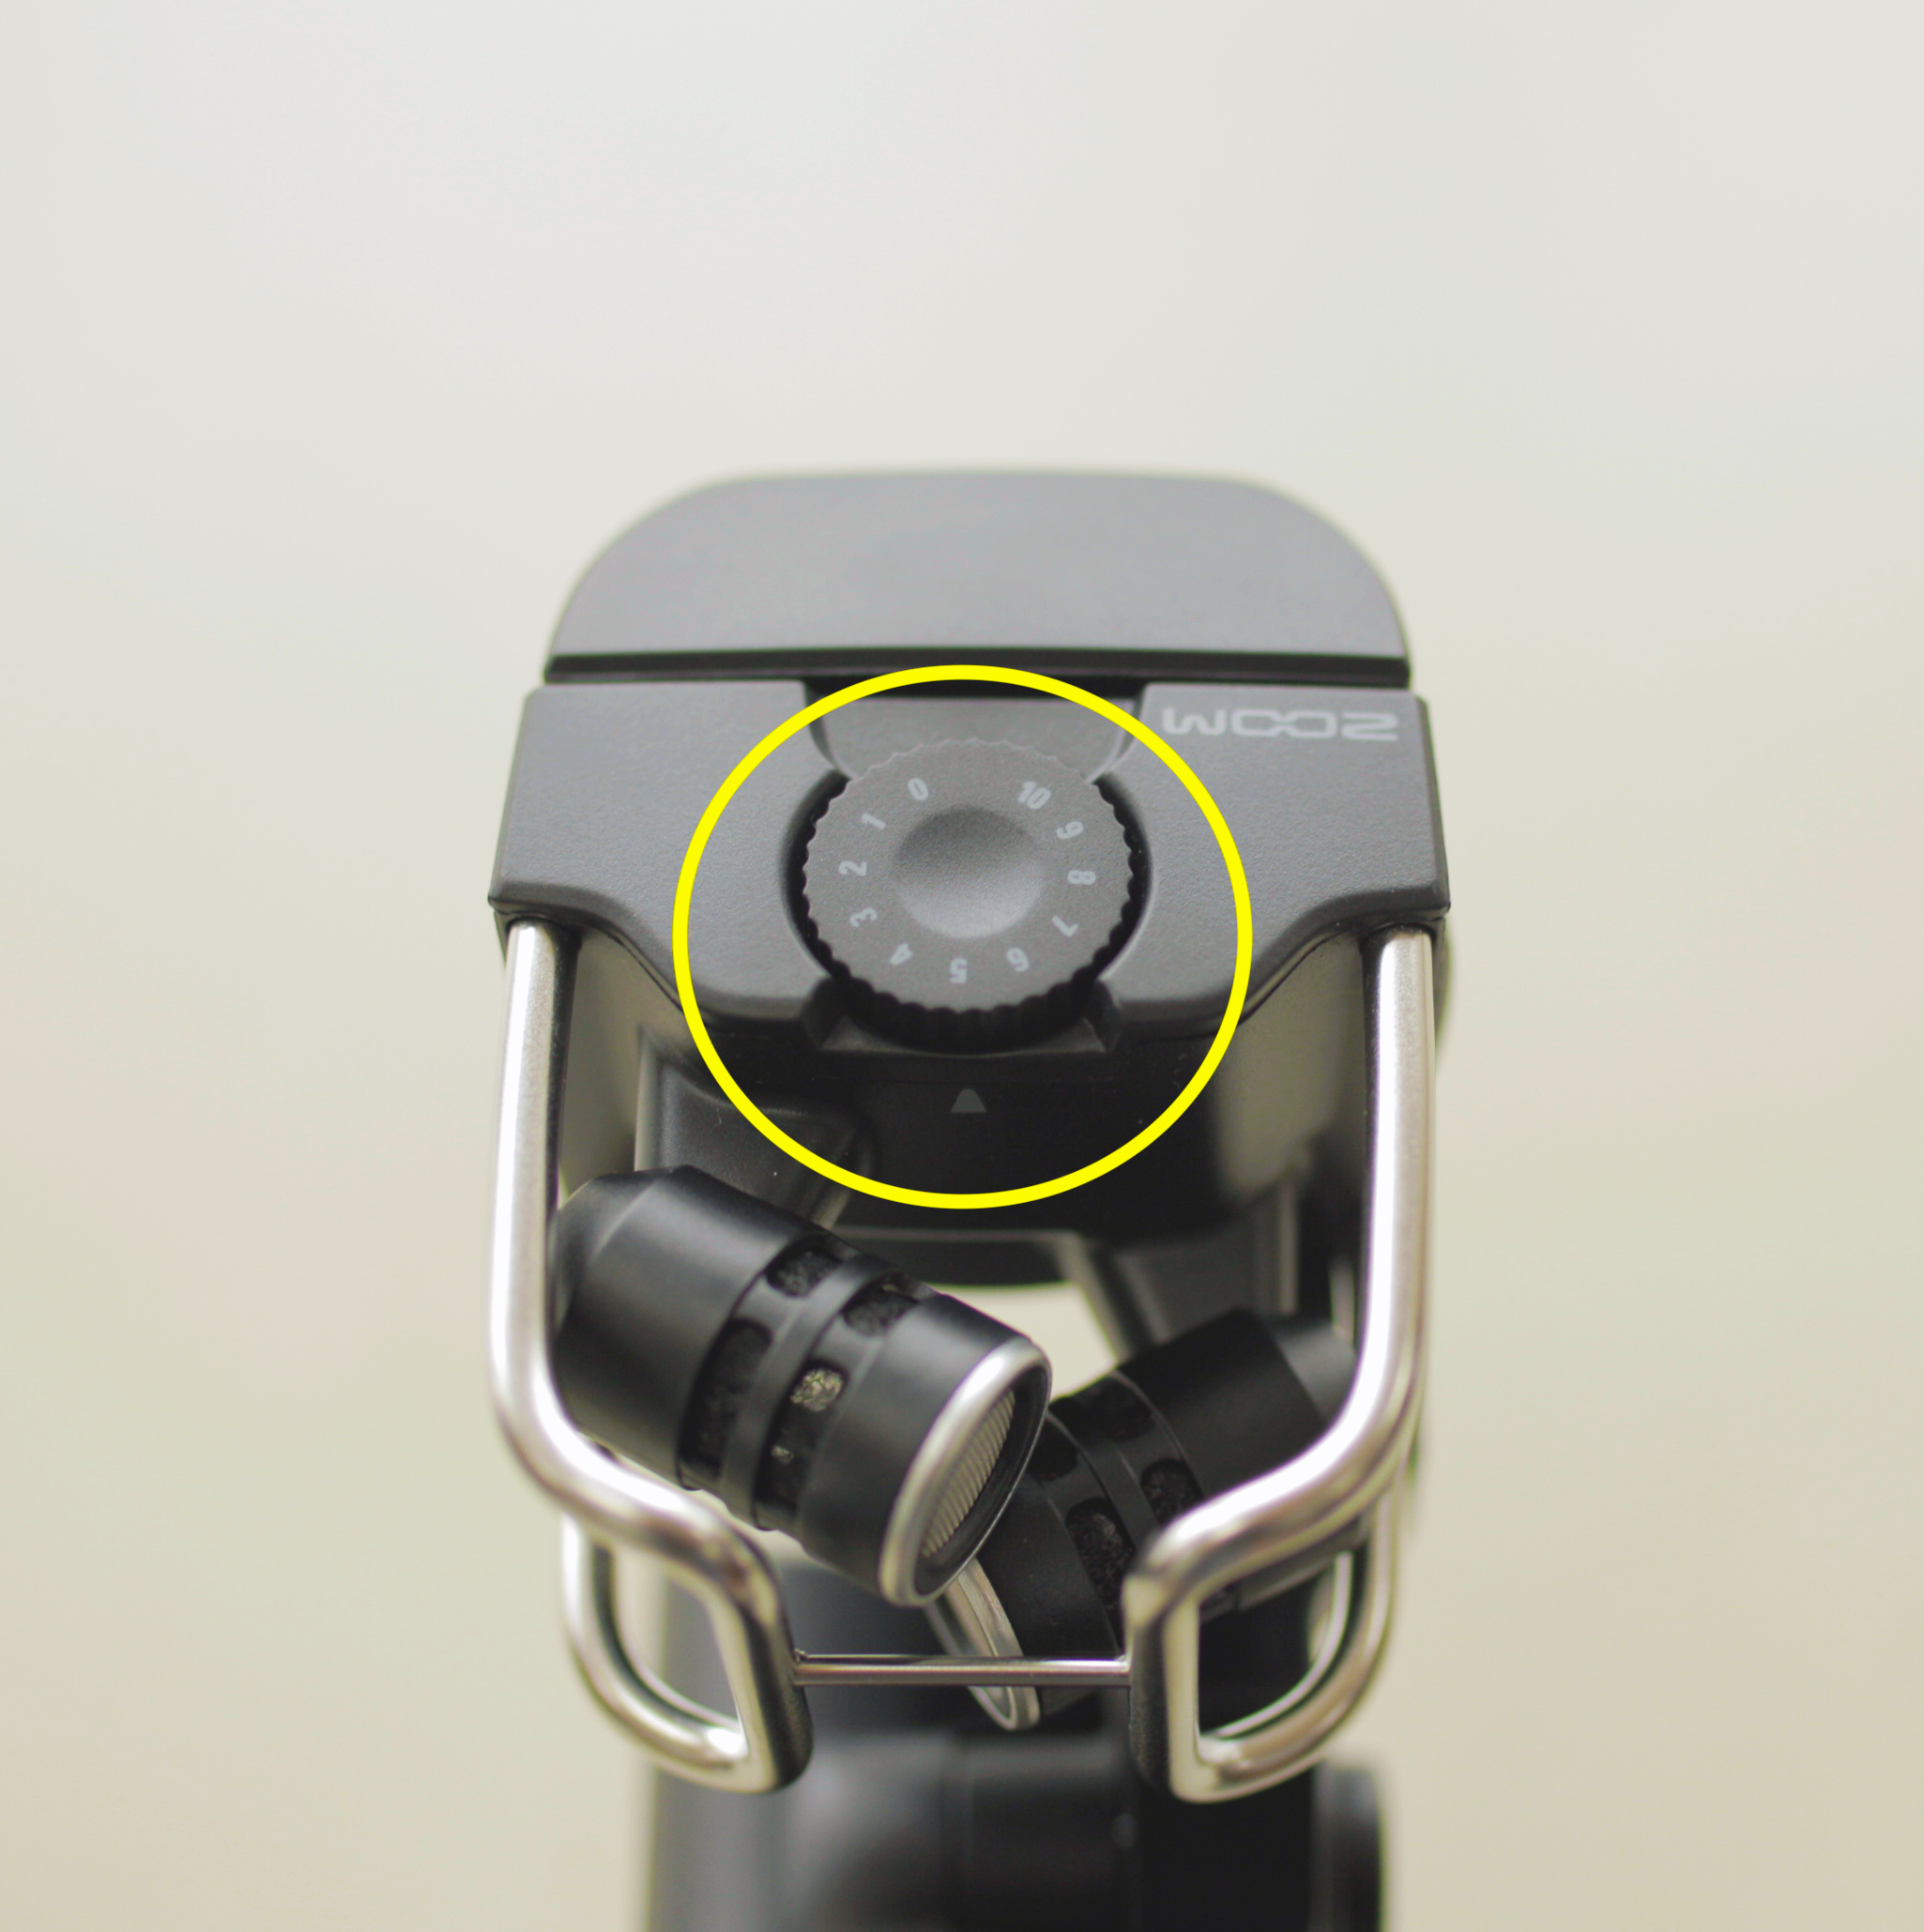
- Instead, use the dial on top of the camera, just behind the microphones.
- Turn the top dial to the middle of the range. 5 is a good level to start at.
- To ensure you're recording at the proper audio level, you'll have to make some adjustments. Sit in front of the camera as you would when recording your speech and flip the viewscreen around to face you.
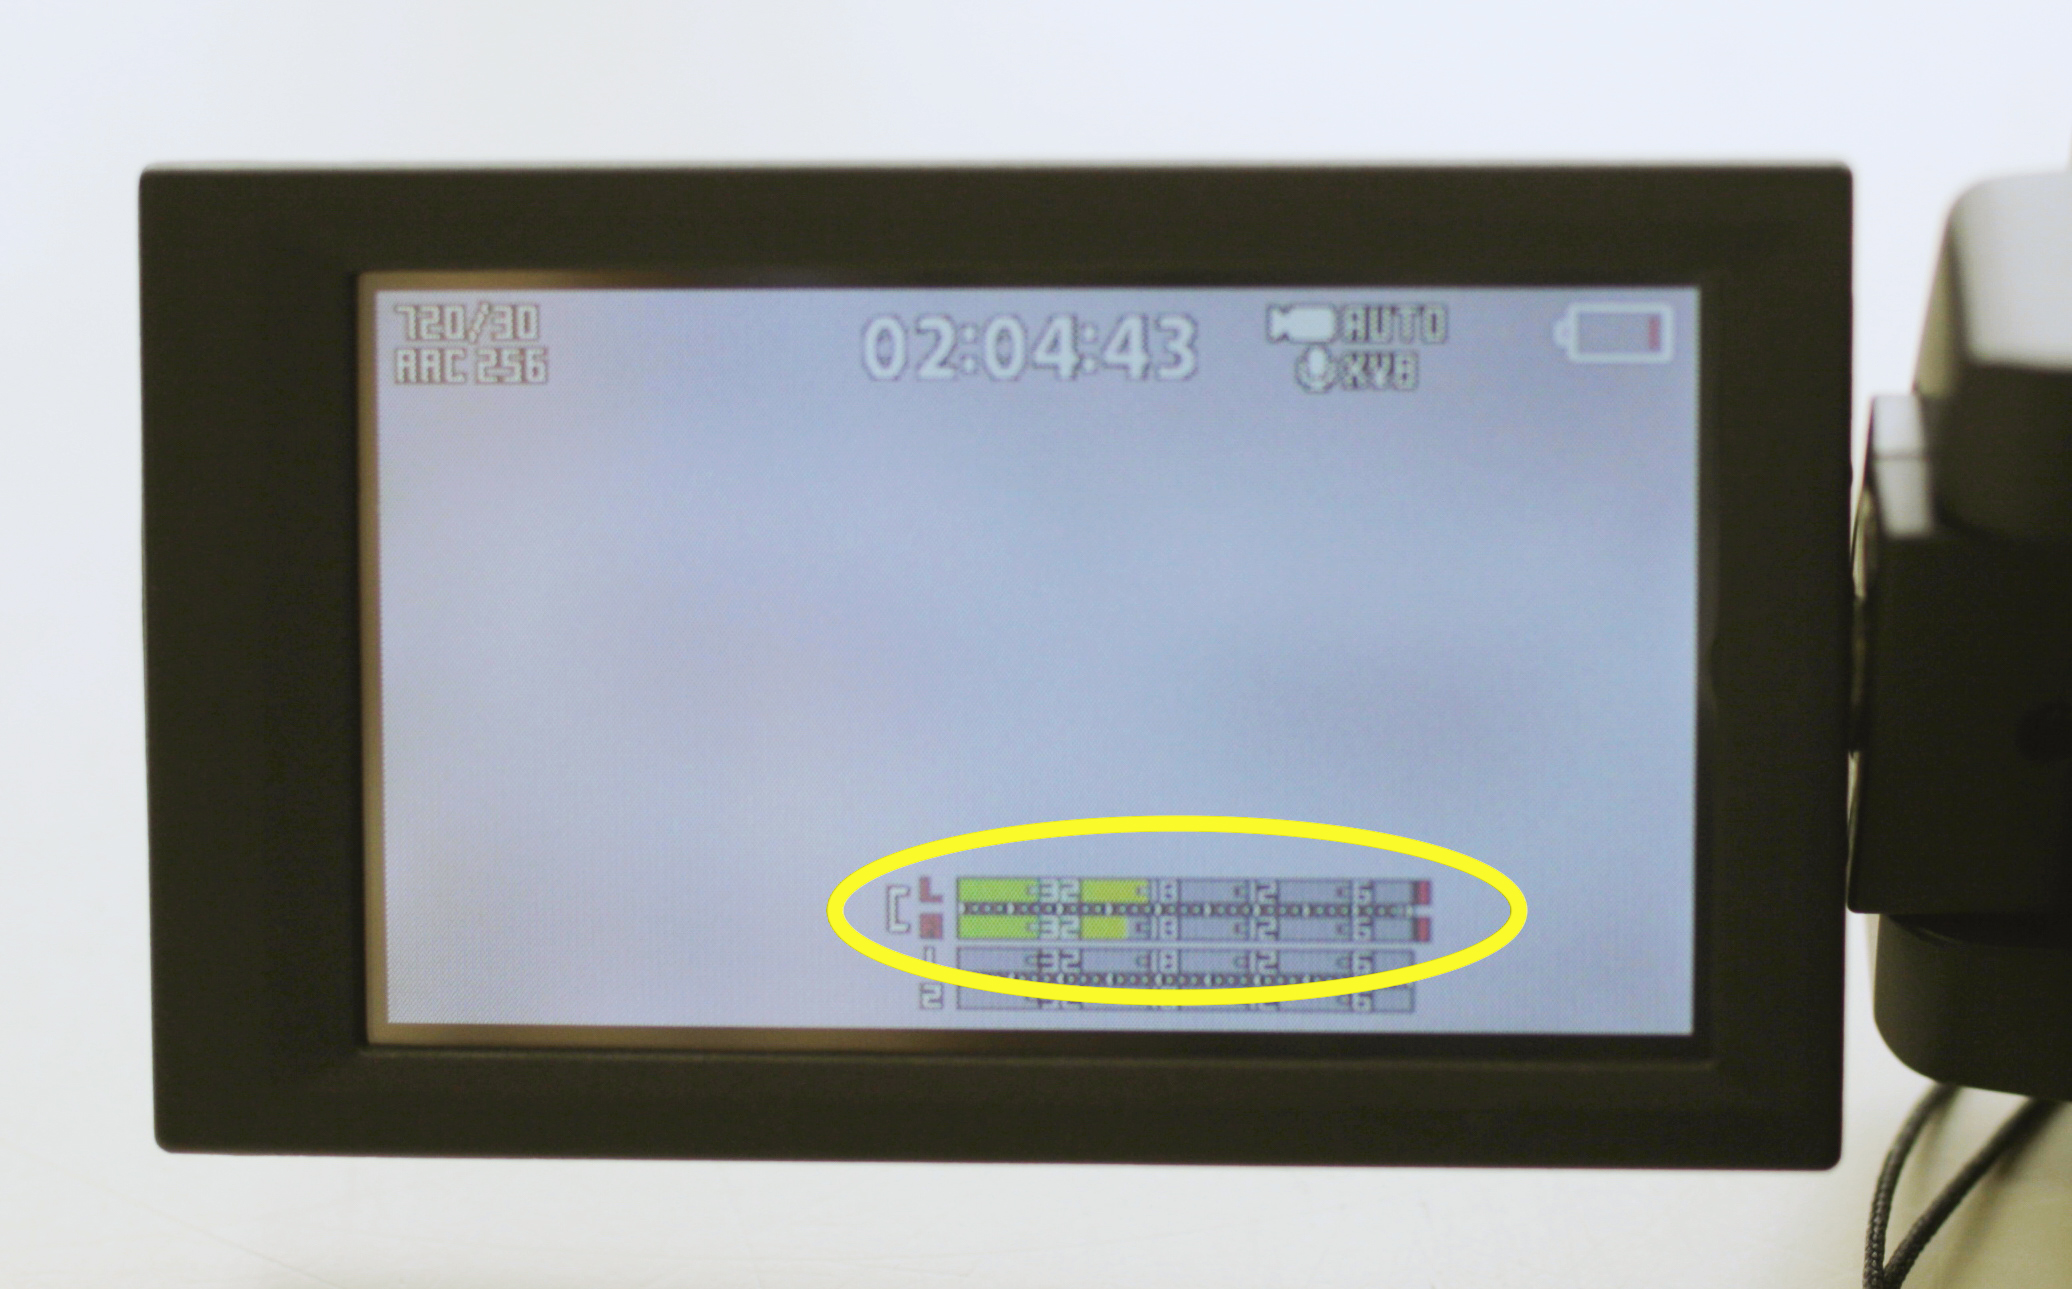
- Talk at a normal volume while watching the green audio meters on the bottom of the screen. The loudest parts of your speech should peak at the -12 mark on the meters.
- If you're peaking below this (closer to -18 or -32), your levels are too low, meaning your audio will be too quiet. Turn the top dial to a higher number.
- If you're exceeding -12, your levels are too high, meaning your audio will sound distorted. Turn the top dial to a lower number.
Zooming In/Out
- To zoom in, tap the magnifying glass + button at the top left of the viewscreen.
- To zoom out, tap the magnifying glass - button above it.

Making a Recording
- Take the lens cap off the camera.
- Power on the camera.
- Flip the microphones into the forward-facing position.
- To begin recording, press the red record button on the top of the camera.

- The viewscreen will indicate that it is recording. You can also see the levels from the microphones at the bottom of the recording screen.

- Press the record button again to stop when you are complete.
Playing Back a Recording
- With the camera powered on, press the "Play/Pause" button on the left side of the camera, just above the power button.
/pause_play_button.jpg)
- The most recently recorded footage should start playing. To check other clips, press the button again to pause the video.
- You should then see video controls on the viewfinder screen. Press the right arrow to skip to the next clip, and so on until you reach the footage you are looking for.
Ingesting & Uploading Your Recordings
- With the SD card in the camera, plug the Mini-USB end of the charging cable into the camera, and the USB-A end into a computer.
- While plugged in, power on the camera.
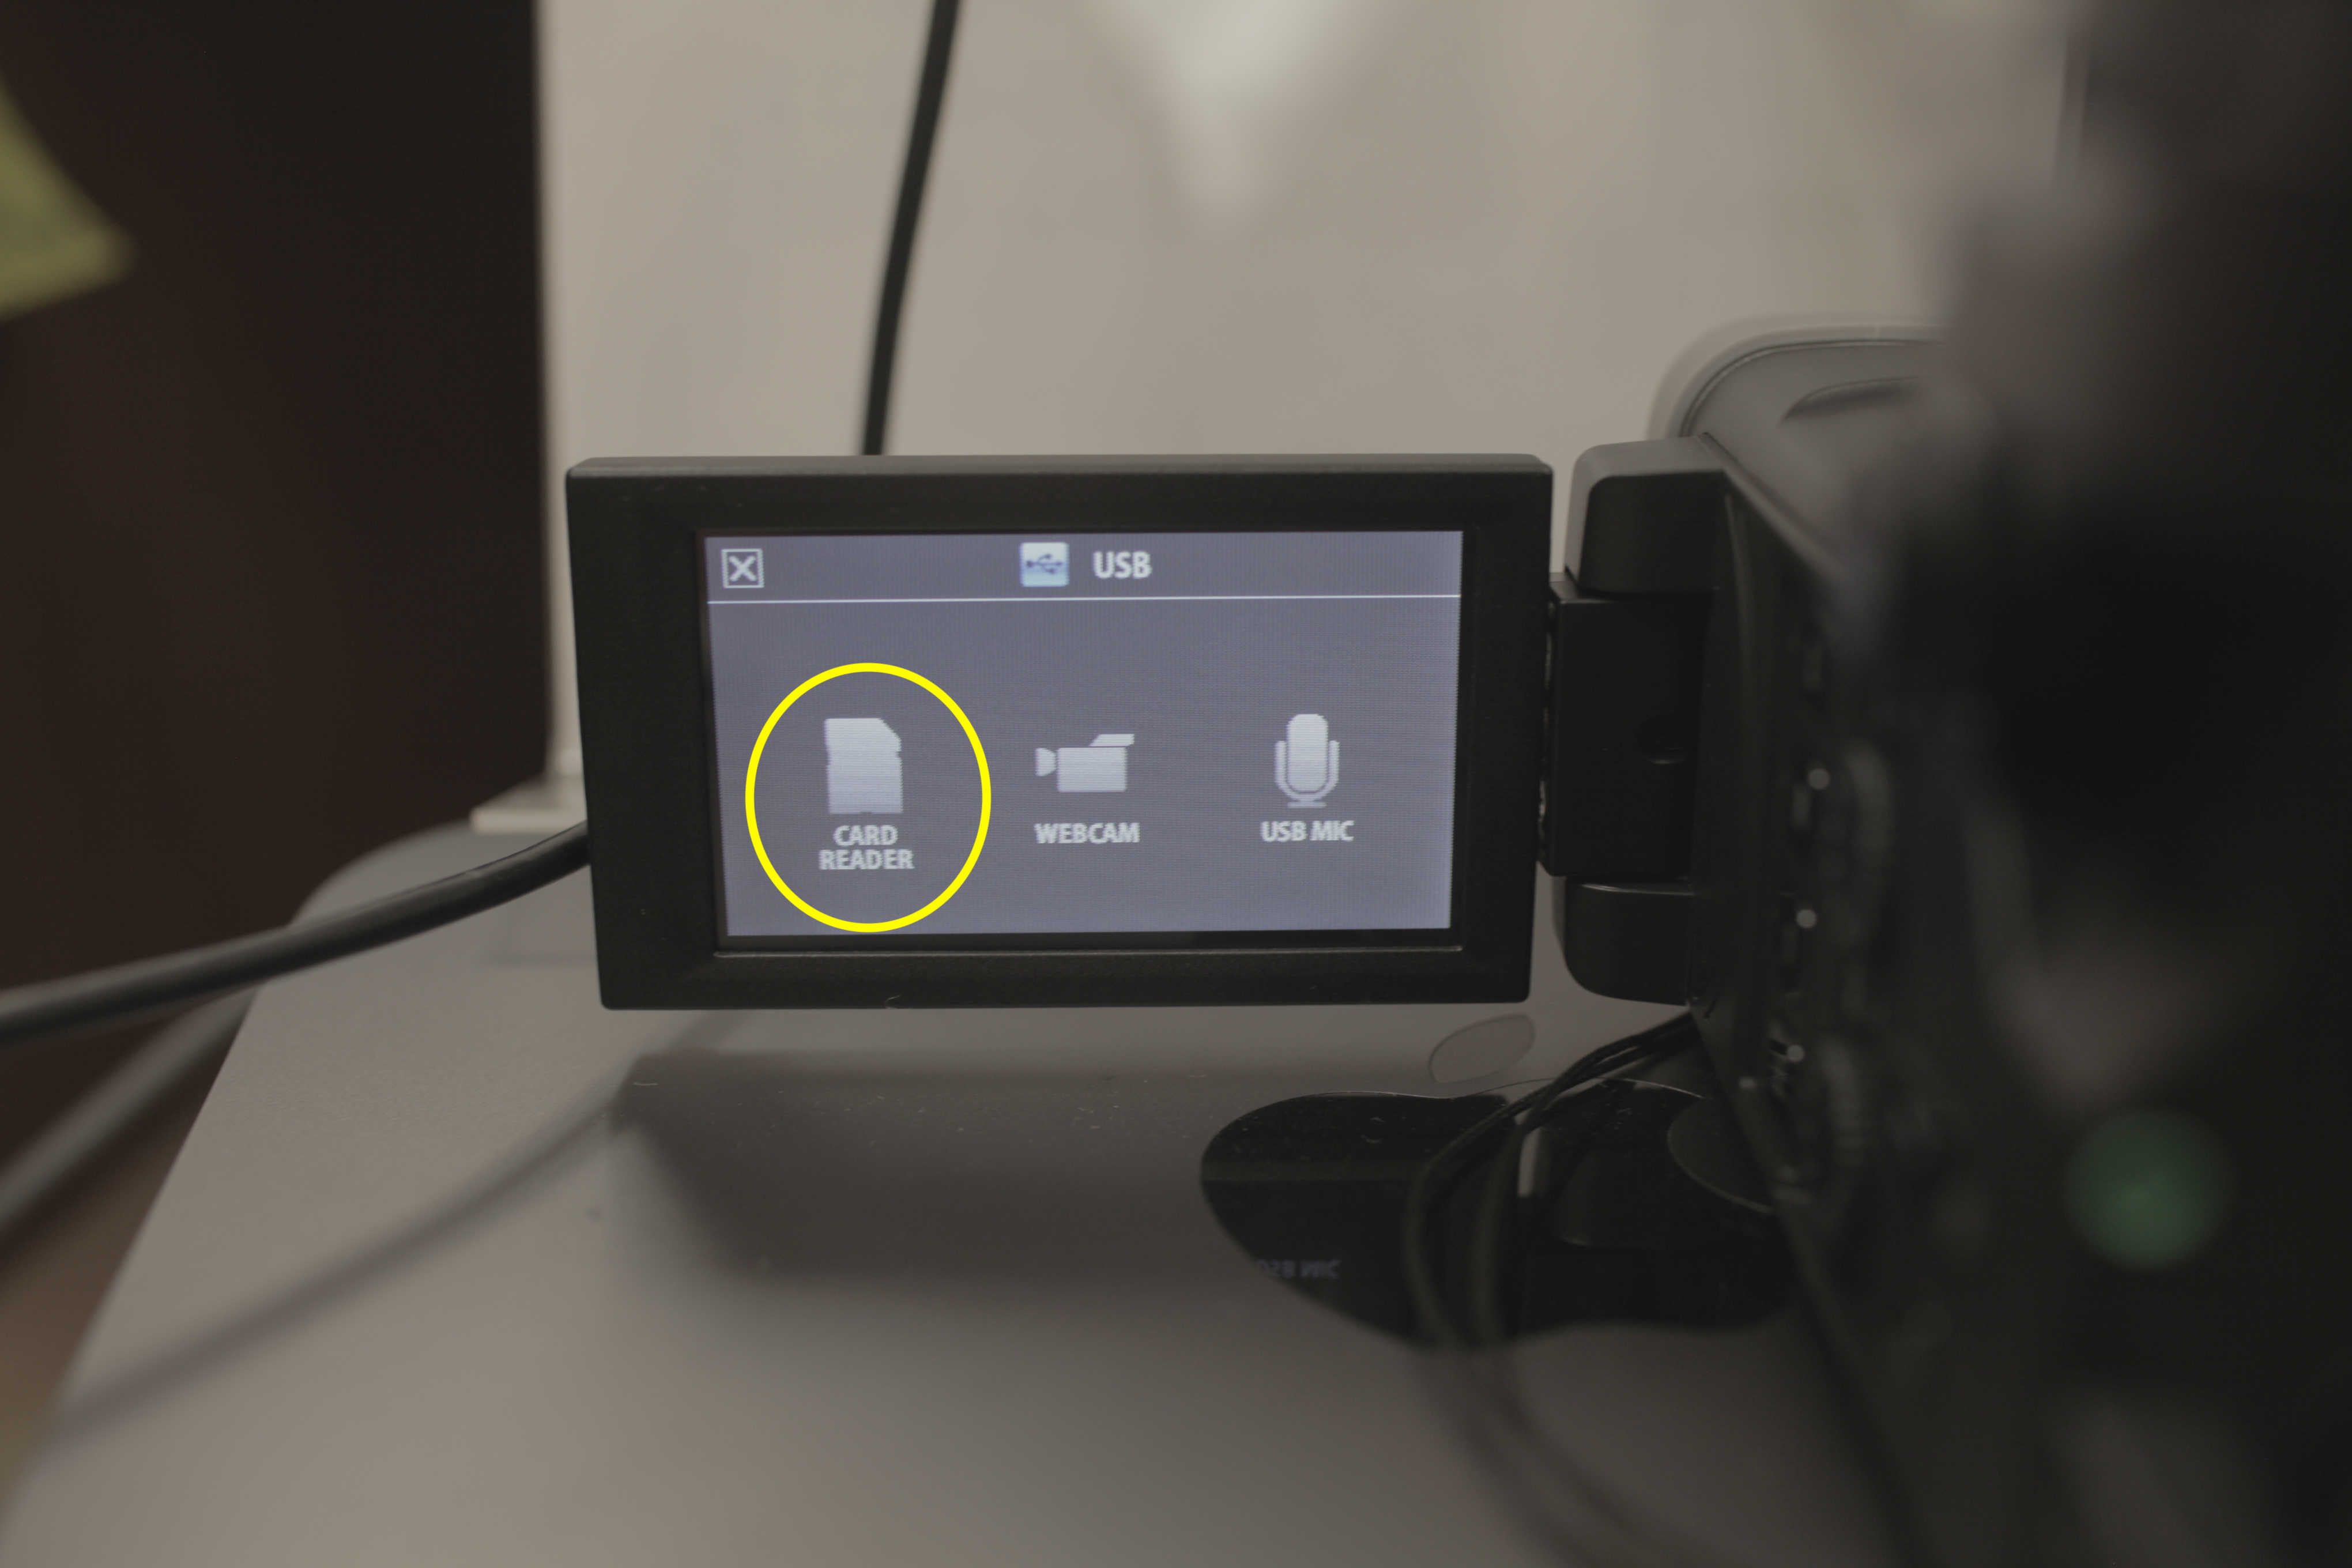
- On the viewfinder screen, select the option for "Card Reader"
- On your computer's desktop, a USB device named "Q8_SD"

- Open this device. Inside you should see a folder named "DCIM". Open it.
- Inside that folder, open the folder named "100_Zoom"
- In the 100_Zoom folder, you will find your video clips.

- From a Mac workstation in Vilas Hall, connect to smb://nas1.commarts.wisc.edu/StreamingUploads
- Copy the MOV files into your section folder.
- Later, after they've finished processing, these files will automatically show up in your mediaspace.wisc.edu account (or via Kaltura My Media in Canvas).
- It's not recommended to publish student speech videos publicly. The most secure way to share the speech videos with each individual student is to set them as co-publisher in Kaltura:
Kaltura - Media Collaboration: Changing Media Ownership, Adding Co-editors, Co-publishers, and Co-viewers [UW-Madison]


/IMG_7694.JPG)
/IMG_7706.JPG)
/IMG_7708.JPG)
/IMG_7710.JPG)
