Downloading and Installing Oracle Client
Downloading and installing the 19c Oracle client (Recommended)
The clients are stored on the UW Box service, which may require your NetID credentials.
To install, review the client installation instructions located in the Oracle Client Box Folder.
Downloading and installing the 12c Oracle client
Downloading the 12c Oracle Client
The clients are stored on the UW Box service so you may be prompted to login with your NetID and password.
- Select on the following item(s) that you want to download.
- Once you are in the Box environment, click on the download button on the top right of the screen.
- Note: 32-bit Windows applications will not work with Oracle's 64-bit ODBC driver. Therefore, users of 64-bit versions of Windows may need to install the 32-bit version of the Oracle Client if they intend to make ODBC connections with 32-bit applications. For instance, if you are running 64-bit Windows 7 but you plan to use a 32-bit copy of MS Access to connect to EPM, you should install the 32-bit version of the Oracle Client. If you intend to use both 64-bit and 32-bit applications to create ODBC connections, you will need to install both clients.
- When you are prompted to download the client, choose to Save the file to an easily accessible location on your computer's hard drive.
- Note: The zip archive containing the client installer is large and may take several minutes to download.
- Once the download is complete, you can continue to the installation process.
Installing the Oracle 12c Client
-
Locate the zip archive containing the client installer on your computer's hard drive.
-
Right-click the zip archive and select 'Extract All...'. Windows will decompress the contents of the zip archive into a folder in the same location.
-
Open the resulting folder called 'Client32' (or 'Client64'.). Double-click on the application labeled 'setup' to launch the installer program.
-
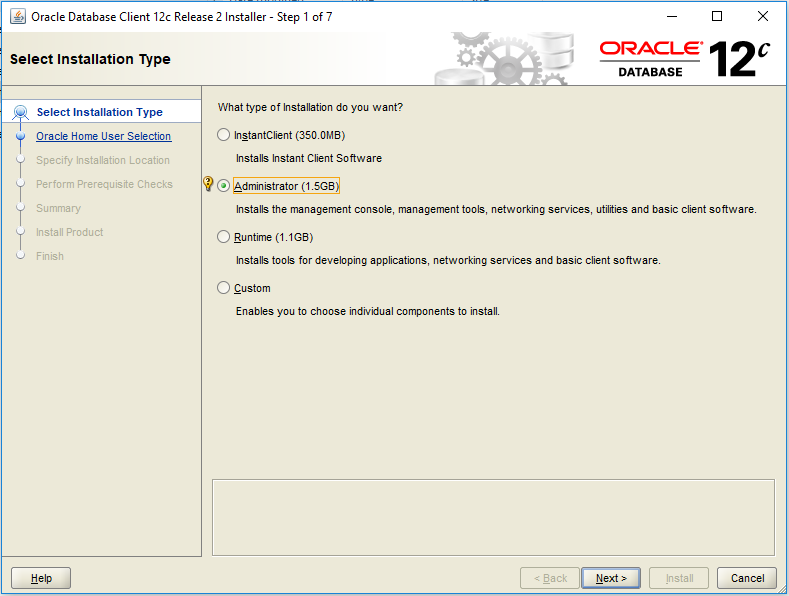
On the first installer screen choose 'Administrator' as the installation type.
-
Click 'Next >' on the language selection screen.
-
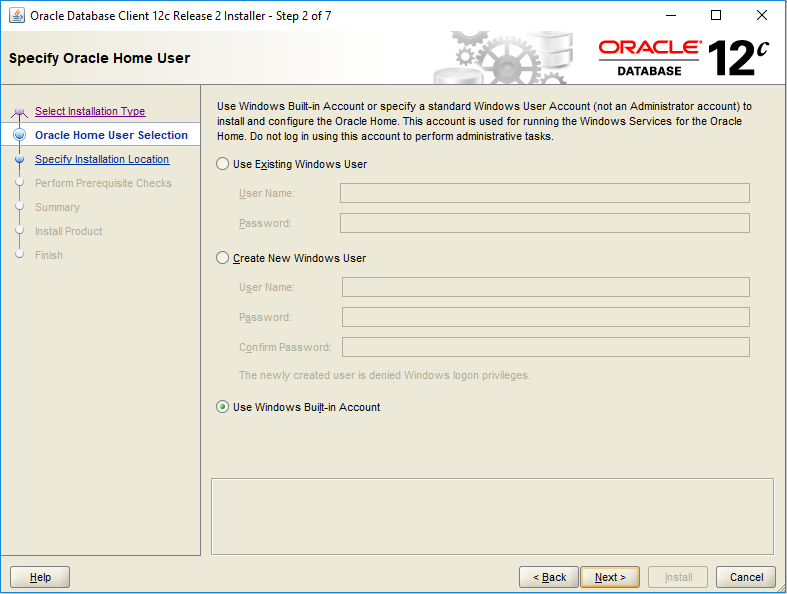
Make sure "Use Windows Built-in Account" is selected, then click 'Next >'..
-
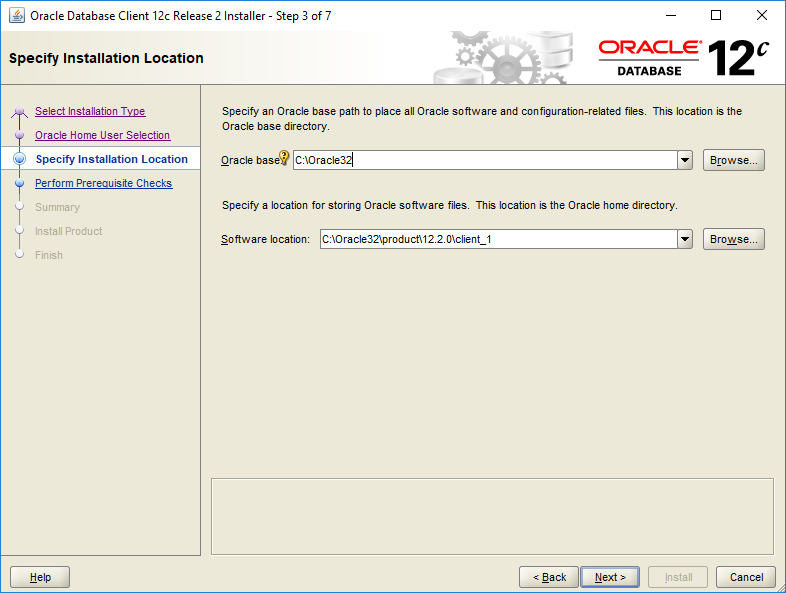
On the 'Specify Installation Location' screen change the default 'Oracle Base' location to C:\app\, and Software Location to C:\app\client\product\x.x.x\client_1. Click 'Next >' to continue with the installation.
The image below does not have the correct install paths. Please follow the install paths above. - click YES and then install
-
The installer program will check for prerequisites and initiate the installation process. Once the installation is complete, you will be taken to a summary screen.
Final Setup Instructions
- Save UW TNSnames.ora file to the correct location in the Oracle directory: Adding, Editing, or Replacing Your TNSnames.ora File
- Set up ODBC connection (using either 32 or 64 bit as appropriate): Configuring an ODBC connection to InfoAccess in Windows . It is critical to name the Data Source Name in ODBC as "UW Data Warehouse" otherwise BA's Access files will give errors when connecting to InfoAccess. Test connection.
- Test in Oracle.


