Lumen/Guide: How to Add/Edit/Delete Footnotes (Table Help)
How to set up, edit, or remove footnote tables.
- Important FYI regarding footnotes
- Definitions
- Examples of footnote table
- Step-by-Step instructions
Important FYI regarding footnotes
- Utilizing footnotes requires the use of two types of tables:
- Course List (identifying content that requires a footnote)
- Footnote Table (the table where you can add the additional context)
- Footnotes do not auto-adjust if revised; if you change a footnote in a course list, you must change it in the footnote table.
- Consider using a single footnote table at the bottom of a page (opposed to utilizing a footnote as an end note).
- Use only numbers for footnotes, as best practice (as opposed to asterisks)
- Footnotes are inaccessible, thus the use must be minimized wherever possible.
- Footnotes must only be used for content that, if missed, would not change the meaning of the text.
- Requirements/Exlusions must not be listed in footnotes.
Course List tables
- Adding a footnote number in a course list does not automatically take an end user to the footnote table with the explanation text (accessibility).
- Footnotes can be used on headers, text, or courses.
- If there are multiple footnotes throughout a page separated by headers, consider continuing the numbers as you progress through the page. This prevents having multiple footnote tables with the same numbers (this can be confusing).
- The footnote field in the course list should only have number characters. The text of a footnote must be in the footnote table.
Footnote Tables
- Important information, such as program requirements, should not be hidden in a footnote.
- Footnotes are intended for additional information that is helpful, but if missed will not be a detriment to program completion.
Definitions
- Course list table: a table that allows for building the curriculum for a program.
- Footnote: a field within the course list table.
- Footnote table: a separate table that serves as the referential point of the footnote from the course list table.

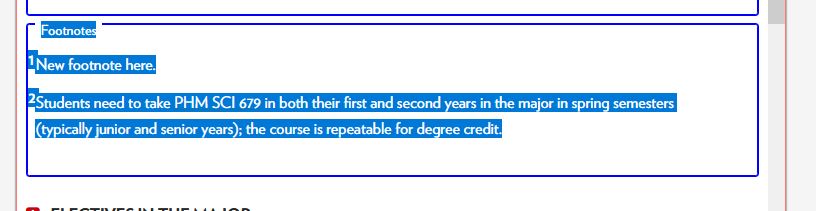
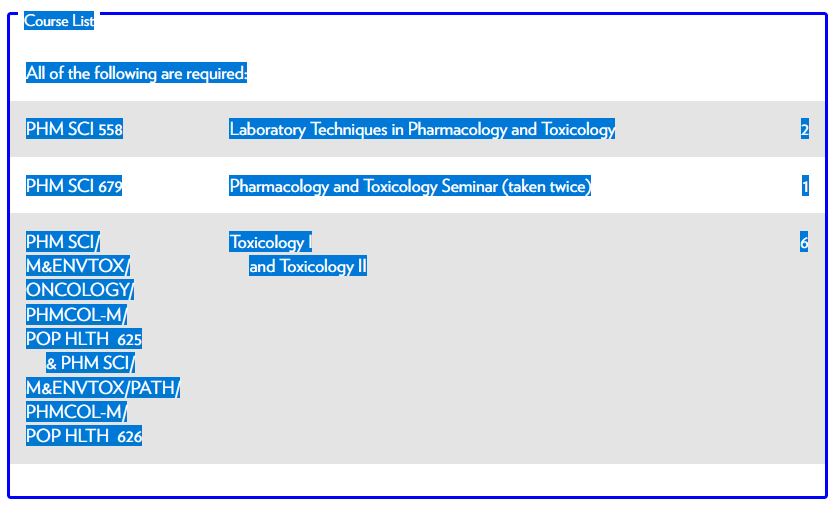
Examples of Footnote table
Published

Edit-Mode
Step-by-Step instructions
How to add a footnote in a course list
Watch this video (no audio) walking through the following steps.
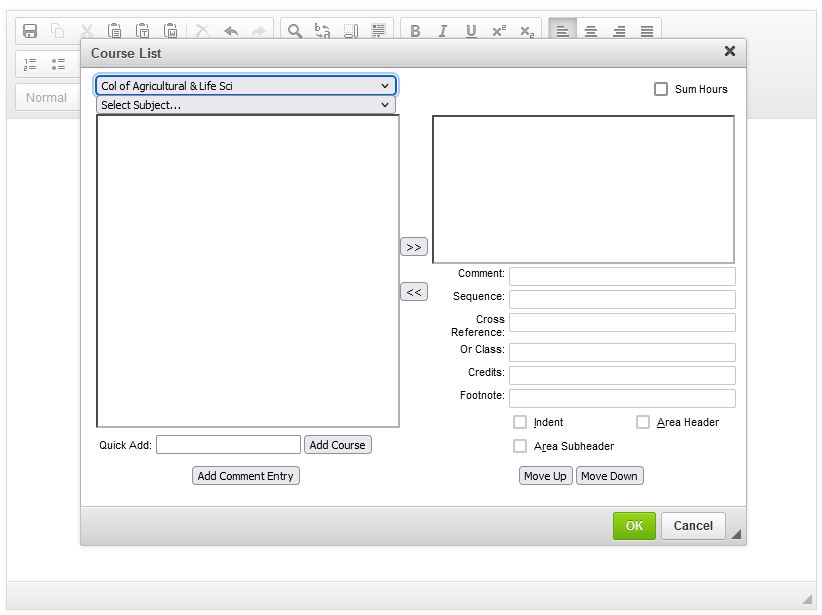
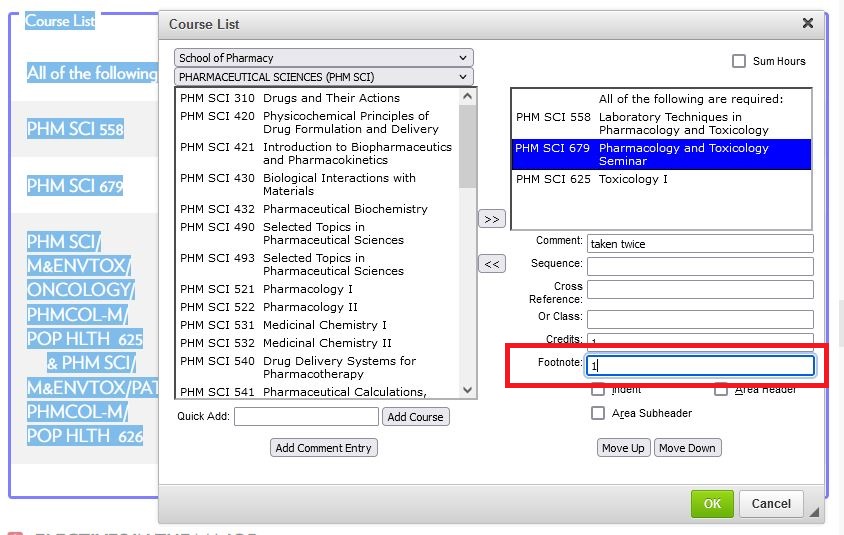
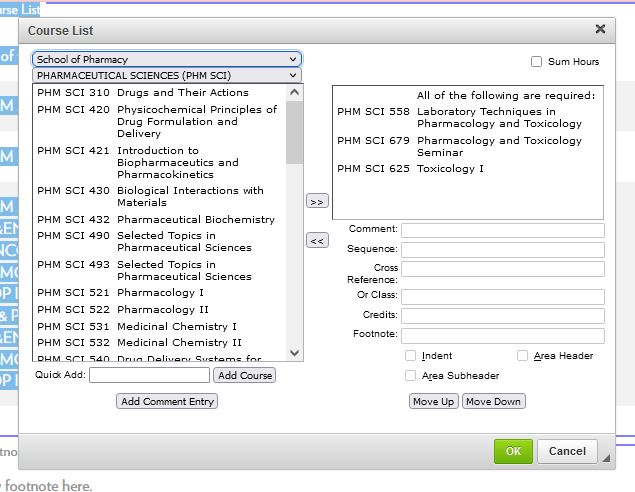
- Double click the Course List with the course requiring a footnote.
- Locate the item where you want to add a footnote indicator in the right side of the Course List. Click on this item. The course becomes highlighted in blue once you click on it, indicating that any changes you make below (comment, sequence, or class, credits, footnote, indent, headers) apply to this course only.
- Add your footnote number in the "Footnote" field. Click the green OK button. Do not write your entire footnote in this field.
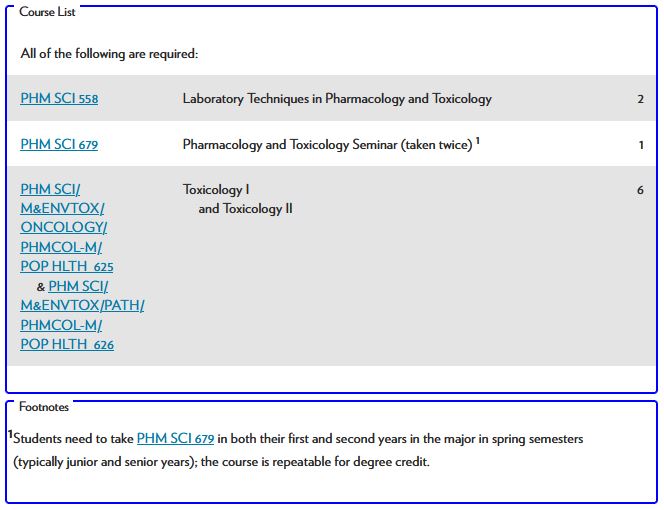
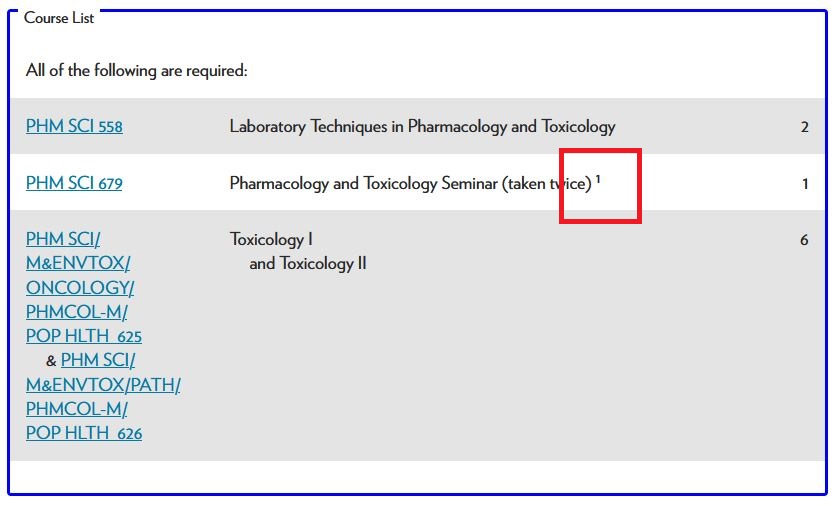
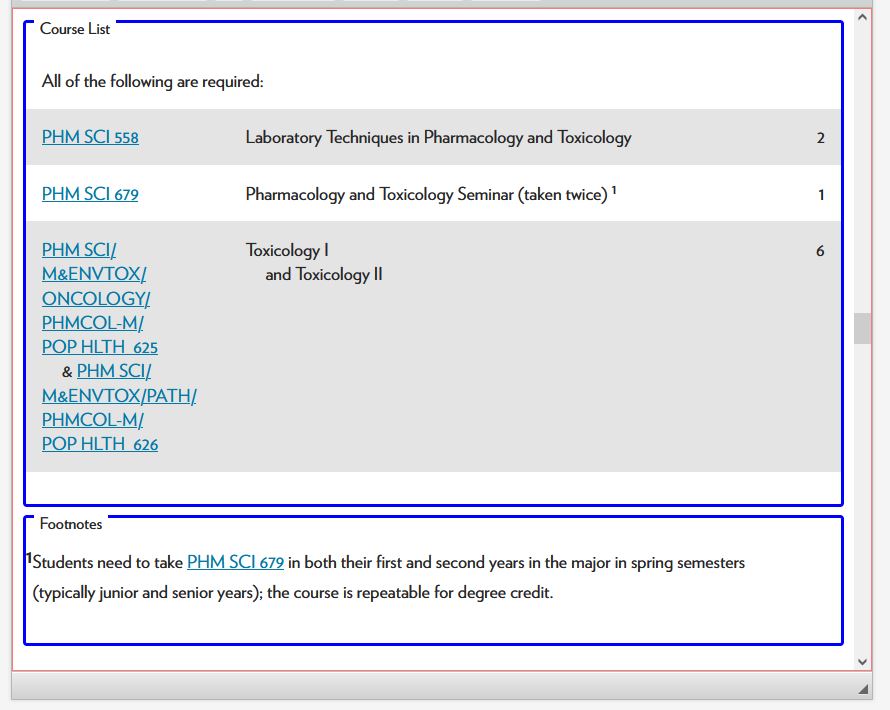
- The final look of a footnote in the table. Note, this shows up after the course title and comments in parentheses.

Notes
- If trying to copy and paste, you may get an error. The software tries to strip away all CSS that may "tag along" with your copied content. To get around that, copy your content (ctrl + C, or right click to copy) and then do a hard paste (ctrl + shift + V) and the content will paste.
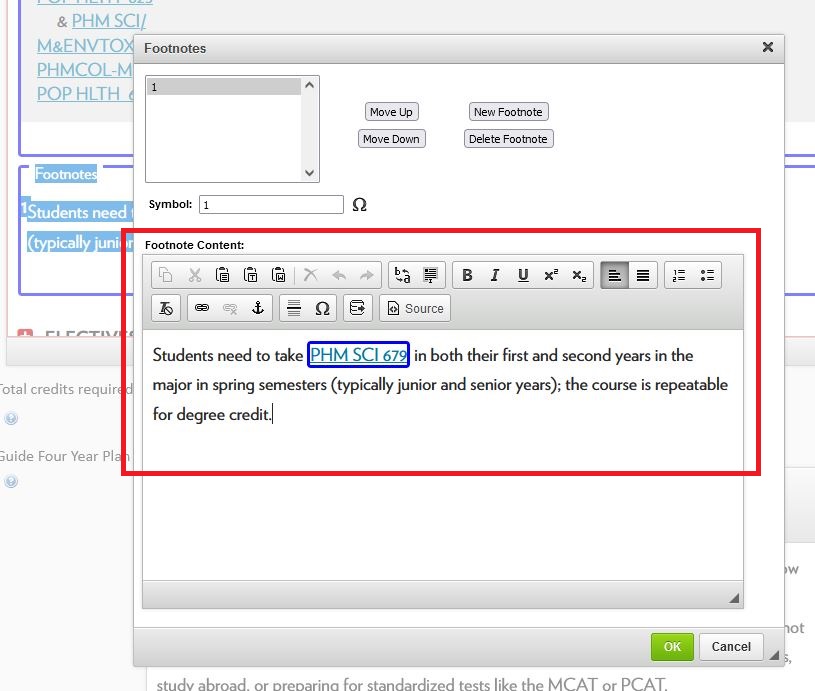
- If you are using courses in your footnotes table, you MUST link them to the database. The video above walks through how to do this at the end.
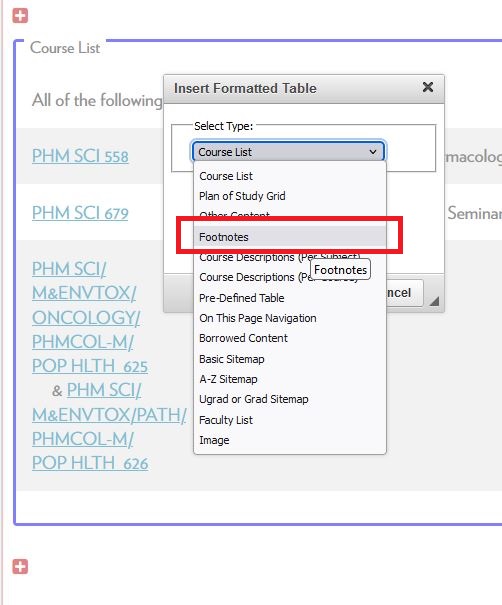
How to add a footnote table
Watch this video (no audio) walking through the following steps.
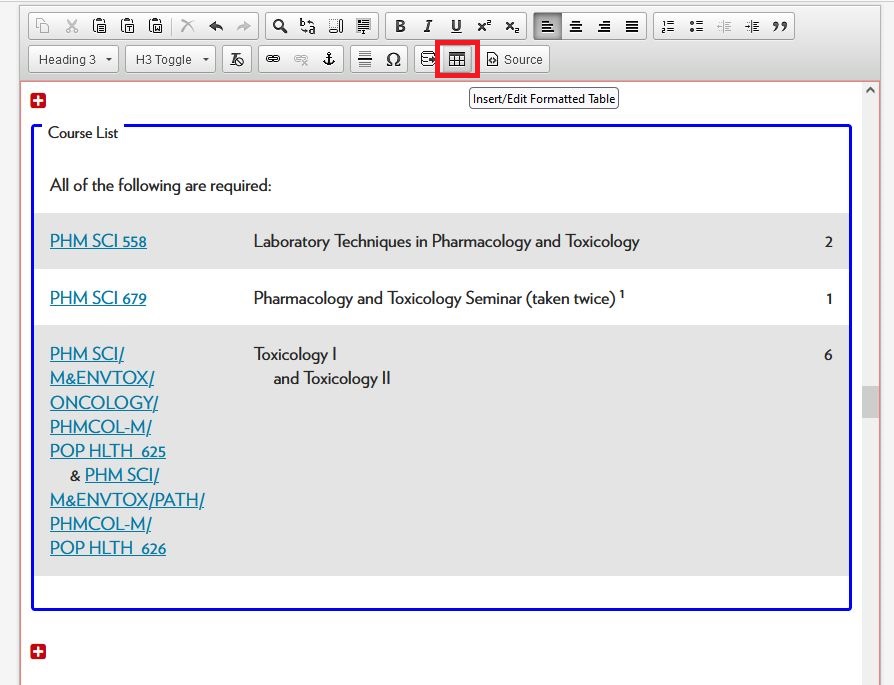
- Click the "Insert/Edited Formatted Table" Icon.
- Select "Footnotes" from the list. This is the fourth item in the list. Click OK.
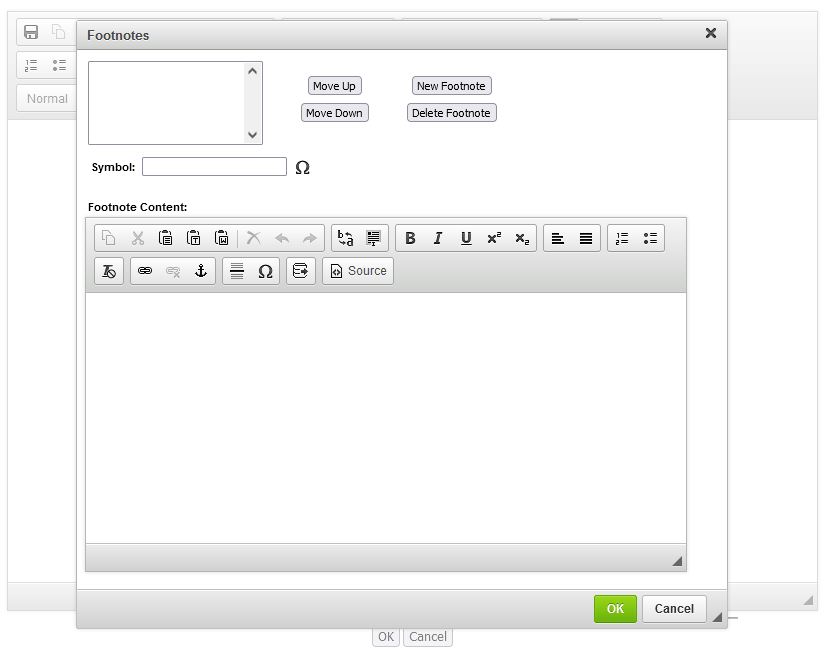
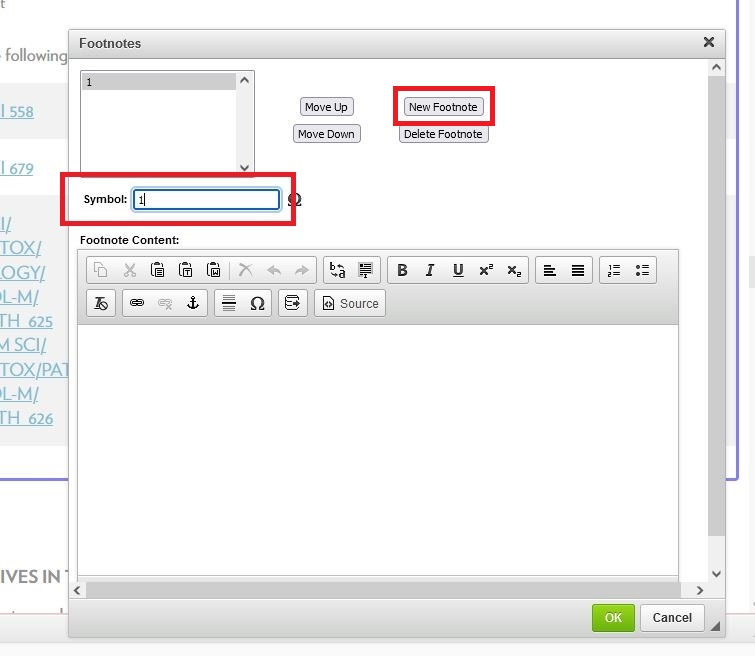
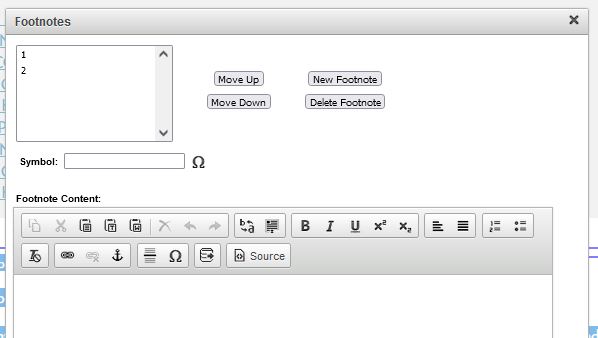
- Click the "New Footnote" button. This will add "New Footnote" text in the Symbol field. Change the "New Footnote" text to the corresponding number in your Course List table. Repeat this step, as needed.
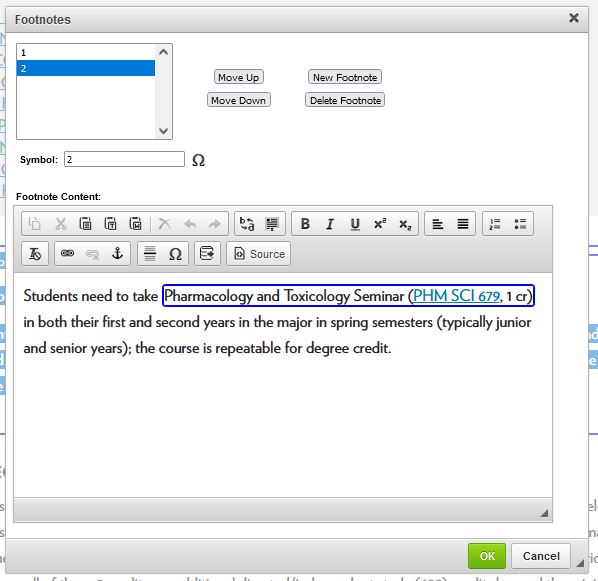
- Enter your text in the "Footnote Content" section. You must connect courses to the database; for help follow these steps.
- Once complete, click the green OK button. The results should look like this, with a course list, a footnote in the course list for a specific course, and a separate footnote table.
How to edit a footnote in a course list
Watch this video (no audio) walking through the following steps.
- Double click the course list table. This will open the Course List edit table.
- Click on the course where the footnote exists that needs to be revised in the box on the right. The blue highlight indicates the course you are editing the footnote.
- Revise your footnote number in the "Footnote" field.
- Click the green OK button. Footnotes will show up at the end of the course title in superscript text.


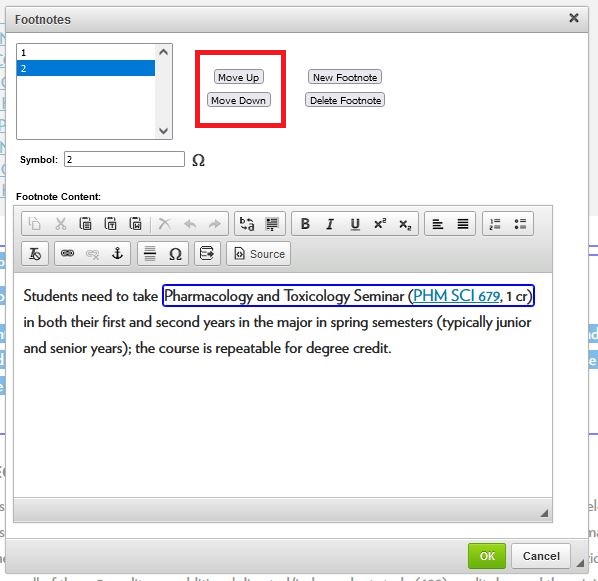
How to edit the footnote table
Note: after step 2, these steps can be done in a different order with the same result.
Watch this video (no audio) walking through the following steps.
- Double click the footnotes table.
- Click on the footnote that needs to be revised from the list of footnotes in the upper left corner of the edit box.
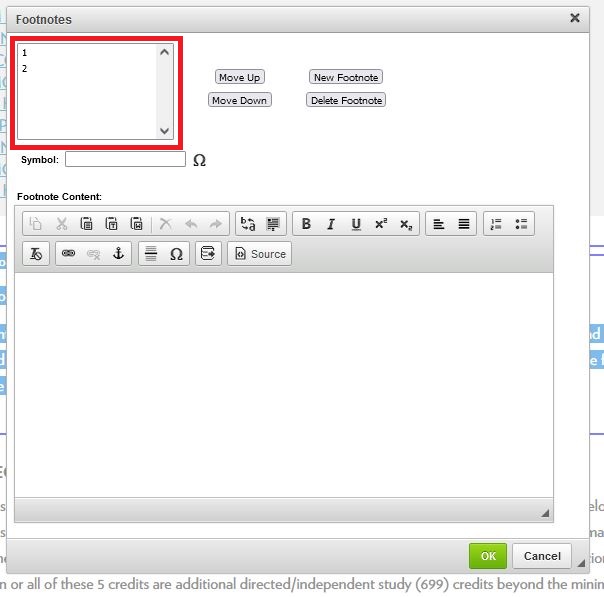
- This will populate the "Symbol" field and the "Footnote Content" related to the associated content in each edit field.
- Make your changes to either the "Symbol" or "Footnote Content" field, related to the desired outcome.
- Change the footnote number to match the corresponding number in the course list table.
- Make any text changes in the "Footnote Content."
- Move the footnote up/down using the buttons to sort the order in the footnote table.
- Change the footnote number to match the corresponding number in the course list table.
- Click the green OK button to save changes.


How to remove a footnote in a course list
Watch this video (no audio) walking through the following steps.
- Double click the course list table. This will open the Course List edit table.
- Click on the course where the footnote exists that needs to be removed. The blue highlight indicates the course you are editing the footnote.
- Delete the content in the "Footnote" field.
- Click the green OK button. The footnote will no longer be in the table.

How to remove a footnote from the footnote table
Watch this video (no audio) walking through the following steps.
- Double click the footnotes table.
- Click on the footnote that needs to be removed from the list of footnotes in the upper left corner of the edit box.
- Click "Delete Footnote".
- Click the green OK button to save.

How to remove a footnote table
Watch this video (no audio) walking through the following steps.
- Single click on the footnote table.
- Click the "delete" button on your keyboard.
- Save your proposal.