
Lumen/Guide: How to Add/Edit Course List Content (Table Help)
- Courses
- Text
- Help that applies to both courses and text
- Fields to Ignore
Default functionality
When adding anything to a course list, the software defaults to adding items to the very end of the course list. You can strategically add new content to a course list by selecting the item before where you want to add your new content to show up. If you need to move content from the bottom of the course list, use the instructions for moving courses or text up or down in a list.
Courses
Adding courses via the drop-down list
Note: When utilizing this feature, you cannot add a course more than once in a single course list. As soon as you move a course into the list, that course will no longer show on the left side from the available courses to choose from. You may add that course again by using the Quick Add feature.
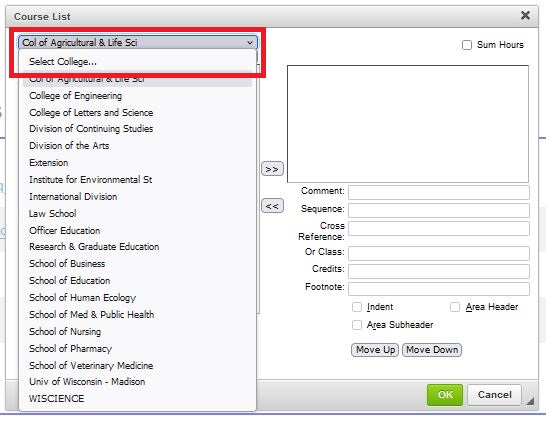
- Select the school/college that owns the subject (or owns the department that owns the subject) from the drop-down in the top left corner.
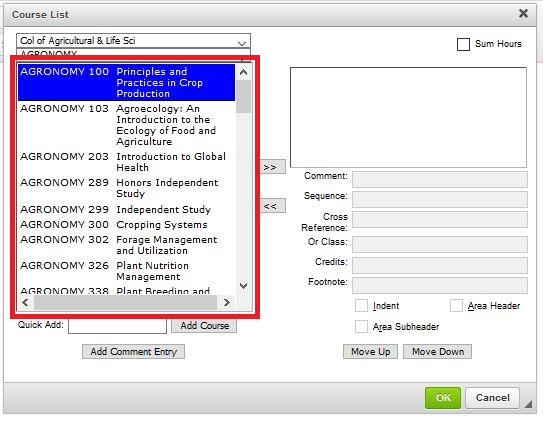
- Select the department that owns the subject from the drop down under the school/college. This will only display subjects owned by this school or college. If you need a different subject owned by a different school or college, revise the school or college from step 1.
- The list of active courses will auto-populate under the subject in the left side of the box. The list of courses included in the course varies depending on the time of the year.
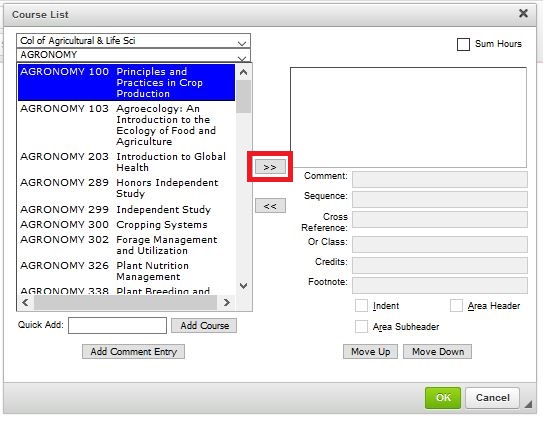
- There are two ways to move the course from the list into the course list:
- Double clicking on the course you want in the course list.
- Select the course you want to add and then use the button with two arrows pointing to the right.
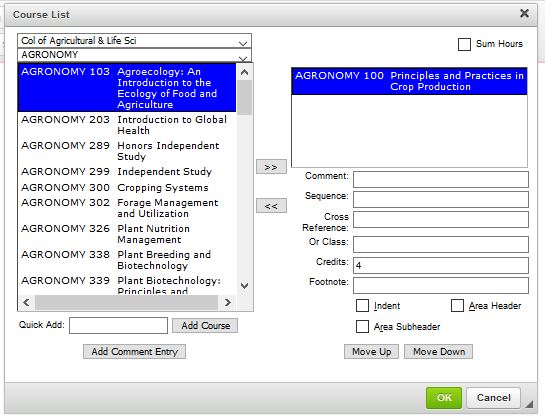
- Click the green "OK" to save and close the window. You must click OK to save changes.

Adding courses via the Quick Add
- Enter the subject short description and catalog number in the Quick Add box. If you are unsure the correct subject short description, review the Academic Structure Tableau viz (requires VPN or campus internet).
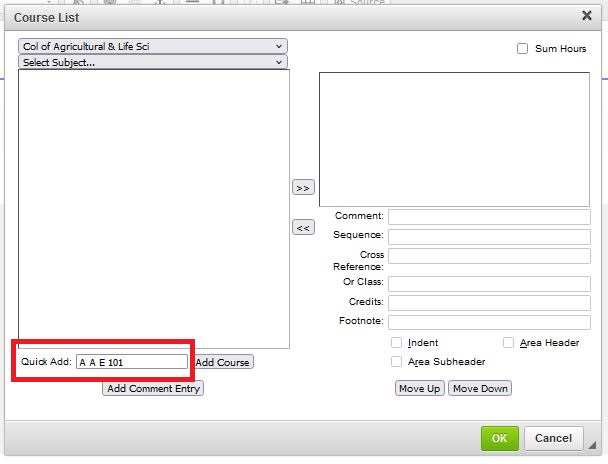
- Click "Add Course." The course will show up in the right hand column.

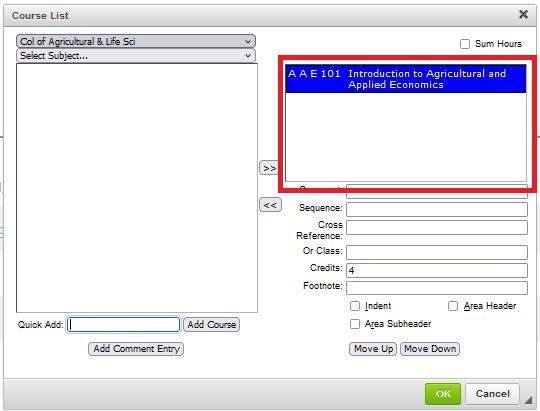
- Click the green 'OK' to save and close the table editor. You cannot save without clicking OK.
Using comments
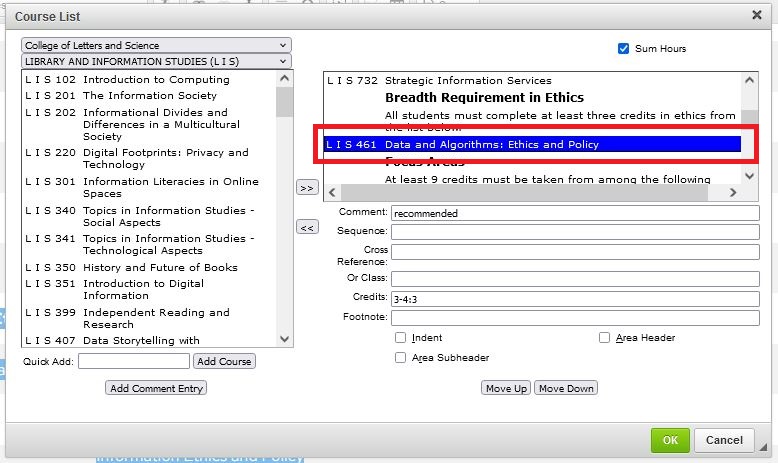
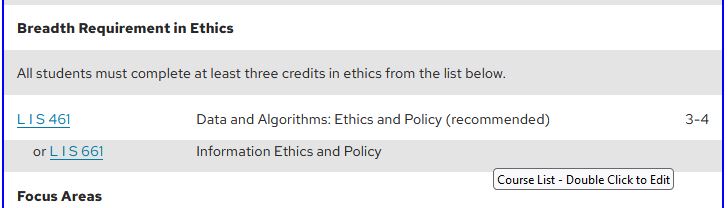
Comments allow you to add context after the title of a course. See below for how to add or edit comment text.

Tips
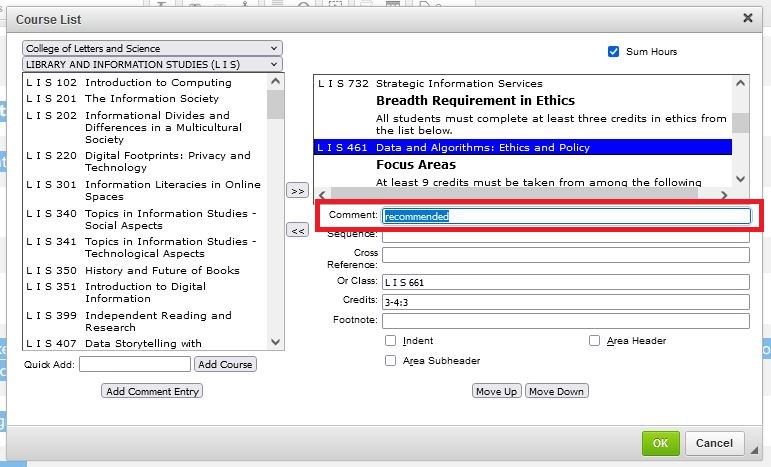
- The software automatically adds parentheses around the text in this field; do not add additional parentheses.
- The table cannot be made larger. It's easier to modify your text outside of this table i.e.: edit your text in Word and then copy/paste into this field.
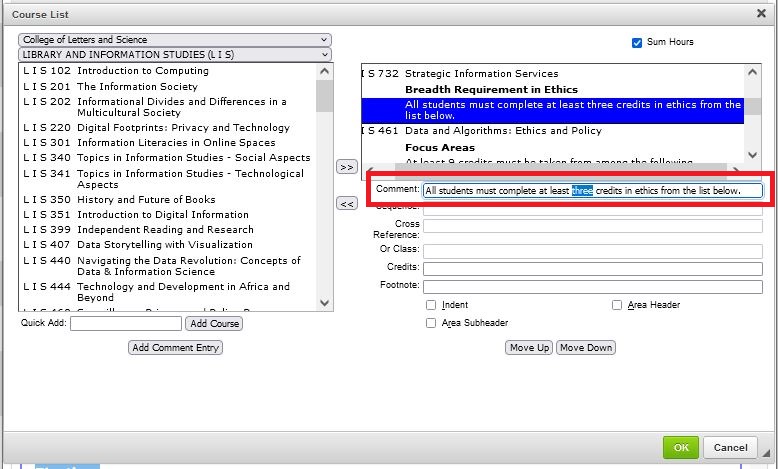
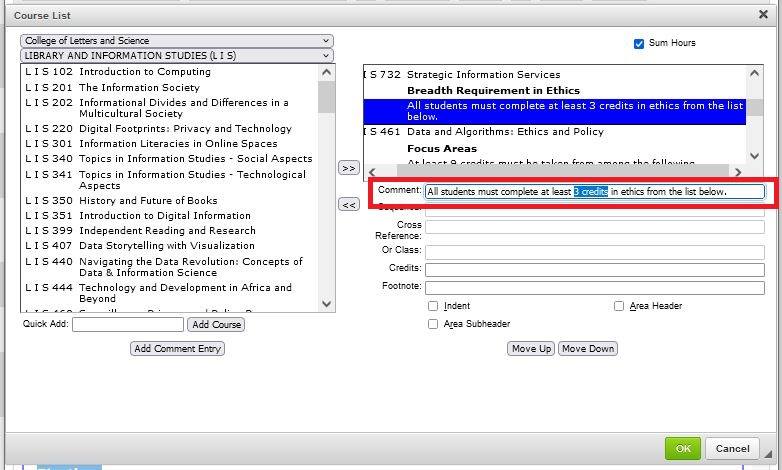
Step-by-Step
- Add your course to the course list or select an existing course in the course list.
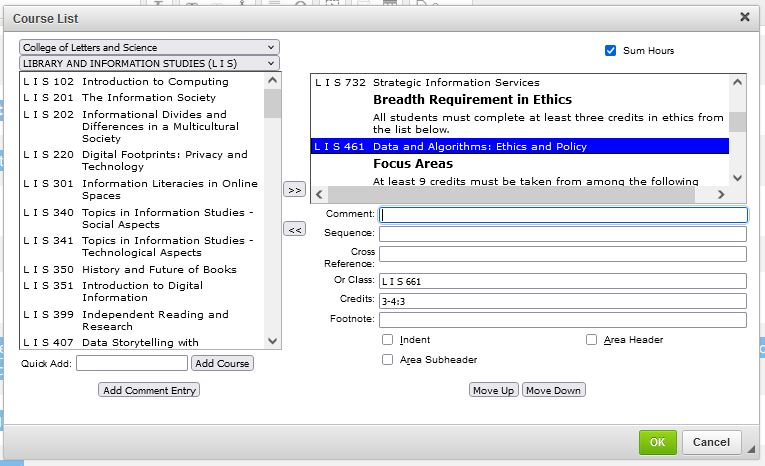
- Add text to the comment field.
- Click the green OK save button.

Example
Using sequences (multiple courses to complete requirement)
Use this field when two courses must be completed to satisfy a requirement.

Tips
- The software can only pull in the data from a single course. You must modify the credits to calculate the sequence of courses. If this is not done, the system will produce a red-box around the credits, indicating something does not compute.e.x. The total credits for CHEM 103 & 104 is 9 credits, but the software will only display the number of credits for CHEM 103 because that's what was added to the course list.

- If you are unsure the total number of credits for both courses, hovering over the red boxed credit total will indicate what the total credits should be (in the non-editing space).
- The second course will display in the course list, however it will not show in the edit window as it's own course. It will always be embedded in the first course.
Step-by-Step
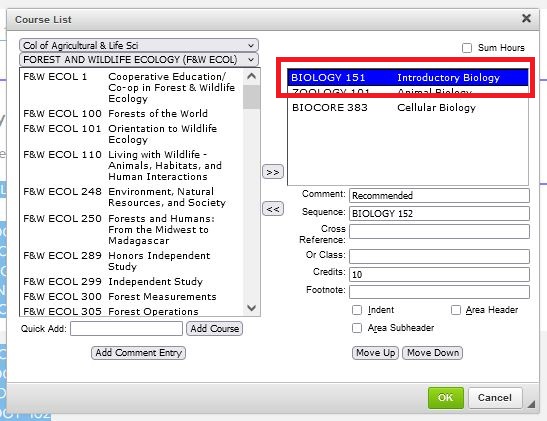
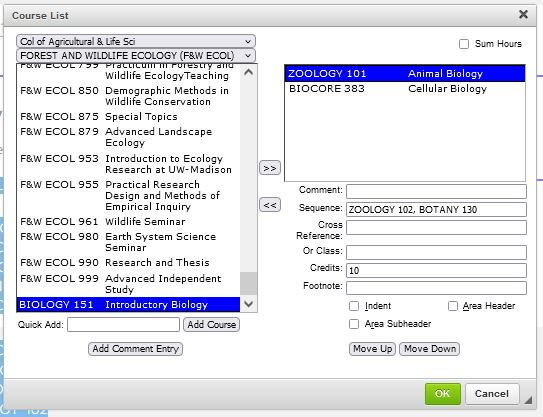
- Add the first course in sequence to the table.
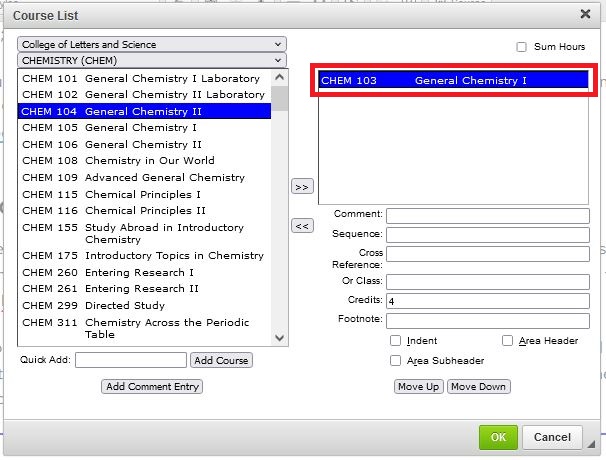
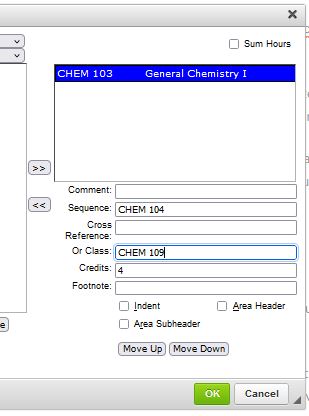
- Click on the course where a second course must also be taken (in this example, CHEM 103)
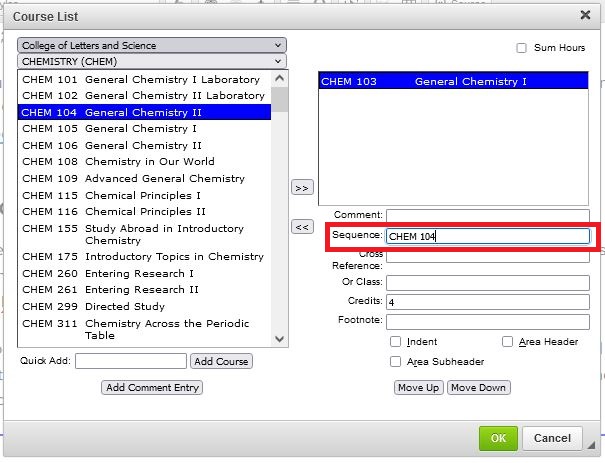
- Add in the 'Sequence:' field the second course (in this example CHEM 104). This must be done with the correct subject short descriptor in all capital letters.
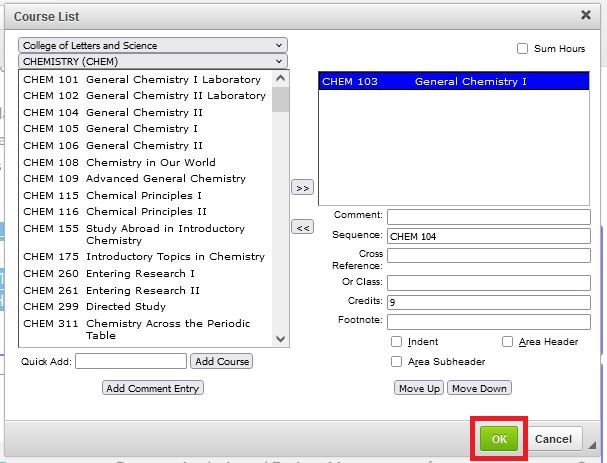
- Adjust the credit count to factor the total credits of both courses.

- Click the green OK.
Examples
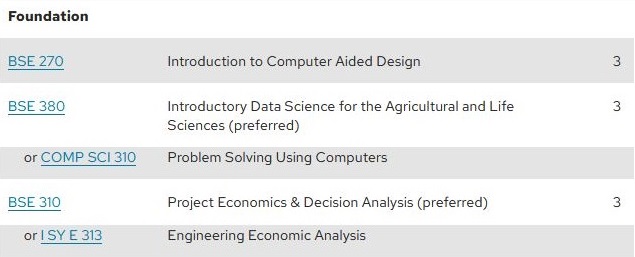
An course list in the editing environment (Lumen Programs/Guide) showing a course sequence.
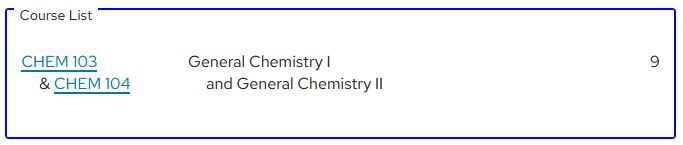
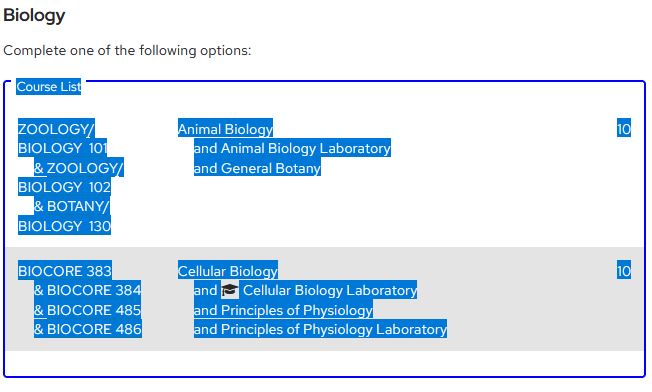
A public facing sequence.

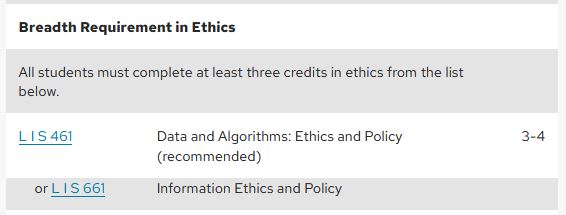
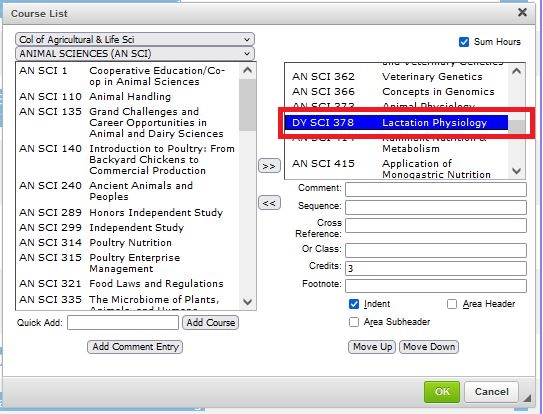
Using "or" classes (one of the courses meets the requirement)
Use this field to indicate any courses approved as alternatives to the course listed. Using this means there is a relationship where the courses are considered/treated as equals within the curriculum.

Tips
- Or courses automatically indent, so credits do not show.
- There isn't a way to add additional context to or courses i.e. you cannot add a comment for an 'or course'
Step-by-Step
- Double click the table you want to add an or class.
- Select the course where you want to add an alternative course.
- Enter the alternative course information (Subject short description and catalog number) of the sequence in the "Or Class" field. Use all caps for the subject short description.
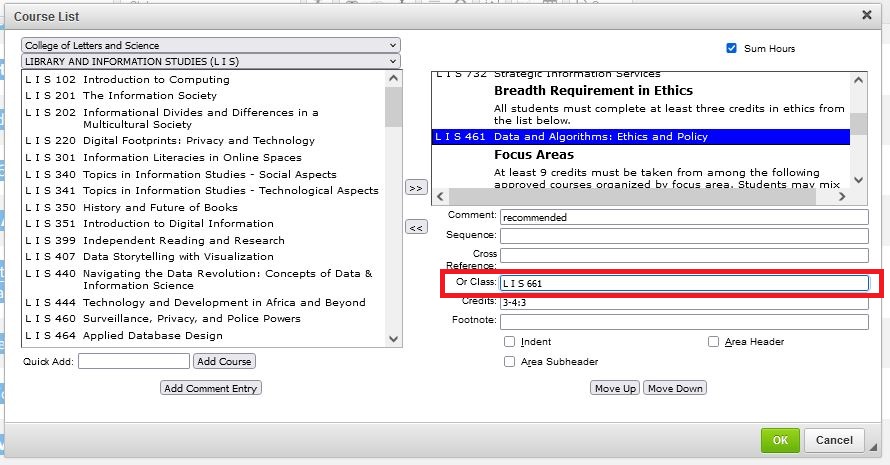
- Adjust the credits on the first course to incorporate the range of both courses (if necessary).
- Click the green OK to save changes.


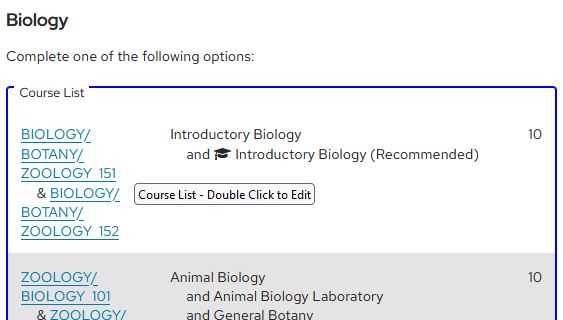
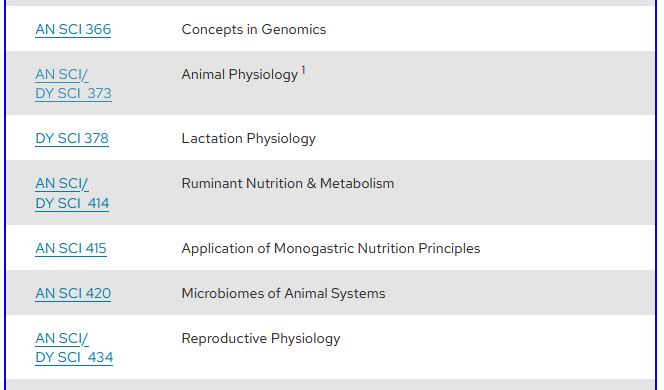
Examples
MATH 319 or MATH 320 will meet this requirement. The courses are separated by the colors to indicate they are separate entities.

Showing two "or classes" in a row. The credits only display on the first course.
Using the sequence and "Or" class fields together
It is possible to use both the sequence and the or class in tandem.
Tips
- The sequence must be listed first e.x. you couldn't have CHEM 109 be the first course and then add (CHEM 103 & 104) as the or class.
- When using or class and sequence fields, the courses will not display in the edited course list. You must click on the first course in the course list to edit either the or class, or the sequence.
- Don't use an "or" class if there is a specific credit requirement and the course does not meet the minimum number of required credits.
Step-by-Step
- Add the first course of the sequence to the course list.
- Enter the second course information (Subject short description and catalog number) of the sequence in the "Sequence" field. Use all caps for the subject short description.
- Add the alternative course in the "Or Class" field.
- Click the green OK button to save.
Example

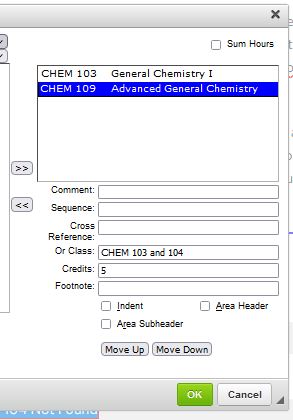
Correct set-up
Incorrect set-up
This display uses CHEM 103 and 104; alternatives that similarly do not work:
- CHEM 103 & CHEM 104
- CHEM 103 and CHEM 104
- CHEM 103 & 104
Credits

Tips
- When a course is initially added to a course list, the software pulls in the current total number of credits in SIS. This may be a range of credits.
- If the credits on a course change, the course list must be manually updated, indicating that the revised credit count will be accepted in the curriculum (and other requirements adjusted if necessary).
- The credit count can always be manually overwritten by editing the 'credit' field.
- If a course should be repeated many times (example: thesis), that credits for that course can be more than what the system indicates. This will cause a red-box around the credits but is okay.
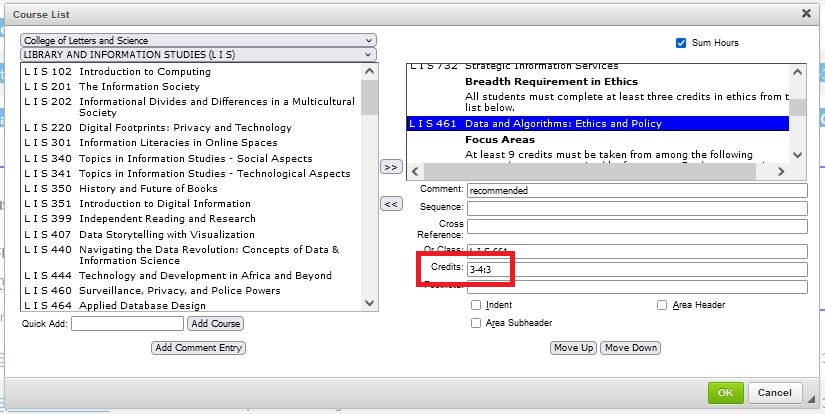
- If the credit should be a range, but you want the sum credits to add a specific credit number in that range, utilize a colon to override what is counted. This feature works well in three/four year plans, or degree requirements that you want to add to a single whole number (example: undergraduate degrees requiring 120 credits). The step-by-step instructions show how to use the colon, overriding the calculation to be three credits.
- When a course’s credit value changes, is good practice to review both the specific requirement the course meets as well as the program itself for coincidental changes to minimum or total credit requirements
Step-by-Step
- Click on the course in the course list.
- Adjust the credits associated with the course(s).
- Click the green OK to save.

Sum hours (calculating table credits)
Check the Sum Hours box when you want the software to add the total number of credits listed in the course list table. This calculates credits from non-indented courses and any text where credits have been added.
To override the number of credits counted, use a colon (:) after the credits with what you want to have counted. Refer to the above Credits section for step-by-step help.

Tip
You will likely need to use a combination of Or Class, Headers, Indenting and hyperlinks in course lists to clearly define what is required versus optional.
Step-by-Step
- Build the curriculum in a single course list table.
- Click the 'Sum Hours' box in the upper right hand corner of the course list edit box.
- Click the green OK. This will add the credits of all courses/text NOT using the Indent feature and/or Or Class.
Example
Text
All stand-alone text (excludes comments) must be entered by using the 'Add Comment Entry.' Do not enter text with the 'Quick Add' feature, as the software reads that as a course and will create a 'red-boxed' text.
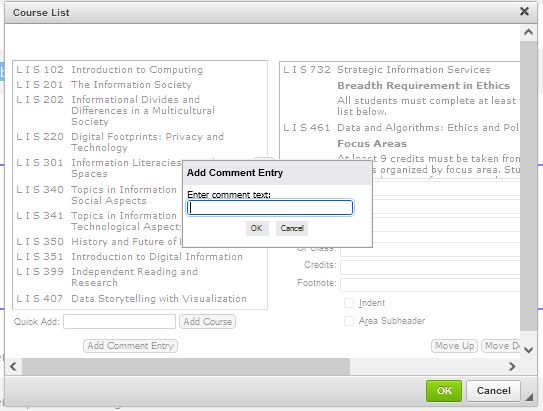
Adding text
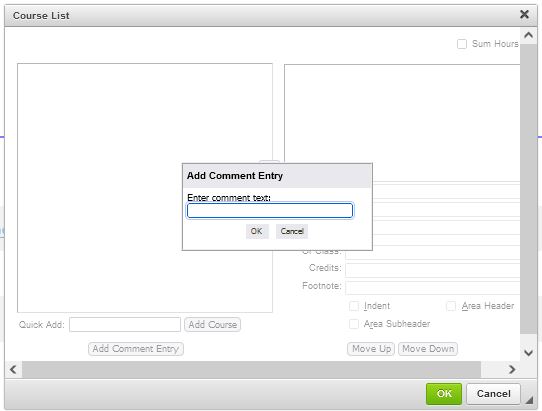
- Click 'Add Comment Entry.' A new window will open.

- Enter your text in the box.
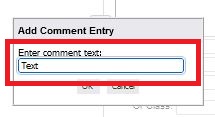
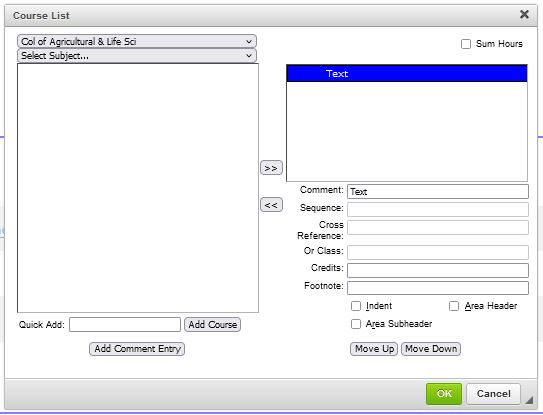
- Click “OK” to add text to the Course List table.

- Click the green OK button to save.
Editing text
- Double click the table where you need to edit the text.
- Select the row in the right hand column where you need to edit the text.

- Revise the text in the Comment field.
- Click the green OK to save.

Tips
- The table cannot be made larger. It's easier to modify your text outside of this table i.e.: edit your text in Word and then copy/paste into this field.
- You can click on the content in the "Comment" field and "ctrl" + "a" to select all the text; "ctrl" + "x" will remove all the content from this field; "ctrl" + "v" will paste the content.
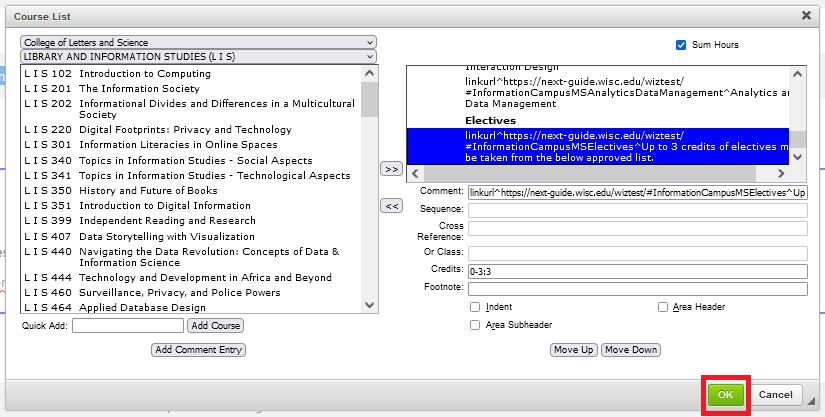
Embedding hyperlinks
- Add a comment entry.
- Enter: linkurl^[full URL]^[text to display] in the window.
- Click the gray OK to save.
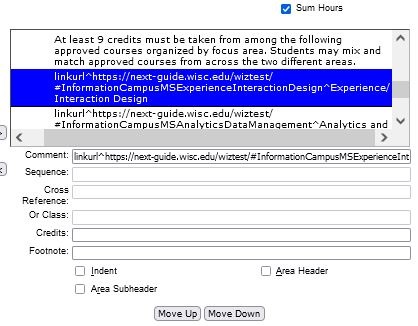
- Click the green OK to save.
Tips
- The entirety of the comment will hyperlink and display underlined and in blue. Keep content concise.
- When linking in Guide, use the public facing url: linkurl^https://guide.wisc.edu/[enter URL]^[enter the text to display]
- It will be easier to write out the content with url and paste into the comment.
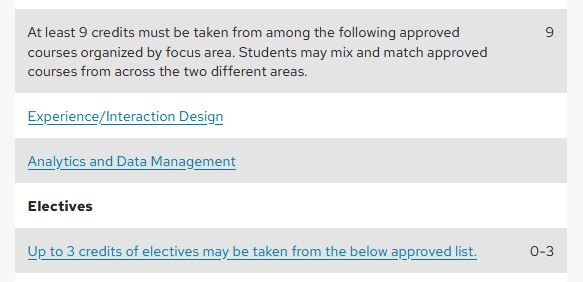
Example
Help that applies to both courses and text
Removing courses or text
- Double click on the course list/table where you need to remove content.
- Select the item (course or text) from the course list edit table.
- Click the double arrow button pointing towards the left. This will move the course to the left side of the table and will no longer show on the right side of the table.

- Click the green OK button to save the changes.

- The window will close and the changes will be reflected in the course list.
Moving courses or text up/down in a list
Note: This feature does not identify when courses move from one section in a course list to another i.e.: when moving a course up or down, there is no visual indicator when looking at the course list that anything has changed.
The most acceptable reason to move anything is due of the default functionality of the course list to add items to the end of the course list. It is acceptable to move new content to the correct location.
Step-by-Step
- Double click the table you need to move content.
- Select the item that needs to move up or down.
- Click the Move Up or Move Down button until the content is where you want it.


- Click the green OK button to close and save the changes.

Before
After

Indenting courses or text
Tips
- When checking the index box, the software slightly indents whatever line you have selected in the course list.
- When indenting courses, the software removes the total number of credits (visible) in the course list. Indented courses are not calculated in the Sum Hours feature.
- Do not indent for visual purposes.
Step-by-step
- Add the course(s) and/or select an existing course in a course list that you want to indent.
- Click the Indent box.
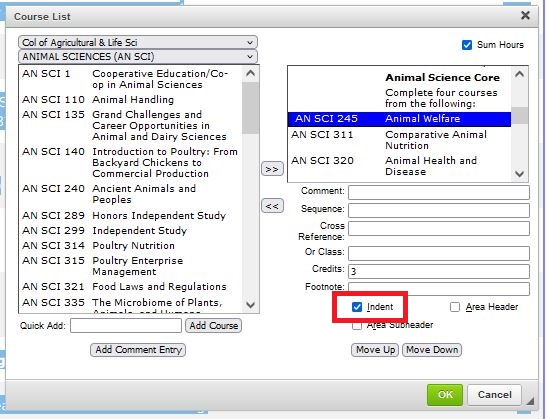
- Click the green OK button to save.

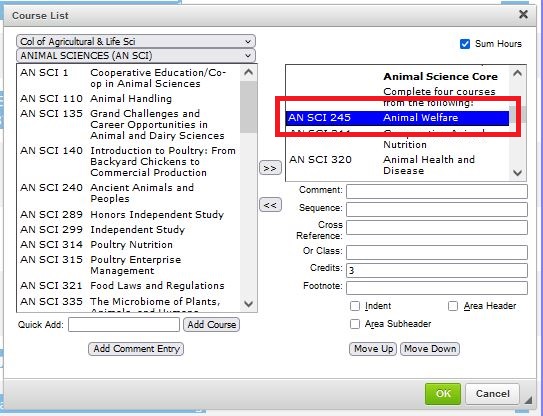
Examples
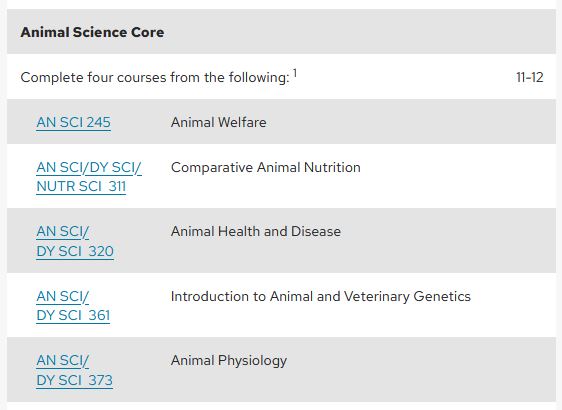
All courses in this image are indented (end user view). In this example, the credits do not show in the course list.
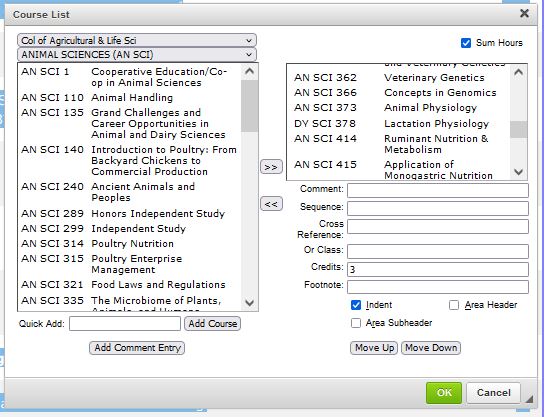
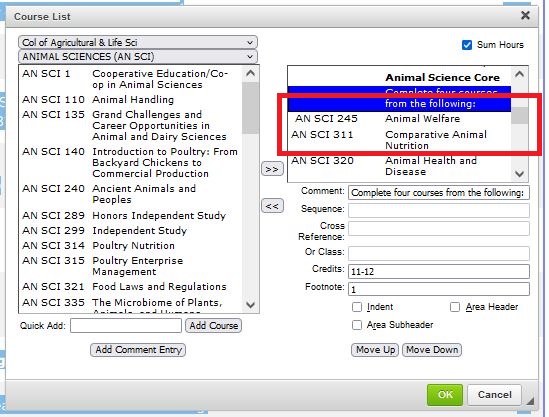
AN SCI 245 is indented in this image (edit mode). AN SCI 311 and 320 are not indented.
Footnotes
- Content entered in this field displays as superscript.
- Utilize only numbers/symbols.
- Text must not be included in this field.
Instructions for how to and considerations for the footnotes field are in the How to Add/Edit/Delete Footnotes (Table Help).
Fields to ignore
Cross Reference
As an institution, we implemented auto-population of cross-listings when adding courses. What this means is, if adding BIOLOGY 102 to a course list, it will automatically display BIOLOGY/ZOOLOGY 102 without any additional effort on your part.
Do not use this field because it's unnecessary and creates hidden issues with the data and/or cross-listings if they were to change.