Lumen/Guide: How to Add/Edit Four-Year Plans (Table Help)
- Overview and Guidance
- Adding the Four-Year Plan table in Lumen Programs
- Adding content in Four-Year Plan table
- Edit a Four-Year Plan in Lumen Programs
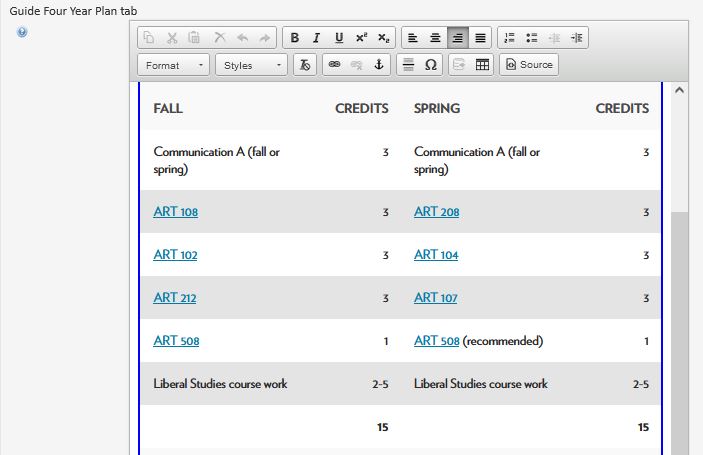
Example of a finished four-year plan:

Overview and Guidance
As part of the university’s concerted effort to help all students progress toward a timely degree, sample four-year plans are required for all undergraduate degree programs featured in Guide. Programs have discretion to structure the four-year plans as appropriate to the program of study, but following is some general guidance for consideration:
-
The main goal for the four-year plan is to help students visualize the years to come and understand what courses and/or other requirements they need to graduate on-time.
-
The plan should include all required courses in a preferred sequence that considers prerequisite courses, course load, etc.
-
Only include courses in the plan that are regularly scheduled/offered.
-
Avoid including parenthetical/explanatory information after a course that is subject to change and/or redundant. For example, do not add “(satisfies Comm-A)” after a course since the Comm-A designation is subject to change and also because that course attribute is noted in the course bubble (which is automatically updated if/when the general education designation changes).
-
The plan should include each of the five General Education Requirements: Communication-A, Communication-B, Ethnic Studies, Quantitative Reasoning A, and Quantitative Reasoning B.
-
In terms of where to place the various GERs in the four-year plan, please note the General Education Requirement Policy states the following:
-
Communication-A: Students are expected to satisfy this requirement by the end of their first year of undergraduate study.
-
Ethnic Studies: Students are expected to complete this requirement within the first 60 credits of undergraduate study.
-
Quantitative Reasoning A/B: Students should complete Part A of the requirement by the end of their first year and must complete Part A before they enroll in Part B.
-
-
- Consider the longevity of the terminology used as this cannot be changed easily. If you want to change using 'first year' instead of 'freshman', the table needs to be rebuilt completely.
- Make sure to SAVE frequently.
Adding the Four-Year Plan in Lumen Programs
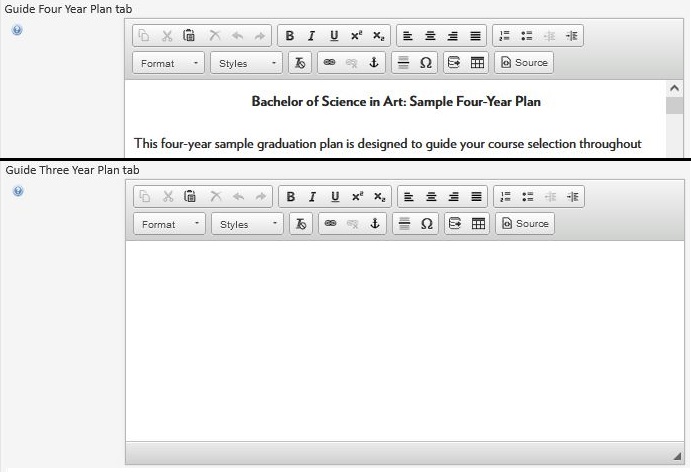
- Scroll to the "Guide Four Year Plan tab" section of the program form. These fields are called "integration points" because what you enter here will publish in Guide; the field is integrated into Guide. You can use the gray triangle in the bottom right edge of the integration point to make the editing area longer.
- Select the “Insert/Edit Formatted Table" icon. This icon is in the second row of, second from the right side. This will open a new window.
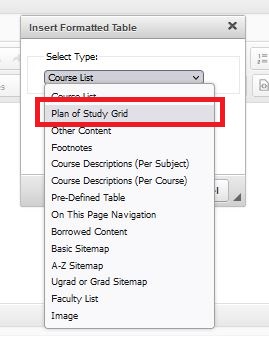
- Select “Plan of Study Grid” from the drop down menu; it is the second item in the list. Click “OK.”

Adding content in a Four-Year Plan table
-
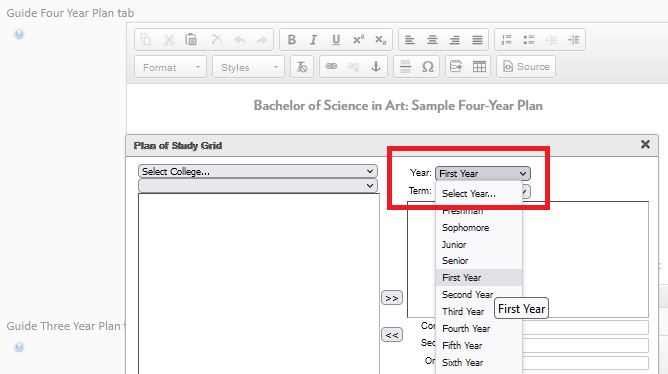
Select the Year and Term in the upper right hand corner of the table. Toggle between these two fields to build the four-year plans. This type of table calculates credits automatically.
-
Recommendations:
-
Use "First Year," "Second Year," "Third Year," or "Fourth Year", opposed to Freshman, Sophomore, Junior, and Senior. Freshman, Sophomore, Junior, and Senior have meaning related to credits on a student record, so someone could be a "sophomore" and be attending UW-Madison for their first year.
- Build the four-year plan in a single table, which will allow the credits to add up to the total credits required for graduation.
-
-
-
- Add or remove courses by year and term.
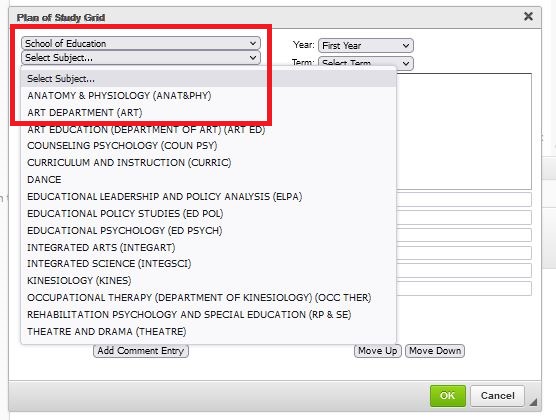
- Courses can be added either by selecting a school/college and then subject via the dropdowns on the upper left hand side, or adding courses manually through the "Quick Add" feature.
- Adding courses using the dropdowns
- Select the school/college of a subject. For example, ART is housed in the Art Department, in the School of Education. If you are not sure where a subject is housed, use the UW-Madison's Academic Structure Tableau data visualization (requires authentication).
- The list uses all approved courses active in SIS. You may need to manually add courses that are new and not fully approved, using the "Quick Add" box.
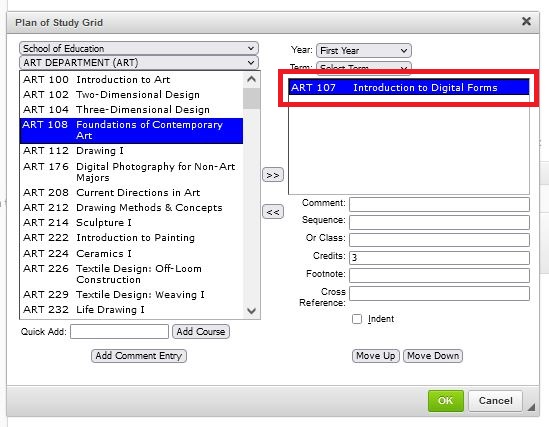
- Select a course from the list on the left that you want to add to the table.
- Use the double greater than symbol (>>) to move a course from the left side to the right side of the table.
- Use the double less than symbol (<<) to remove a course from the right side of the table.

- Notes:
- If you need to have a course listed twice in the right side of the list, you MUST add the course again using the "Quick Add" feature.
- All courses in the right side of the table display in the finalized table. The course list on the left hand side does not publish.
- If you need to have a course listed twice in the right side of the list, you MUST add the course again using the "Quick Add" feature.
- Select the school/college of a subject. For example, ART is housed in the Art Department, in the School of Education. If you are not sure where a subject is housed, use the UW-Madison's Academic Structure Tableau data visualization (requires authentication).
- Adding courses manually
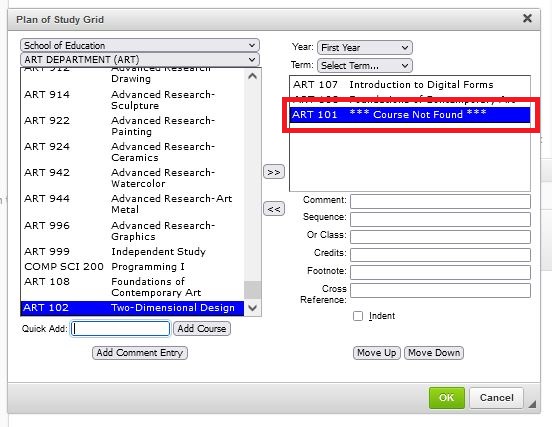
- When using the Quick Add, you MUST use the correct subject short description (example: COMP SCI) and catalog number for the software to register a course.
- Once you have entered the course in the box to the right of "Quick Add", click "Add Course."
- If entered correctly, the course will show up in the right side of the table with the title and credits.
- If entered incorrectly, the course will show up as "***Course Not Found***" in the right side of the table.
- If entered correctly, the course will show up in the right side of the table with the title and credits.
- If text is erroneously entered with the 'Quick Add' feature, the software reads that as a course and will create a 'red-boxed' text.
- Adding courses using the dropdowns
- Once you have listed all courses for a term, switch to the next term. For example, if you filled out the Fall term, select the Spring term under the First Year and you will get two terms side by side in the finalized table.
- Once you are done entering a year's list of courses, switch to the next year. Make sure to also select the term before adding more courses.
- Courses can be added either by selecting a school/college and then subject via the dropdowns on the upper left hand side, or adding courses manually through the "Quick Add" feature.
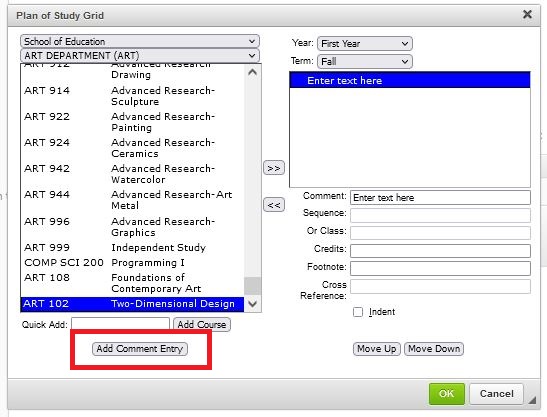
- Add any additional text using the "Add Comment Entry" feature.
- Click the "Add Coment Entry." A new window will pop up.
- Enter text. Click "OK" when finished.
- The text will show up in the right side of the table editor.
- Click the "Add Coment Entry." A new window will pop up.
- Click "OK" to finalize changes.


NOTE: If text is erroneously entered with the 'Quick Add' feature, the software reads that as a course and will create a 'red-boxed' text.
Edit a Four-Year Plan
- Navigate to the Four-Year plan you wish to edit.
- Double click on the table, indicated by a blue line.
- Follow the instructions above for building a table.