Topics Map > Program Proposals
Topics Map > Guide > Editing Help
Guide/Lumen Programs: Table help
How to create/add a table:
1. Select the “Insert/Edit Formatted Table” icon.

2. A new box will open. Select the appropriate table from the drop-down list.


The following are used. All the other items in the drop-down list have specific uses throughout Guide and should not be used in integration points in Lumen Programs, nor on tabs in Guide.
- Course List
- Plan of Study Grid Used for the three or four-year plan.
- Footnotes
- Borrowed Content
Course List
If you are creating a new course list, the course list will be empty and you are able to create content as needed.

There are many ways the Course List table can be used.
- Building a course list
- Detailing requirements for a degree (essentially combining adding courses and text)
- Creating a list of exclusive text (see course list features for how to add text)
Building a Course List
There are two ways to add courses to a course list when building a course list.
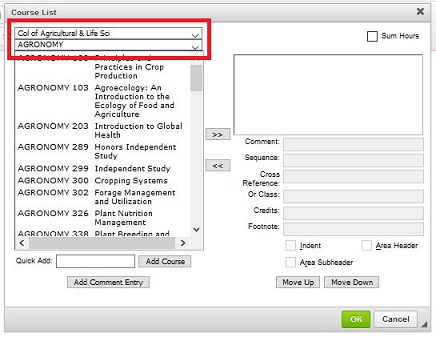
1. Select the school/college of a subject for the listing of all courses in a specific subject. Depending on the location of the table (Lumen Programs or Guide) this course listing may vary. Lumen Programs course lists include all courses (proposed not yet approved, and current). Guide course lists include all approved courses for a specific term, typically the Fall of the following academic year. For example, the Guide editing in Fall 2020 will populate courses that are effective Fall 2021, as the editing time frame is for the next academic year.
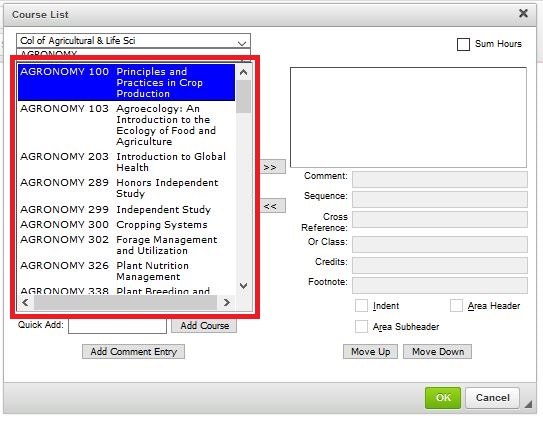
1a. Once the subject list populates, select the course from the list on the left
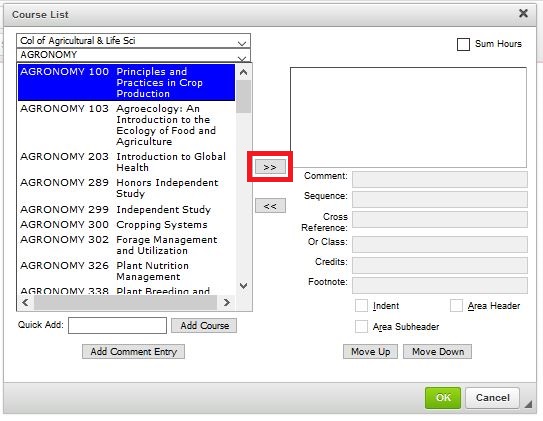
1b. Either double click the highlighted course, or click the >> icon to move the course into the right box. The right box is what displays in the course list.
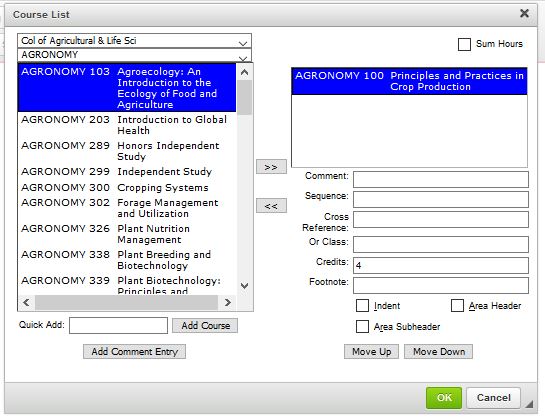
1c.When all the courses needed are populated, click the green 'OK' button to close the table editor.

2. If you know what the approved subject short description of a subject is and the number of a course, you can use the “Quick Add” feature. (Note: You can find the official list on the Office of the Registrar’s website or the academic structure Tableau viz; requires VPN or campus internet)
2a. Enter the subject short description and catalog number in the 'Quick Add:' box. If entering a course that is cross-listed, select whichever subject you want displaying first in the course list.
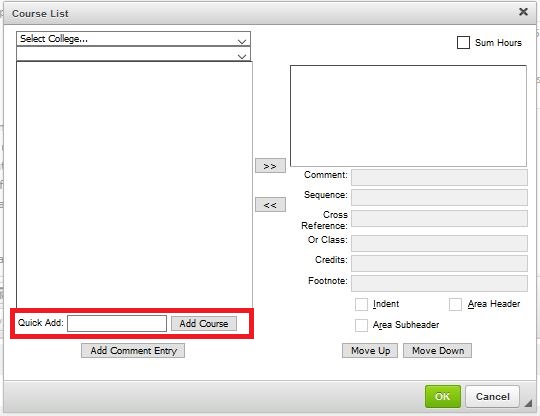
2b. Click “Add Course”

2c. The course will show up in the right hand column.

2c. Click the green 'OK' to close the table editor.

Course List Features and How-tos
This section covers the basics on how to add text, and utilize the other features in the Course List.
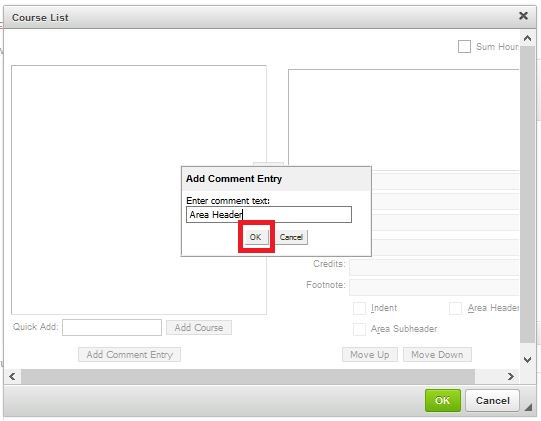
All text must be entered by using the 'Add Comment Entry.' Frequently, text is erroneously entered with the 'Quick Add' feature, but the software reads that as a course and will create a 'red-boxed' text.

1. Click 'Add Comment Entry.' Enter your text in the box that opens and click “OK” to add text to the Course List table.
Once text has been entered, there are a multitude of ways to format the text. Follow your school/college guidelines for formatting (if applicable).
- Area Header
- Area Subheader
- No formatting
- Indent
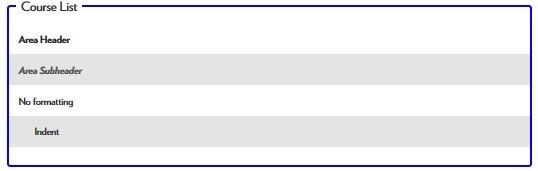
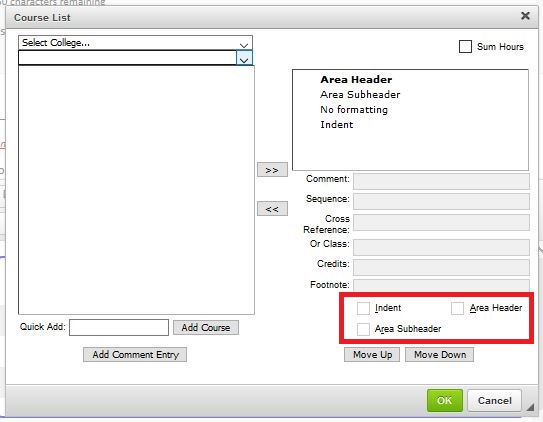
To utilize any of the above options, check the box with the same name below (in red). To utilize the 'no formatting' option, don't check any of the boxes. Note: the area header and subheader should be utilized with text only.
Indent can also be used with courses. See below to see how this changes how courses display.
Once text has been added, click on the
Comments provide additional information to be added in parenthesis after the course title. Generally, this is recommended if a specific topic counts towards a requisite, or if there is a specific section that students should enroll in. There is no need to add the parenthesis, the system automatically adds them.
Additionally, the comment box cannot be made larger. Unfortunately, this is a part of the core system build of CourseLeaf.
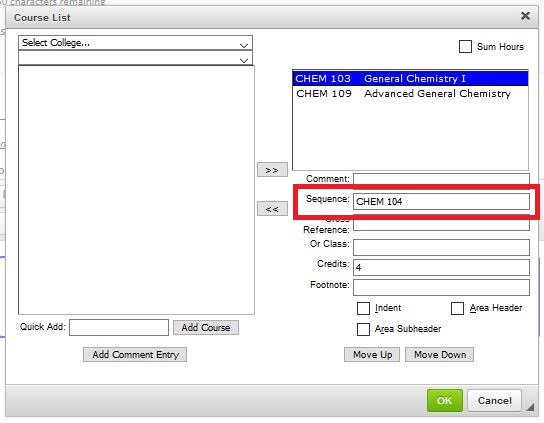
When two courses must be completed in a sequence to complete a specified requirement, utilize this field.Example: CHEM 103 & CHEM 104 may complete the same requirement as CHEM 109, however both must be taken to fully complete the requirement.1. Add the first course in sequence to the table.2. Click on the course where a second course must also be taken (in this example, CHEM 103)3. Add in the 'Sequence:' field the second course (in this example CHEM 104). This must be done with the correct subject short descriptor in all capital letters. NOTE: The second course will display in the course list, however it will not show in the edit window as it's own course. It will always be embedded in the first course.4. Adjust the credit count to factor the total credits of both courses.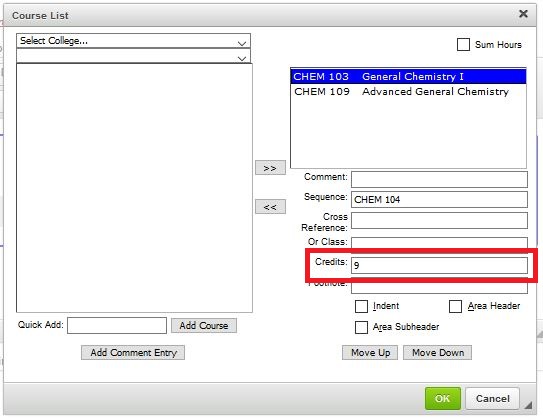 The software can only pull in the data from a single course, which in this example is CHEM 103. The total credit for both courses is 9. If this is not done, the system will produce a red-box around the credits, indicating something does not compute. If you click OK with the wrong credit count, hovering over the red box will indicate what the total credits should be.
 5. Click the green OK.NOTE: The software cannot combine both a 'Sequence' + 'Or Course' data elements. Select only one of the options. The software will show the 'Sequence' course but not the 'Or Course.'
Cross reference is the software's functionality that mimics what we call cross-listing. When developing the functionality for our University, they embedded the cross-listing functionality into a single course. What this means is, if adding BIOLOGY 102 to a course list, it will automatically display BIOLOGY/ZOOLOGY 102 without any additional effort on your part. Do not use this field, as doing such will mess with cross-listing and requires manual adjustment every time that course would update.
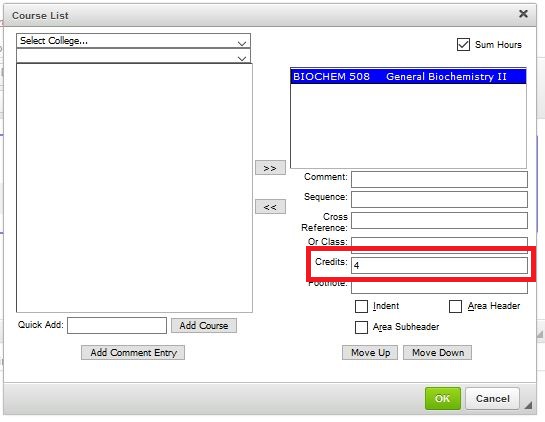
When a course is initially added to a course list, the software pulls in the current total number of credits in SIS. This could be a range of credits. If the credits on a course change, the course list will need to be manually updated, indicating that the revised credit count will be accepted in the curriculum (and other requirements adjusted if necessary). The credit count can always be manually overwritten by editing the 'credit' field.
1. Click on the course in the course list.
2. Adjust the credit count of the course based on the number required for your award.
3. If the credit should be a range, but you want the sum credits to add a specific credit number in that range, utilize a colon to override what is counted. This feature works well in three/four year plans, or degree requirements that you want to add to a single whole number (example: undergraduate degrees requiring 120 credits)
Note: If a course should be repeated many times (example: thesis), that credits for that course can be more than what the system indicates. This will cause a red-box around the credits but is okay.
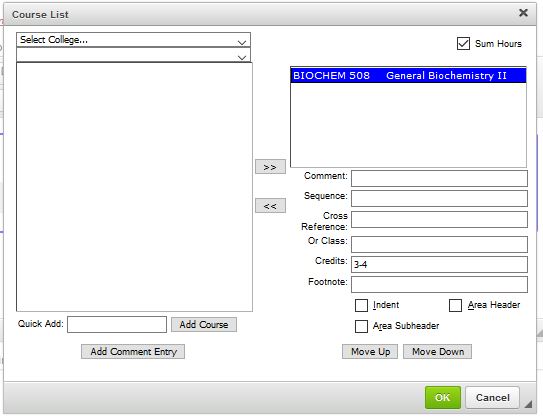

When building a course list, the 'Sum Hours' feature showcases the total credits required of an award. All curriculum could be built into a single course list, including electives, and the course list can total the minimum credits required.
1. Click the 'Sum Hours' box in the upper right hand corner of the course list edit box.
2. Click the green OK. This will add the credits of all courses NOT using the Indent feature.


