
Mass Email Tool Guide - Additional Information
This document takes a deeper dive into some of the more complex considerations of using the UW-Madison Mass Email Tool.
- Working with formatting in the Mass Email Tool
- Adding Create PDFs macro to existing letterhead files
- Sending emails from shared accounts
Working with formatting in the Mass Email Tool
Problem
Formatting can be one of the trickier parts of using the Mass Email Tool.
Excel sometimes shows the values of cells in a different way than the "true" value of the cell. As an example, the cells in the spreadsheet below are formatted as Currency and Date.

Select image to enlarge - image will open in new tab
However, if we change the format to General, you'll see the "true" values of the cells - an unformatted number and an Excel date serial number (number of days since 1/1/1900).

Select image to enlarge - image will open in new tab
These "true" values are what Microsoft Word uses when doing a mail merge and what will show up in the PDF memos, which can cause confusion if Excel and Word are showing different things.
Solutions
The MET Worksheet tries to show you the "true" value of cells whenever possible to make sure you see the data how it will show up in the PDF memos. There are also options to get your data into the format you want that will carry through into the PDF memos.
Pasting as values
If you paste copied data into the MET Worksheet, it will paste as values. If the copied data is formatted in a different Excel spreadsheet, the formatting will be removed when you paste into the MET Worksheet. Using the example above, if you copied the cells that were formatted as Currency and Date ("$70,000" and "November 18, 2022"), they would paste into the MET Worksheet as their "true" values ("70000" and "44883"), which is how the formatted values would be seen in the Word mail merge. You can then use the processes described below to change those "true" values to the format you want.
The MET Worksheet will show a pop-up message describing this behavior the first time you open the Enter Data tab. The pop-up will not be shown again unless you close and reopen the worksheet.

Select image to enlarge - image will open in new tab
Data Actions buttons
The Enter Data tab contains several Data Actions buttons to help you format your data in specific ways. Selecting any of these buttons opens a window that provides more information about the conversion, allows you to select the cells you would like to format by either typing or clicking and dragging, and presenting any additional options for the specific format. These actions will permanently reformat the data in a way that will pull into the Word mail merge as expected when it's time to create the PDF memos.
Current Data Actions include:
- Convert to dates - select cells with date serial numbers and convert them into short date format (7/1/2022) or long date format (July 1, 2022)
- Convert to currency - select cells with numbers and convert them into currency format. User may specify a comp rate threshold - numbers less than the threshold will include cents for hourly comp rates and numbers equal to or greater than the threshold will not include cents for annual comp rates.
- Convert to Empl ID / Position Nbr - select cells with numbers and convert to UW employee ID / position number format (8 digits including leading zeroes)
- Convert to proper case - select cells with text and convert to proper case (first letter and any letters following non-letter characters are upper case, all other letters are lower case). This can be useful for names, but note that proper case formatting isn't guaranteed to match how every person writes their name.

Select image to enlarge - image will open in new tab
Manual data reformatting
If you need to set up a different format than what's available through the Data Actions buttons, you can set your own formatting using the Excel TEXT function, which tells Excel to force the value of a cell into a specific format. This is the same process happening behind the scenes with the Data Actions buttons - by configuring the function yourself you can set the output format to anything you need.
To begin, select a blank column and change the format to General, which will allow you to enter formulas.

Select image to enlarge - image will open in new tab
Next, enter the following formula into the first cell that you would like to hold a formatted value, adjusting your cell reference according to your spreadsheet.
=TEXT(K4, "$#,##0.00")

Select image to enlarge - image will open in new tab
This formula tells Excel to take the value of cell K4 - the first cell on the example spreadsheet containing a value to be formatted - and then display in the format "$#,##0.00", meaning to add a dollar sign in front, separate thousands with a comma, and keep one digit for dollars and two digits for cents even if the value is 0. You can see the value displaying in the desired currency format in cell M4. The triangle in the top left corner indicates that the cell contains a number formatted as text, which is what we want.
Next, making sure the cell with the formula is selected, double-click or click and drag the fill handle (the square in the bottom right of the cell) to expand the formula to the rest of the rows.

Select image to enlarge - image will open in new tab

Select image to enlarge - image will open in new tab
Finally, make sure that all of the cells containing formulas are selected and copy (right-click and select Copy or use Ctrl+C keyboard shortcut). Select the top cell of the original column ("Currency" in this example), right-click, and select the Paste Option "Values" (clipboard with "123").

Select image to enlarge - image will open in new tab

Select image to enlarge - image will open in new tab
The currency formatting is now part of the "true" value of the cell and will keep that formatting during your mail merge. You may delete the "helper column" (Column M in this example); it is no longer needed.
This method can be used to stage data in all sorts of different formats - dates, times, fractions, etc. Refer to Microsoft's TEXT function page for more details.
Additional Excel functions
There are many Excel functions that you can use to get your data how you want it. Refer to Microsoft’s Excel functions (by category) page for the full catalog of Excel functions. Also check out the Excel courses on LinkedIn Learning - free when you log in with your NetID@wisc.edu email address!
Here are some common functions to start.
|
Function |
Description |
|---|---|
|
Get a specified number of characters from the left or right ends or from a specified starting point in the middle of a cell. |
|
|
Convert text to uppercase, lowercase, or proper case |
|
|
Removes all spaces from text except for single spaces between words |
|
|
Combines text from selected cells separated by a specified character or characters |
|
|
Create different outcomes depending on if a specified condition is true or not. |
|
|
|
Searches for a value in a specified range and returns the value of a specified column when it finds a matching row. Note: You may need to use the predecessor VLOOKUP function if you are using an older version of Excel. |
|
Check if a cell has a specific value or state |
|
|
Checks if all or any of a set of specified conditions are met |
|
|
Rounds a number to a specified number of digits |
|
|
Calculates the number of days between two dates |
|
|
Returns the current date |
Adding Create PDFs macro to existing letterhead files
Although we strongly encourage you to use the MET Memo file to create your PDF memos, we recognize some users might worry about recreating an existing letterhead file and would prefer to add the Create PDFs macro into an existing letterhead file. This section will walk you through that process. Note that this may be more technical than normal Microsoft Word use.
To begin, open your letterhead file and navigate to the Developer tab in the Microsoft Word ribbon. If you don't see the Developer tab in the ribbon, you might need to show the Developer tab.
Select the Visual Basic option.

Select image to enlarge - image will open in new tab
This will open the Microsoft Visual Basic for Applications window. In the Project window towards the top left, right-click your document (UW_ltr_4c_RedHat in this example), open the Insert menu, then select the Module option.

Select image to enlarge - image will open in new tab
Copy and paste the following code into the Module window.
Sub CreatePDFs()

    Dim mainDoc As Object
    Dim startResp As String
    Dim sendCount As Long
    Dim strFolder As String
    Dim strName As String
    Dim i, j As Long

    Set mainDoc = ThisDocument

    startResp = MsgBox("This will create a PDF file for each row of your MET Worksheet. Depending on the number of files being created, this process might take a while." & Chr(10) & Chr(10) & _
    "Microsoft Word will hide while the process runs to prevent a flashing effect as the new documents are created. " & _
    "Word will reappear with a confirmation message when the process finishes." & Chr(10) & Chr(10) & _
    "Click OK to begin or click Cancel to end.", _
    vbOKCancel + vbInformation, _
    "UW-Madison Mass Email Tool")

    If startResp = vbCancel Then

        Exit Sub

    ElseIf startResp = vbOK Then

        'Hide all Word windows to prevent flashing
        For j = 1 To Windows.Count
            Windows(j).Visible = msoFalse
        Next j

        'Hide Word application to prevent flashing and show progress bar
        Application.ActiveWindow.Visible = False

        With mainDoc

            sendCount = 0

            For i = 1 To .MailMerge.DataSource.RecordCount

                With .MailMerge
                .Destination = wdSendToNewDocument
                .SuppressBlankLines = True

                    With .DataSource
                    .FirstRecord = i
                    .LastRecord = i
                    .ActiveRecord = i

                        'Skip mail merge row if Empl ID without leading/trailing spaces is blank
                        If Trim(.DataFields("First_Name")) = "" Then Exit For
                        strName = .DataFields("File_Name")
                        strFolder = .DataFields("File_Path")

                    End With

                .Execute Pause:=False

                End With

                strName = Trim(strName)
                strFolder = Trim(strFolder)

                With ActiveDocument
                    .SaveAs FileName:=strFolder & Application.PathSeparator & strName & ".pdf", FileFormat:=wdFormatPDF, AddToRecentFiles:=False
                    sendCount = sendCount + 1
                    ActiveDocument.Close SaveChanges:=wdDoNotSaveChanges
                End With

            Next i

        End With

        'Unhide Word windows
        For j = 1 To Windows.Count
            Windows(j).Visible = msoTrue
        Next j

        'Show Word and bring mail merge document to focus
        mainDoc.Activate
        Application.ActiveWindow.Visible = True

        'Show completion message
        MsgBox "You have successfully created " & sendCount & " memos in the folder:" & Chr(10) & _
        strFolder & Chr(10) & Chr(10) & _
        "You may now close Word and open the MET Worksheet in Excel to finish sending the emails and memos.", _
        vbOKOnly + vbInformation, _
        "UW-Madison Mass Email Tool"

        Exit Sub

    Else

        Exit Sub

    End If

End Sub
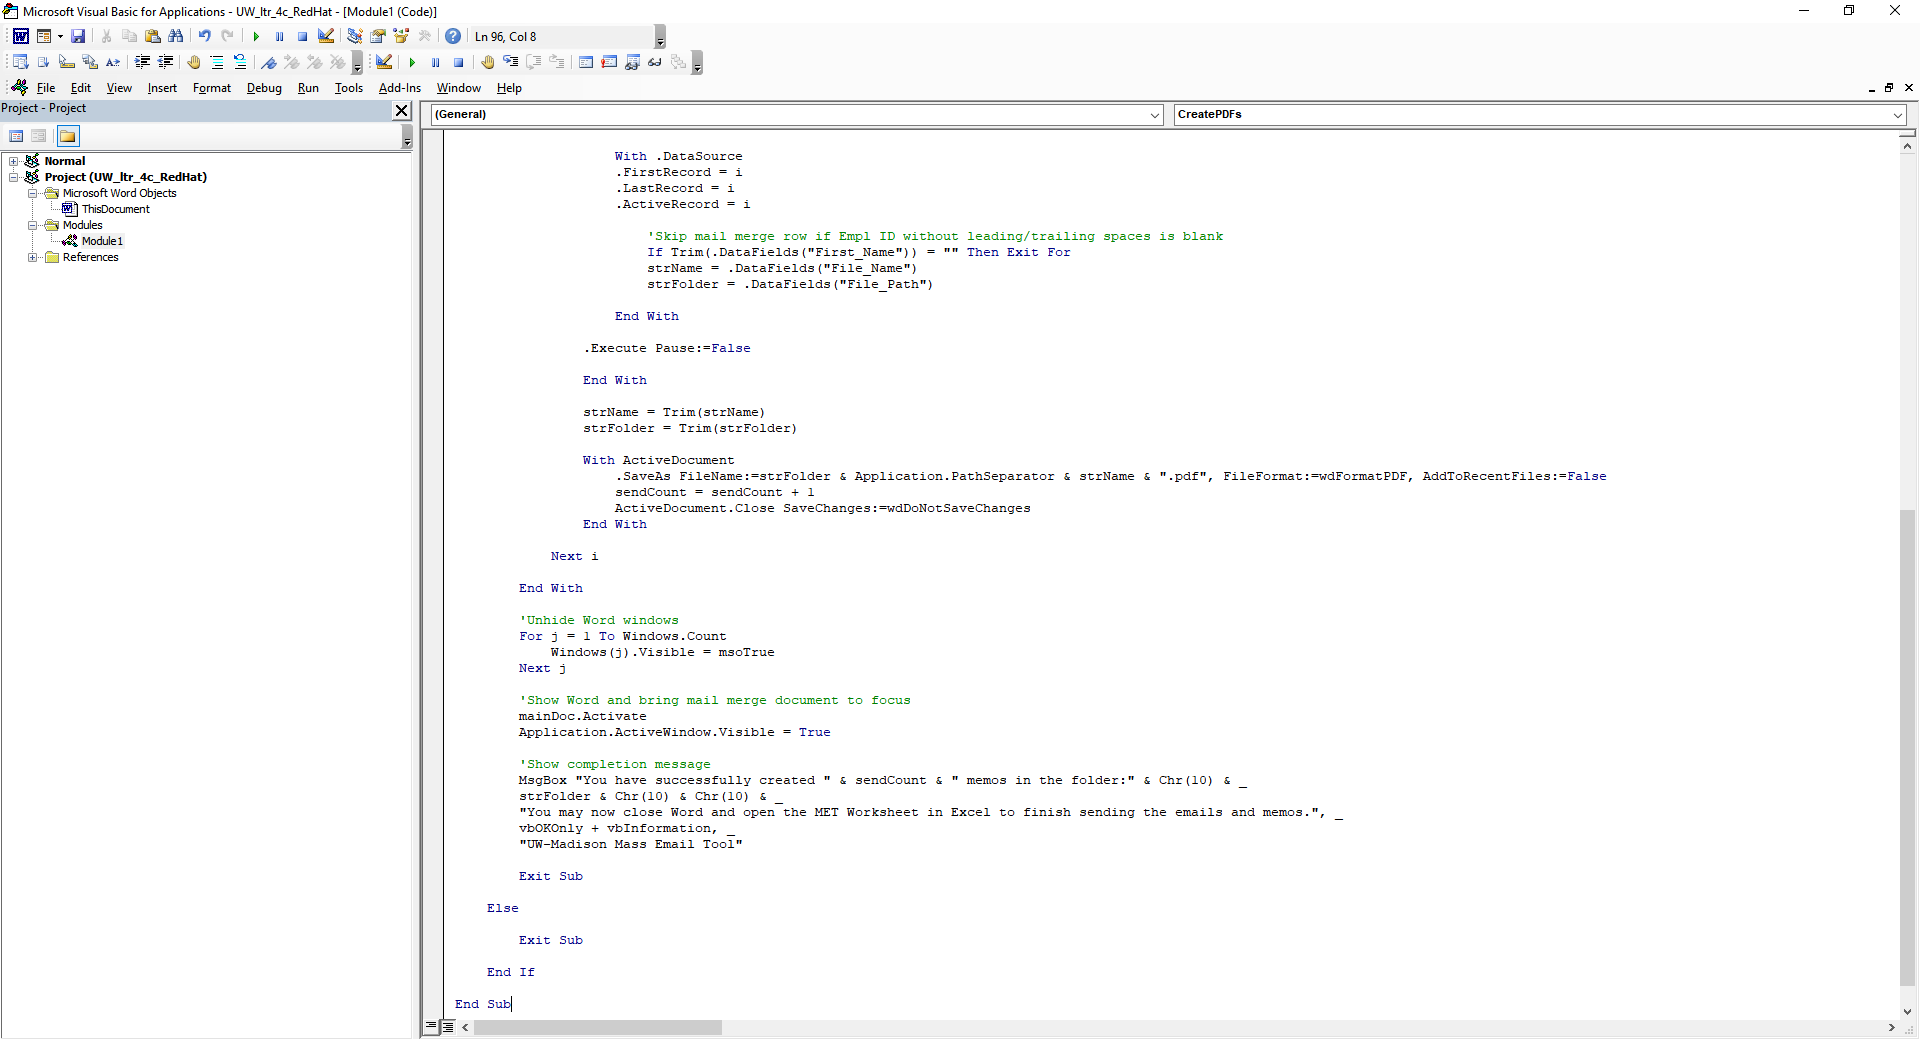
Select image to enlarge - image will open in new tab
You may close the Microsoft Visual Basic for Applicants window after you have pasted the code into the module.
To link the MET Memo to the information you entered into the MET Worksheet, go to the Mailings tab in the Word ribbon, then select the Select Recipients button and select Use an existing list...

Select image to enlarge - image will open in new tab
Next, select your MET Worksheet file and select Open.
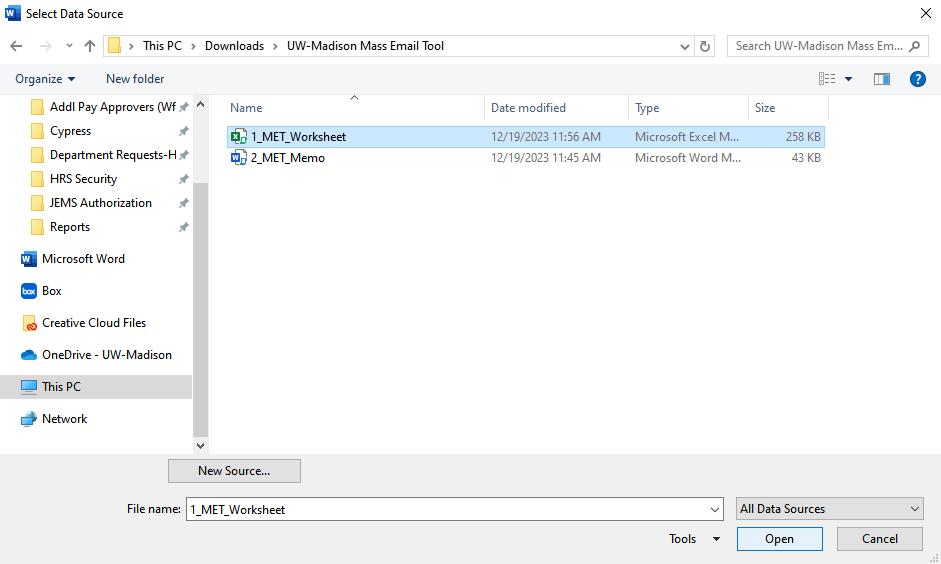
Select image to enlarge - image will open in new tab
In the Select Table window that appears, be sure to select the Mail Merge (read-only) sheet.
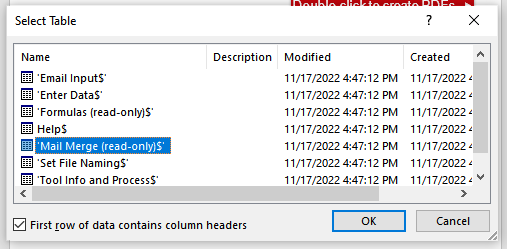
Select image to enlarge - image will open in new tab
You may now insert fields from your MET Worksheet into your memo.
Verify the Mail Merge
After linking your MET Memo to your MET Worksheet, verify that everything looks correct by previewing the mail merge.
In the Mailings tab, activate the Highlight Merge Fields option. This will highlight all mail merge fields in gray so you can verify which information is set up to pull from your MET Worksheet.

Select image to enlarge - image will open in new tab
Next, activate the Preview Results option. This will display the actual data from your MET Worksheet within the memo so you can verify all of the merge fields are pulling in correctly. You can use the Next/Previous Record arrows in the Preview Results section to review rows one by one, or click the Last Record arrow to verify that the mail merge recognizes all of the rows that you expect.

Select image to enlarge - image will open in new tab
When you are ready to create your PDFs, return to the Developer tab in the Word ribbon and select Macros.

Select image to enlarge - image will open in new tab
In the Macros window that displays, make sure that the CreatePDFs macro is selected and then select the Run button. The macro will prompt you through the rest of the process.
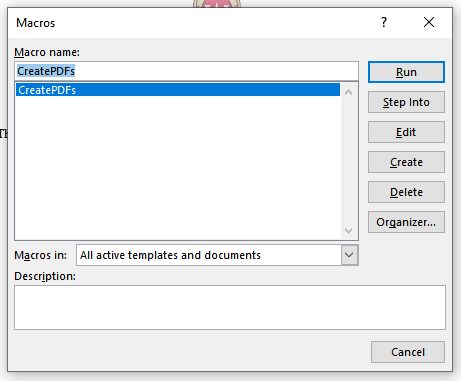
Select image to enlarge - image will open in new tab
Sending emails from shared accounts
The Mass Email Tool will send emails from your default email address in Outlook. In most cases, that will be your individual address. You may want to send from a different email address, like a shared service account.
In order to do this, you'll need to set up a new Outlook profile and sign directly in to the account from which you want to send.
There are a couple of steps involved in this process.
Confirm service account password
To begin, make sure you know the password to the service account. If you do not know the password for the service account and you are an administrator for the account, refer to DoIT's Office 365 - Reset Service Account Password document to set a new password.
Create new Outlook profile
Now that you know the password for the service account, you can set up the new Outlook profile. For this example, we'll be signing in to the HRIS@ohr.wisc.edu service account.
In Outlook, select the File tab, then click the Account Settings button and select the Manage Profiles option.
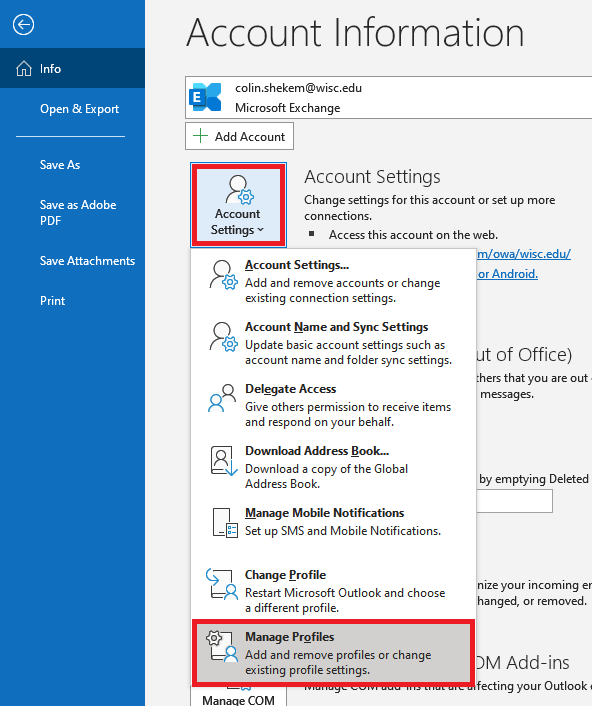
Select image to enlarge - image will open in new tab
In the Mail Setup - Outlook window that opens, select the Show Profiles... button.

Select image to enlarge - image will open in new tab
In the Mail window that displays, select the Add... button.

Select image to enlarge - image will open in new tab
Choose a name for the profile you will be setting up. You may name the profile whatever makes sense to you. We'll enter "HRIS" since we're setting up a profile for the HRIS account.
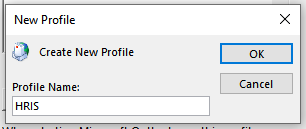
Select image to enlarge - image will open in new tab
In the Add Account window that displays, fill in the information in the Email Account section. Outlook may autofill your name and email address with your current individual account - just change the email address and the rest of the fields should become editable. Select the Next button.
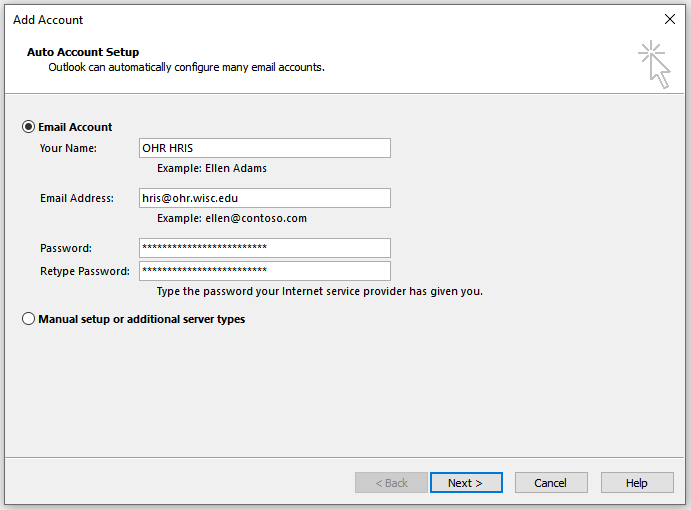
Select image to enlarge - image will open in new tab
Outlook will attempt to automatically sign in to the account. If a Microsoft Sign in window displays, confirm that the email address shown is the account you are trying to add, then select the Next button.
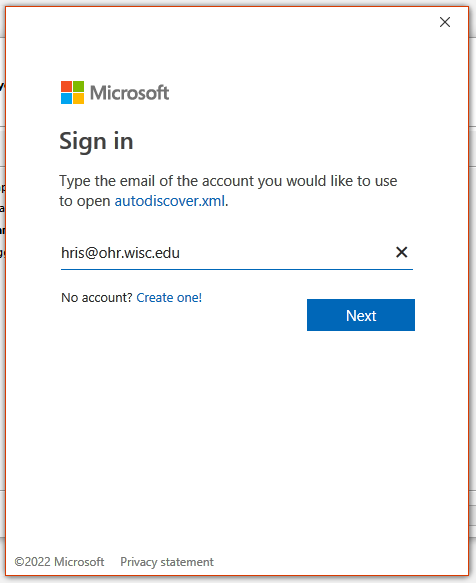
Select image to enlarge - image will open in new tab
You will likely be shown a UW-Madison Login window asking for NetID login. The NetID for a service account follows the format name_domain, where name is the part of the email address before the @ and domain is the part of the email address between the @ and "wisc.edu" (if it exists). For example, the NetID for the HRIS@ohr.wisc.edu account is HRIS_ohr. Use the password that you confirmed in the previous section. Select the Log In button.
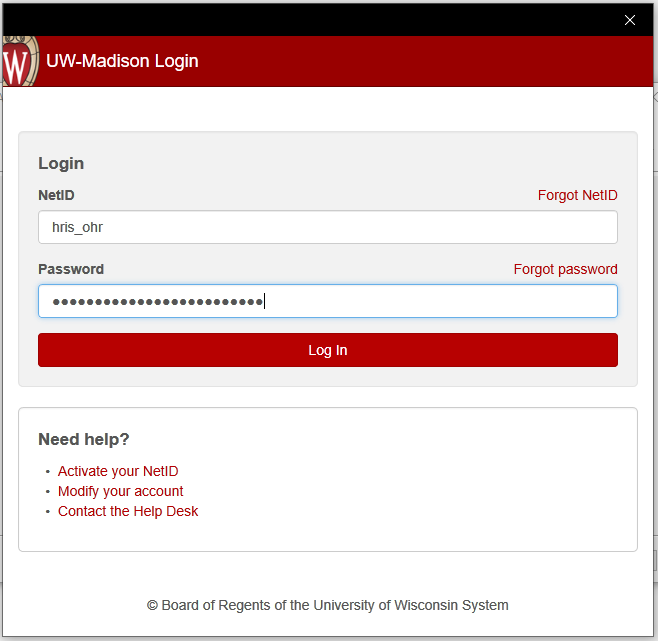
Select image to enlarge - image will open in new tab
Outlook should display a success message. Select the Finish button to finish setup.
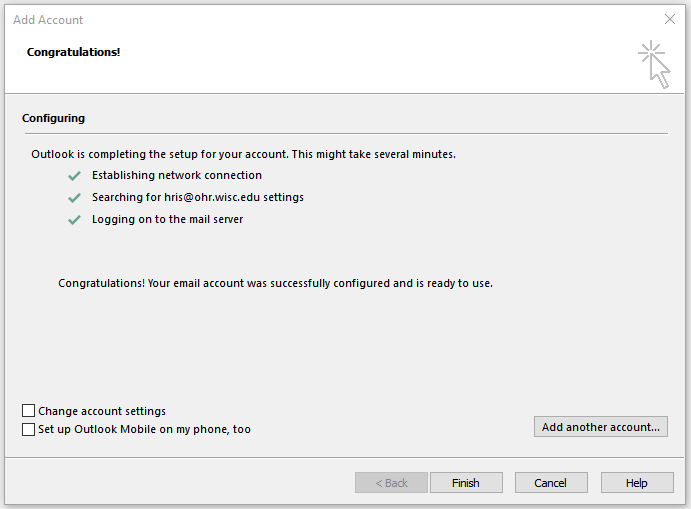
Select image to enlarge - image will open in new tab
You should now see your new profile in Outlook profiles list you saw earlier. Select the OK button to close this window.
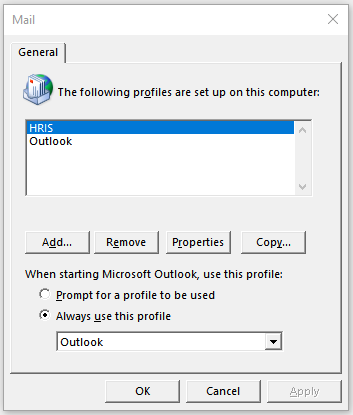
Select image to enlarge - image will open in new tab
To switch to your new profile, open the Account Settings menu again and select the Change Profile option.

Select image to enlarge - image will open in new tab
Outlook will display a pop-up message and then close. Re-open Outlook. Outlook will show a prompt to choose which profile you would like to open. Select the new profile you created. Tip: if you want to get this prompt every time you open Outlook to ensure you always select the appropriate profile, select the Options button, then select the option for "Prompt for a profile to be used". Select the OK button to open Outlook.
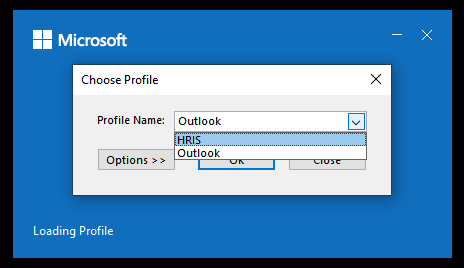
Select image to enlarge - image will open in new tab
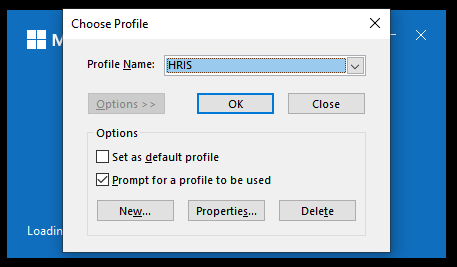
Select image to enlarge - image will open in new tab
It may take longer than usual to open the new profile for the first time. Once Outlook opens, you should see the folders for your service account. It may take some time for Outlook to load all of your messages and items.
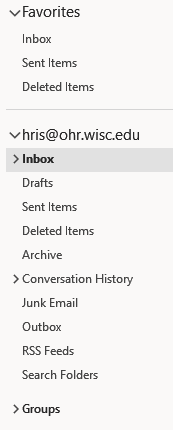
Select image to enlarge - image will open in new tab
To change back to your normal profile after sending your emails, go to Account Settings > Change Profile as you did previously or just close and re-open Outlook if you selected the option to select a profile every time. You can also go back to Account Settings > Manage Profiles > Show Profiles to change your settings about asking for a profile every time or selecting a default profile.