Webex App - How to Enable and Use Reactions in Meetings
This feature is available in Webex scheduled meetings, Personal Room meetings, and enhanced meetings associated with a space.
Meeting hosts and cohosts can turn off reactions so this feature may not be available to you. Hosts and cohosts can also hide the display name that shows next to reactions on meeting platforms that support Edge Video Mesh.
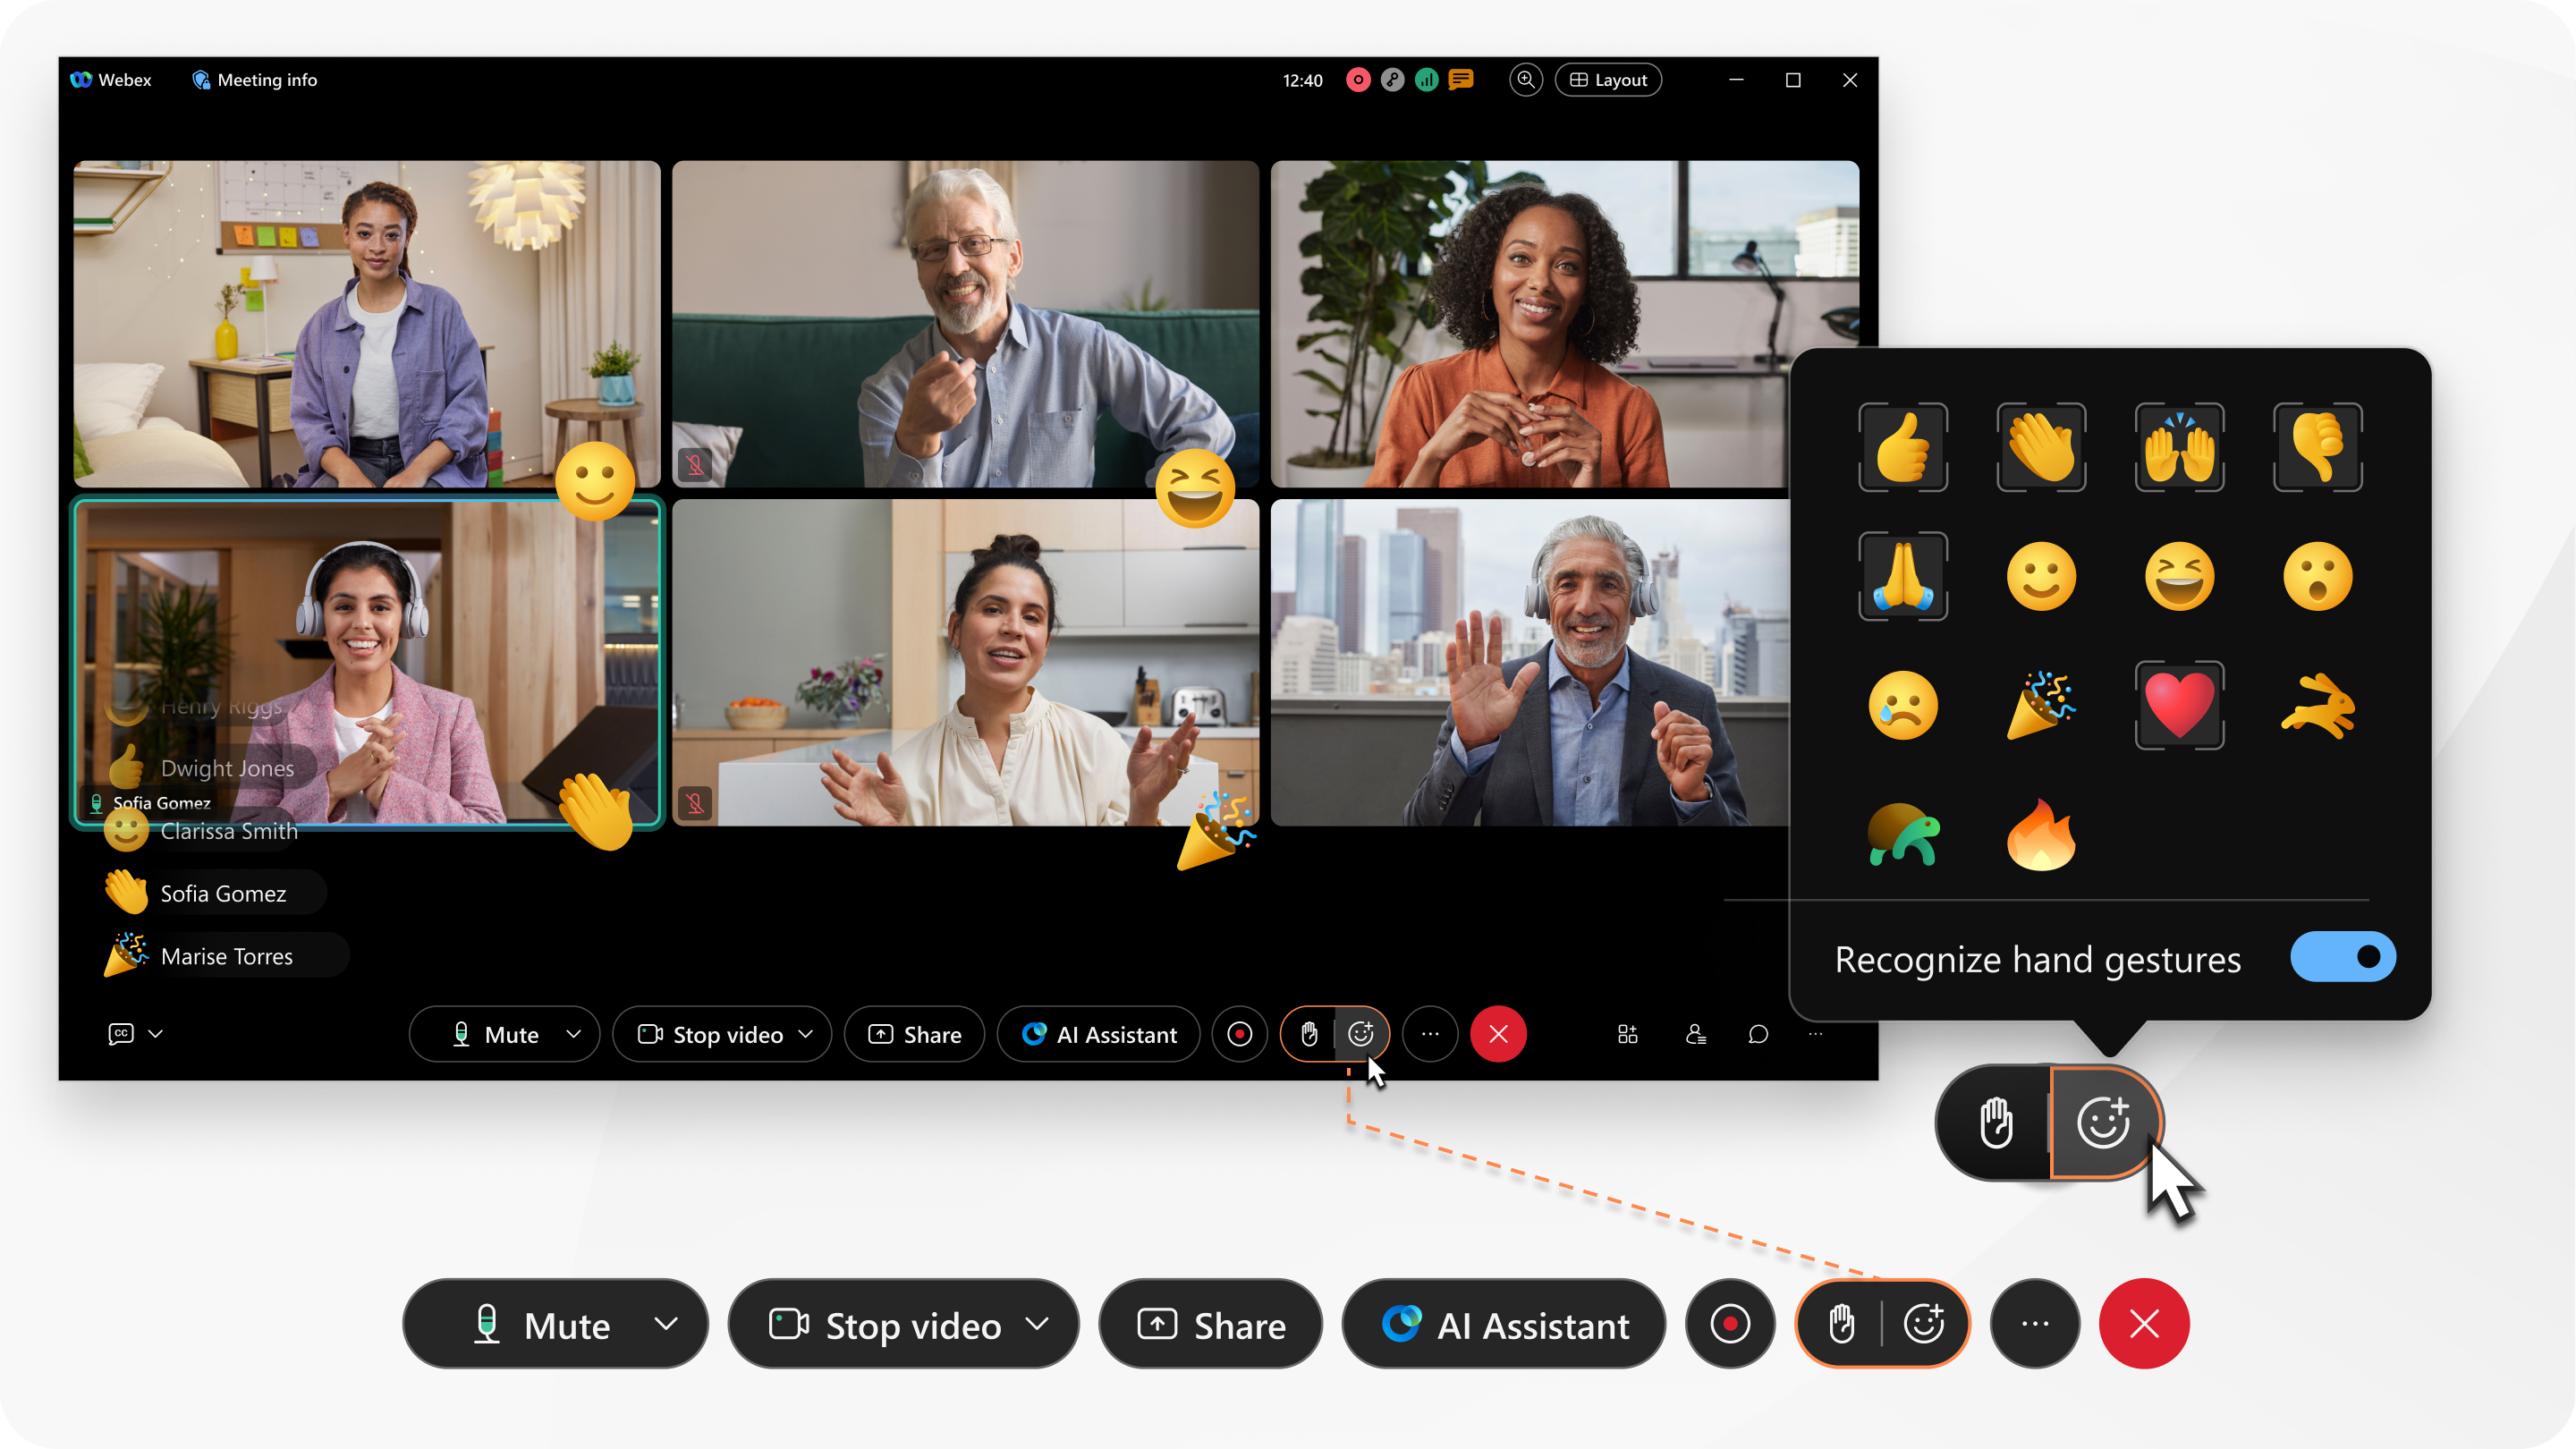
For gesture reactions, such as thumbs up, you can choose the skin tone you prefer.
If you want to enable gestures, make sure you're sharing your video and that your computer meets the following requirements:
-
Operating System—Windows 10 version 10.0.17763 or later
-
Processor—four physical cores or more
-
Memory—4 GB or more of RAM
|
Click Reactions
Others see your reaction in the lower-right corner of your video or in the lower-left corner of the meeting window along with your name, depending on whether your video is within view. |
 and then choose one of the following options: