RStudio Pilot migration – migrating your code to GitLab
Migrating your code from RStudio to GitLab
Managing your code is a crucial step in making your research reproducible. Git is a version control system used for tracking changes in computer files. It is generally used for source code like the code you created in RStudio. You can learn about the benefits of using git and managing your code with repositories here and here.
GitLab is a web-based Git repository that provides both public and private repositories. DoIT manages an instance of GitLab free of charge for campus researchers. However, if you are planning to leave campus, you can still get a free account with GitLab or Github. Both have generous licenses for individuals.
-
Install Git on your computer
GitLab runs on top of Git. You can follow these steps to install Git on your computer.
-
Request a GitLab account
As a UW-Madison faculty, staff, student or other researcher, you can request a GitLab account here.
-
Create a repository for your R code
You need to create a repository into which you will migrate your code. Follow these steps to migrate your code into the repository
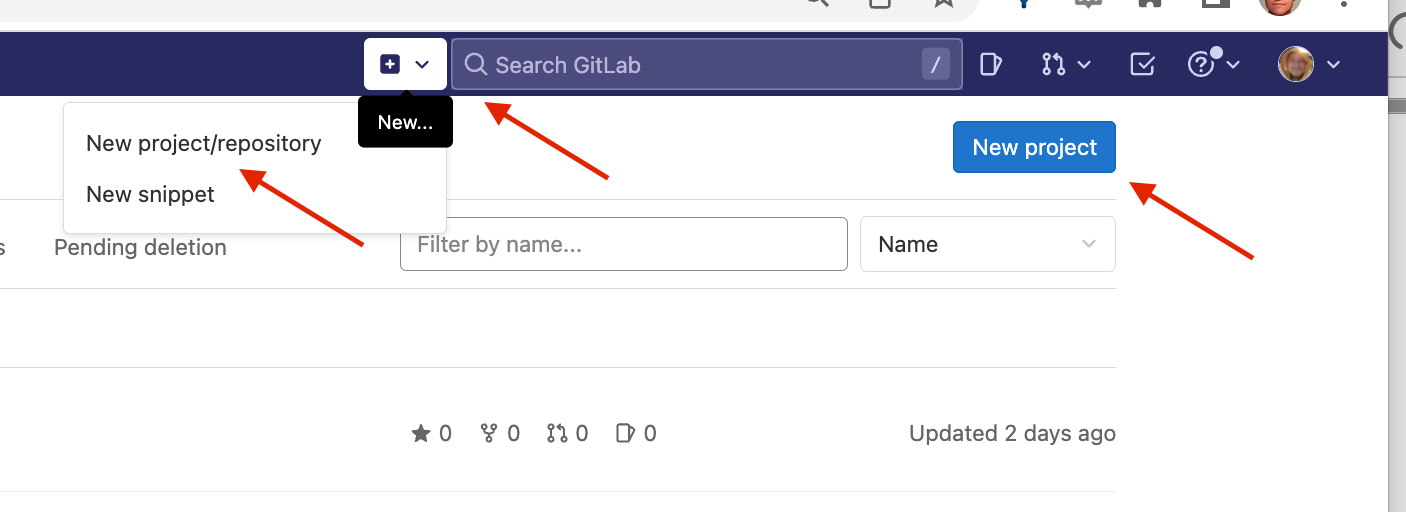
- Create a repository. Click the
New Projectbutton or click the disclose triangle next to the "+" sign and then click theNew Project/Directory.
- Pick the
Create Blank Projectoption.

- Choose a name and location for your project. Chose the appropriate visibility, i.e.,
Publicif you anticipate sharing with audiences outside UW-Madison,Internalfor inside campus sharing, orPrivateif sharing will not be allowed. You can change these settings later.

- Copy the HTTPS link to your repository.

-
Migrate your code
You will need to use the Terminal on your computer to complete these steps.
- Make the directory of your project a git directory by running
git init
- Add the files you want to track. This will track all your files. Modify as needed
git add .
- Commit the files and add an informative commit message
git commit -m “first commit message”
- Add the remote repository you just created in Step 3 above by running:
git remote add origin git@git.doit.wisc.edu:<name-of-your-repository>
- Make sure you are on the main branch
git branch -M main
- Push the context of your code folder/directory to the GitLab repository
git push -uf origin main