KB User's Guide - Settings Tab - CSS for Full View
- Links at the Bottom of the Screen
- Custom Homepage Layout (Internal & External)
- Standard / Subpage Layout (Internal & External)
- KB Admin Tools Custom CSS
Navigation: KB Admin Tools > Settings Tab > Layout link > Layout screen.
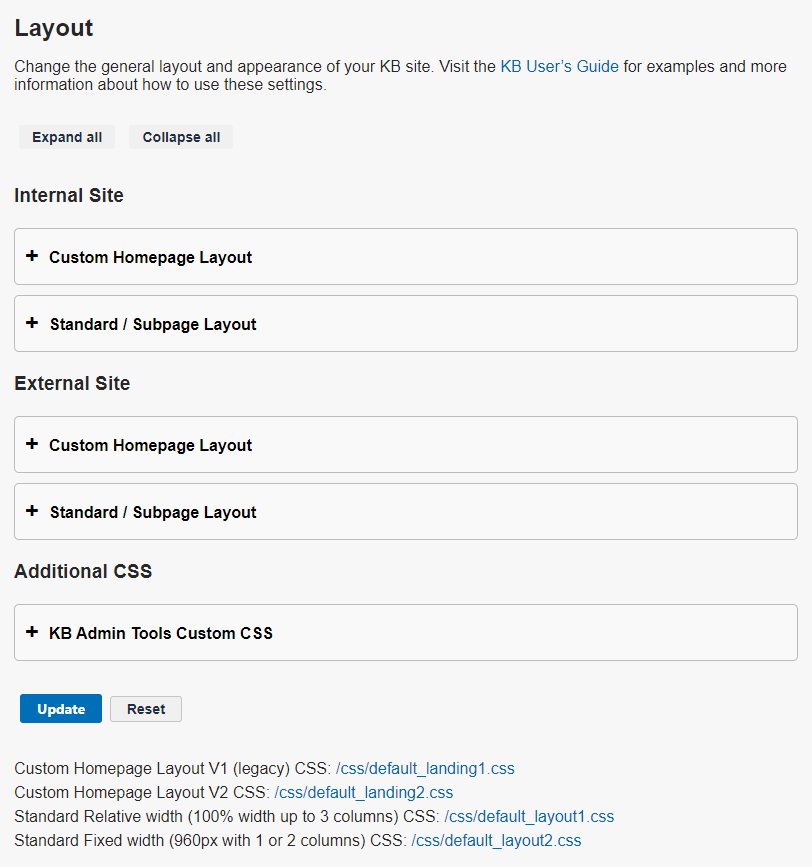
The sections of the page are split between links at the top of the screen and 5 expanding/collapsing panels. Click a panel to expand the content within. The image below shows the Layout screen.
Links at the Bottom of the Screen
There are four links at the bottom of the Layout screen. The links lead to the default CSS file of each Site Layout, which are provided for you to reference when updating the default values.

The table below gives a description of each Site Layout and provides an example.
| Site Layout Name | Site Layout Description | Live Site Example |
|---|---|---|
| Custom Homepage Layout CSS | Fixed centered search only (without content/ side modules) | Used in Unified Sites like the Wisconsin Knowledgebase |
| Standard Relative width | Relative width (100% width up to 3 columns) | Like the UW Arrow Help KB |
| Standard Fixed width | Fixed width (960px with 1 or 2 columns) | Like the Campus and Visitor Relations KB |
Custom Homepage Layout (Internal & External)
The two panels highlighted in the image below include attributes for the optional "Fixed centered search only (without content/ side modules)" homepage. Each Site (Internal and External) have their own set of attributes allowing each site to look distinct from each other.

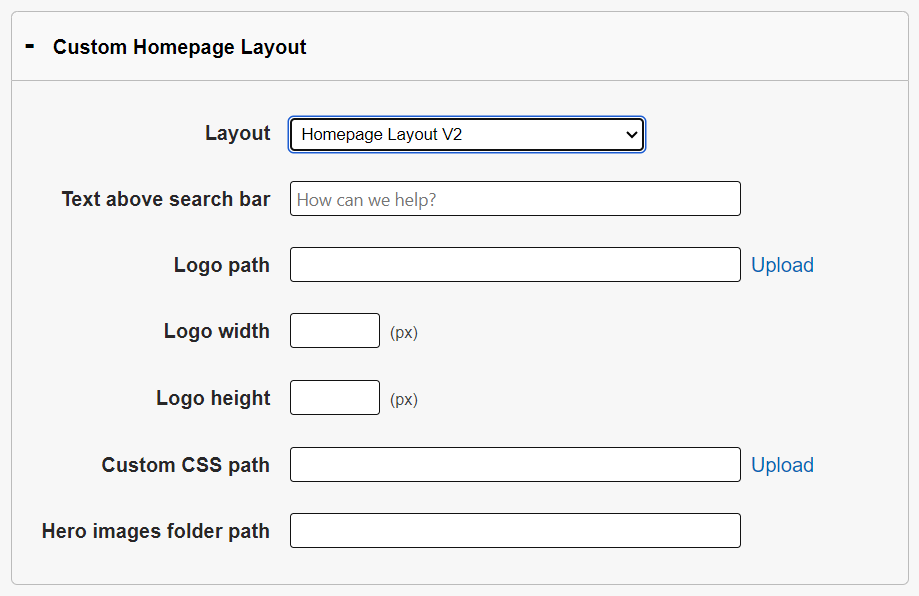
The image below shows the expanded panel containing the External "landing page" attributes. These attributes are only needed if the "Layout" field is set to Homepage Layout V2.
- Note: The images and field names below reference the External site CSS, but the process is same when working in the Internal site section.
-
Layout: Dropdown with the following two options:
-
None (same as standard / subpage layout): landing page is the same as your External Site page. Note that other attributes are not needed if this options is chosen.
-
Homepage Layout V2: Newer version of the Homepage Layout.
-
Homepage Layout V1 (legacy): Used in Unified Sites like the Wisconsin Knowledgebase
-
-
Text above search bar: Text to be displayed above the search bar.
-
Logo path: Click on the Upload button to the right of this field and upload your logo. In the field provided, enter the image path.
-
Logo width: Enter a width in pixels for your KB logo.
-
Logo height: Enter a height in pixels for your KB logo.
-
Custom CSS path: If desired, you may upload and link to a stylesheet that contains custom CSS for your KB landing page.
-
Hero images folder path: Enter the file path to the folder contained within your group's logo folder. Go to the Settings tab -> click the Group Logo Folder link in the left side bar to open your group's logo folder. The path to this folder is right above the table of files. The images in this folder path are used in the background of the centered search box.
After updating your desired attributed click the Update button at the bottom of the page.
Standard / Subpage Layout (Internal & External)
The two panels highlighted in the image below include attributes for KB sites of 1 to 3 columns. Each Site (Internal and External) have their own set of attributes allowing each site to look distinct from each other.

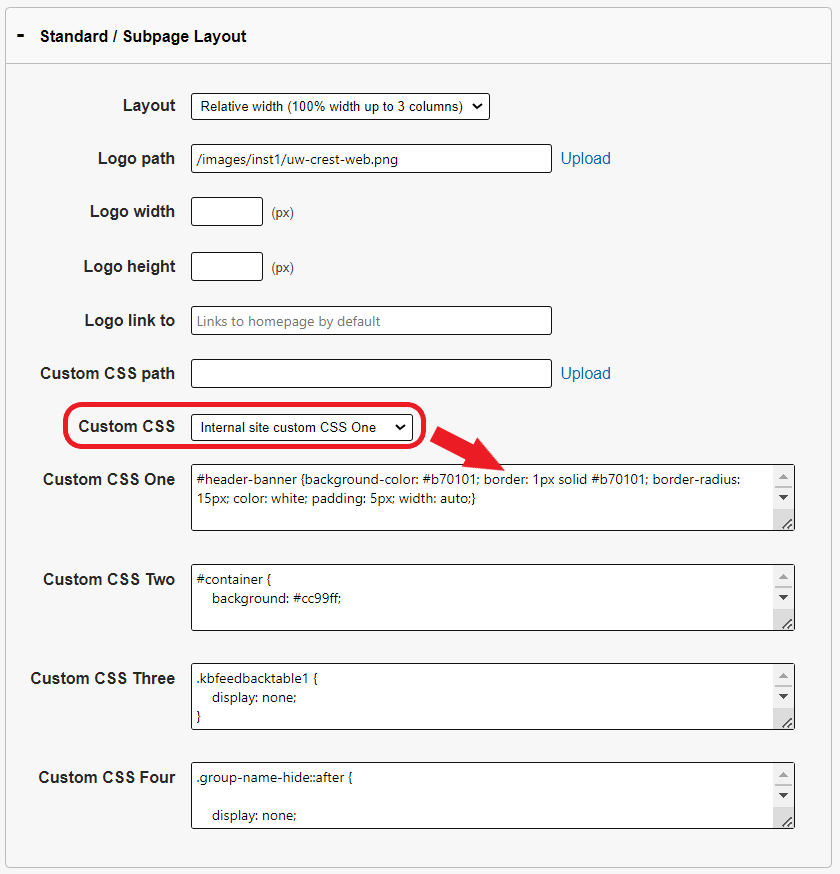
In the image below, you will see the attributes selected for the KB User's Guide External Site.
- Note: The images and field names below reference the External site CSS, but the process is same when working in the Internal site section.
-
Layout: Choose one of the two standard layouts provided, or choose "None" if you prefer to use your own CSS to style the entire site (this is generally not recommended unless you have your own resources to provide styling).
- Logo path: Click on the Upload button to the right of this field and upload your logo. In the field provided, enter the image path.
-
Logo width: Enter a width in pixels for your KB logo.
-
Logo height: Enter a height in pixels for your KB logo.
- Logo link to: Enter a link here to send the user to a page other than the home page when they click on the link.
-
Custom CSS path: If desired, you may upload and link to a stylesheet that contains custom CSS for your KB landing page.
- Custom CSS: Choose from the dropdown menu to enable one of the four fields listed below, Custom CSS One, Custom CSS Two, Custom CSS Three, or Custom CSS Four. If you have custom CSS entered in the enabled field, it will be added to your site and will overwrite any existing CSS rules from the CSS files referenced above (i.e. your base layout and/or custom CSS).
After updating your desired attributed click the Update button at the bottom of the page.
Order of Loaded CSS
Your site CSS is loaded in the order specified on this page. This means that the CSS for your base layout loads first, followed by any custom CSS file provided, followed by the contents of any custom CSS in the enabled text field.
This way, you can rely on the base layout options to supply the majority of the site CSS, then overwrite particular rules as needed to customize colors, fonts, etc.
CSS present in individual KB documents (e.g. internal style sheets added to the page or inline CSS) will be loaded last.
KB Admin Tools Custom CSS
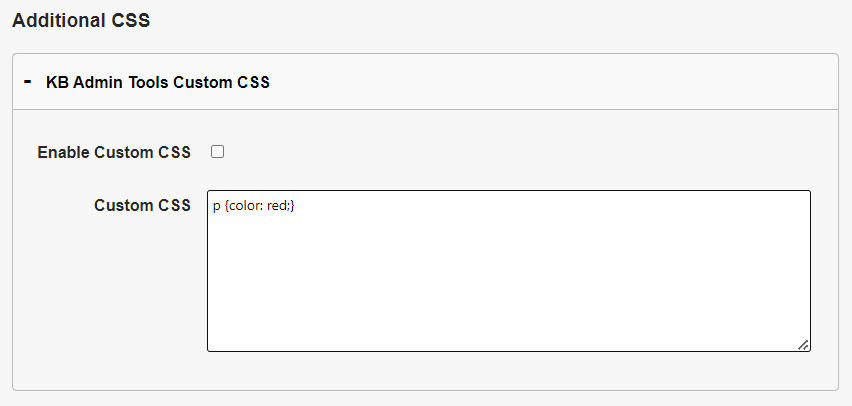
The last panel on the page contains an option to enable custom CSS for the KB Admin Tools. This is particularly useful if you are relying on custom CSS entered above to style document content, as you can ensure that the same content is similarly styled when those documents are being viewed in the KB Admin Tools.
Enable the checkbox, enter your desired custom CSS, and click the Update button at the bottom of the page.


