Approving Room Reservations
How to approve a room reservation
To be able to approve the Room Reservation, you need to use the EMS Client. Instructions on installing the client can be found here: https://kb.wisc.edu/cae/78158
Start the EMS Application
Start the EMS Windows Application.
You will need to login with an login/password that has been provided to you from the CoE EMS Administrator.
Check for pending reservations
Click on the Dashboard icon (may not always be green).

Click on Everyday User Reservations in the lower part of the screen.
In the Status area, make sure the Request item is checked. To just show Request items, make sure other status types are not checked.
In the Building section, make sure the (all) is selected. This will change the filter to show all the rooms in Engineering you are responsible for.
Next to View, make sure All Dates is selected.
The main area of the window should now show if there are any pending reservation requests.

You should now be viewing the Event Editing screen similar to the one shown below.

On this screen, there are various tabs to view additional information. The primary ones of interest are:
The Reservation Summary tab will show the entered contact information as well as a listing of the dates/times and rooms requested.
The User Defined Fields tab will show the additional information that the web form may have asked for (user entered comments, etc).
This History tab will show all the changes to the event that have been made since it was created.
The Bookings section will show all the date/times and rooms that were requested.
To approve the reservation request,
Click on the event in the left hand column so the very top entry is highlighted

Click on the "User Defined Fields" tab to view additional information about the event provided by the requester:
The main area of the window should now show if there are any pending reservation requests.

Approving a Reservation
Select a pending reservation from the list and click the Go To button to bring up the reservation:You should now be viewing the Event Editing screen similar to the one shown below.
On this screen, there are various tabs to view additional information. The primary ones of interest are:
The Reservation Summary tab will show the entered contact information as well as a listing of the dates/times and rooms requested.
The User Defined Fields tab will show the additional information that the web form may have asked for (user entered comments, etc).
This History tab will show all the changes to the event that have been made since it was created.
The Bookings section will show all the date/times and rooms that were requested.
To approve the reservation request,
Click on the event in the left hand column so the very top entry is highlighted
Click on the "User Defined Fields" tab to view additional information about the event provided by the requester:

You can see the additional information provided, the example is shown below:

Now click on the "Reservation Summary" tab

We now want to change the status of the reservation. To do this, click on the Change Status button.

This will bring up the Change Booking Status window.
In the drop down list for the Status, select the Confirmed entry
Make sure the Update Reservation Status is checked
Click the Next button to continue:

This will bring up the entry with all the individual booking entries that we can change the status for. By default, all the entries will be selected. We just need to click on the Finish button to continue:

If none of the events were able to be approved, you will be presented with a dialog box. You will need to scroll over to see the reason that it wasn't able to be approved. To send out an email from the program in this case, Go back to the main Reservation entry, and on the "Reservation Summary" tab, use the "confirmation" button to send out an email confirmation where you can then tell the requester that their reservation was unable to be approved due to conflicts.
A window should pop up with whatever changes were made. This window should look something like:

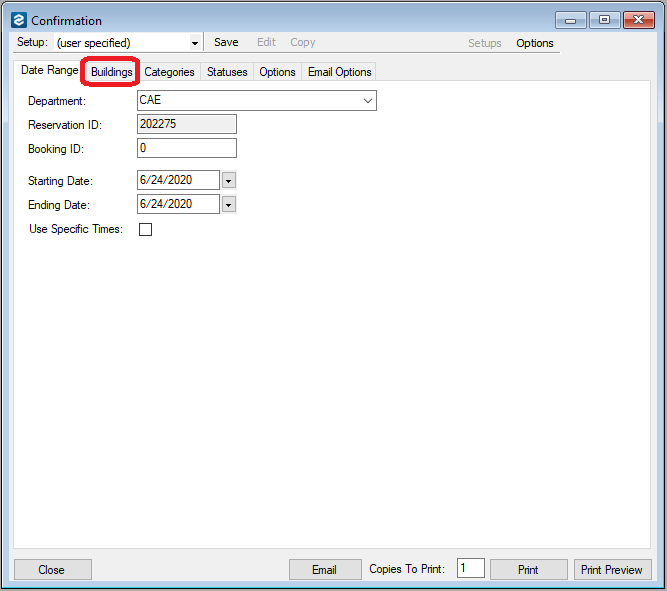
After closing the previous window, you can now send a confirmation email to the person requesting the reservation. To do so, click Confirmation on the Event Editing window

The FIRST TIME you send a confirmation email from the system, there are a few things that need to be done. The system will remember the options you select for future email confirmations you send. In the future, you will just need to click the Email button. But for now, let's check to make sure everything is set up correctly. Start by clicking on the Buildings tab:
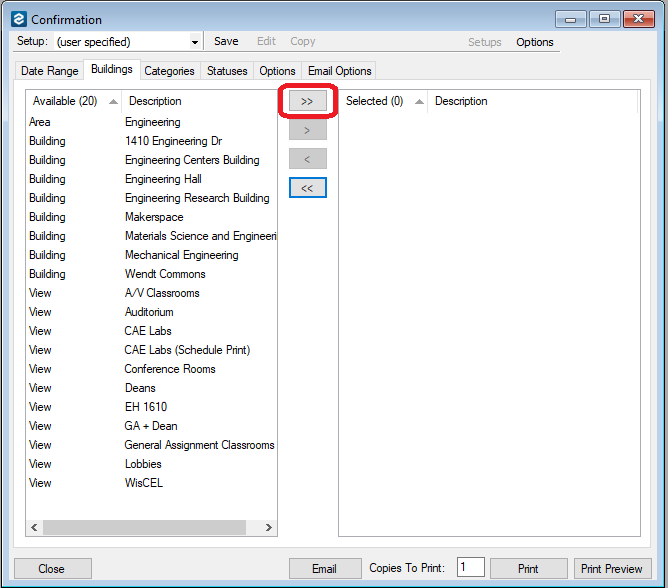
Make sure all the Buildings are selected by clicking on the > > button:
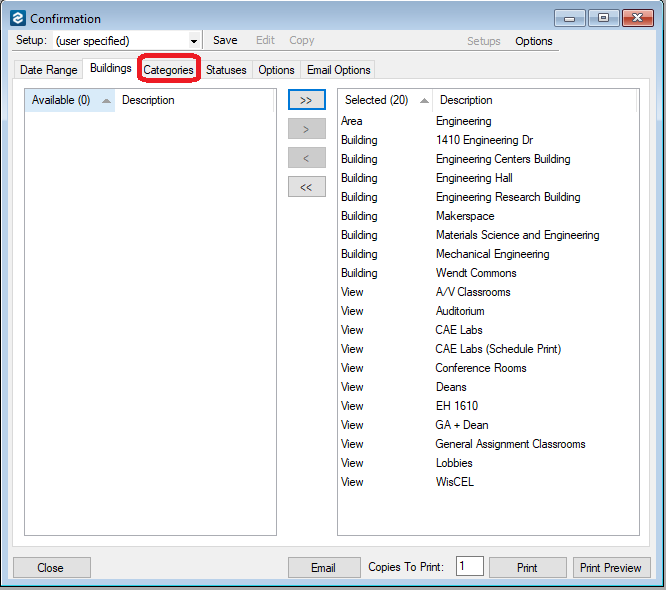
Now click on the Categories tab:
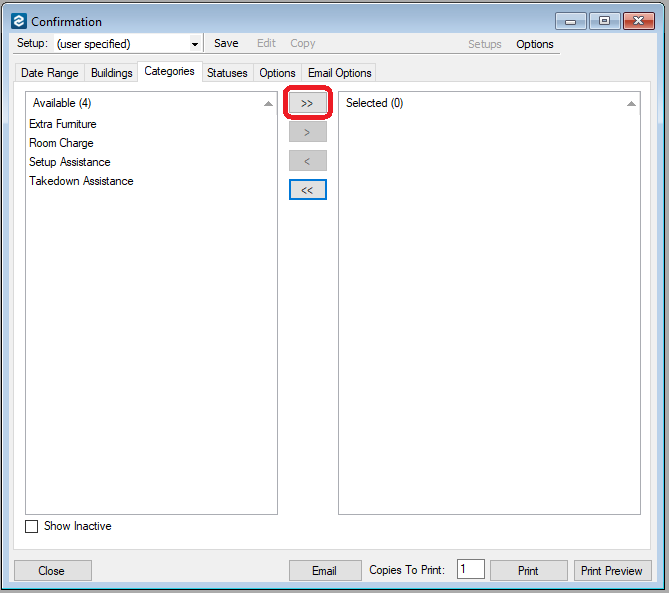
Again, make sure everything is selected by clicking on the > > button:
Now click on the Statuses tab:
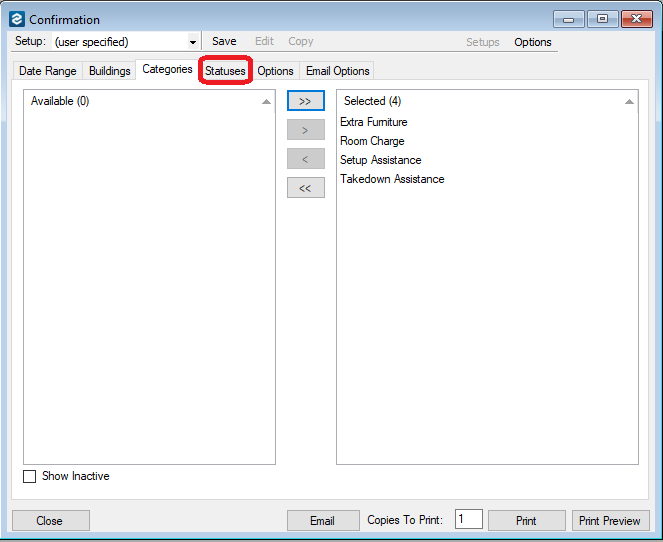
Make sure all the Status types are selected by clicking on the > > button:

Now move to the next step by clicking on the Options tab:
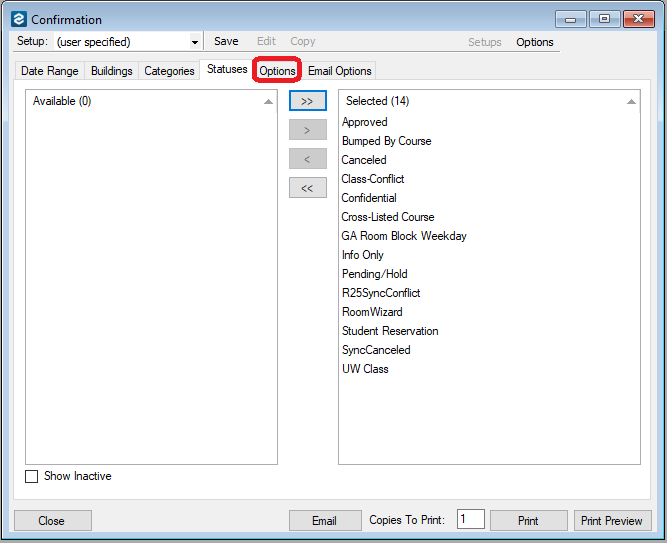
Here, make sure the Confirmation Title has "Confirmation" in it, then select a Header and Footer message. For a general message, select "ENGR-General Conference Room Approved" for the Header and leave the Footer with (none). Some Departments and Groups may have bespoke headers and footers set up, so use whichever you prefer.

Now click the Email Options tab:

Here, make sure you have same Header and Footer messages as the previous step. Again, the ENGR-General Conference Room Approved Header Message is a good option to use as a start. You may need to scroll down the list to find it.
Make sure the Email Format is set to Summary and the Attach Detailed Confirmation and Attach .ics File boxes are checked, while the Prompt for Res. Attachments and Add Res. ID to File Name boxes should stay unchecked:
Check the box for 1st Contact in the Email To line and the Onsite Contact and Everyday User are checked for the Email CC line. This will generate an email message to the two contact emails the requester may have put in the request form as well as sending the requester (Everyday User) a copy as well.

Now click the Email button to generate the email message

A few accounts are old enough to be grandfathered in to sending email directly from EMS, but this service has been retired. For all accounts made since that service went away, this will open Outlook and bring up a generated email message. An example is shown below:

At this point, you can make any changes you need. If you need to adjust who the email is sent to, you can do so in the area shown below:

If you need to update any of the text sent in the confirmation message, you can do so in the area circled below:

Once you are ready to send the confirmation email, click on the Send button

You have now approved the reservation request, and sent out a confirmation email.
Make sure all the Buildings are selected by clicking on the > > button:
Now click on the Categories tab:
Again, make sure everything is selected by clicking on the > > button:
Now click on the Statuses tab:
Make sure all the Status types are selected by clicking on the > > button:
Now move to the next step by clicking on the Options tab:
Here, make sure the Confirmation Title has "Confirmation" in it, then select a Header and Footer message. For a general message, select "ENGR-General Conference Room Approved" for the Header and leave the Footer with (none). Some Departments and Groups may have bespoke headers and footers set up, so use whichever you prefer.
Now click the Email Options tab:
Here, make sure you have same Header and Footer messages as the previous step. Again, the ENGR-General Conference Room Approved Header Message is a good option to use as a start. You may need to scroll down the list to find it.
Make sure the Email Format is set to Summary and the Attach Detailed Confirmation and Attach .ics File boxes are checked, while the Prompt for Res. Attachments and Add Res. ID to File Name boxes should stay unchecked:
Check the box for 1st Contact in the Email To line and the Onsite Contact and Everyday User are checked for the Email CC line. This will generate an email message to the two contact emails the requester may have put in the request form as well as sending the requester (Everyday User) a copy as well.
Now click the Email button to generate the email message
A few accounts are old enough to be grandfathered in to sending email directly from EMS, but this service has been retired. For all accounts made since that service went away, this will open Outlook and bring up a generated email message. An example is shown below:
At this point, you can make any changes you need. If you need to adjust who the email is sent to, you can do so in the area shown below:
If you need to update any of the text sent in the confirmation message, you can do so in the area circled below:
Once you are ready to send the confirmation email, click on the Send button
You have now approved the reservation request, and sent out a confirmation email.