KB Author Training - Creating a New Document
This document provides background information on the process of creating a new KB document. It also includes a training exercise that demonstrates the document editor's basic functionality. For detailed information about specific aspects of the document editor, please continue with this training series or return to the KB Author Training - Overview.
In this document:
- Logging in and creating a new document
- Editing a new document
- Activating your document
- Training Video
- Editing an existing document
Logging in and creating a new document
To begin the process of creating or editing documents, log in to your KB Admin Tools area. Please note if your institution is not using Shibboleth for login processes, go to your Active Directory Login. When you have logged in, you will be brought to your default workspace.
To begin creating a new document, make sure that you are on the Documents tab, and click New Doc in the left navigation bar.
The editing interface for a KB document will appear.
Editing a new document
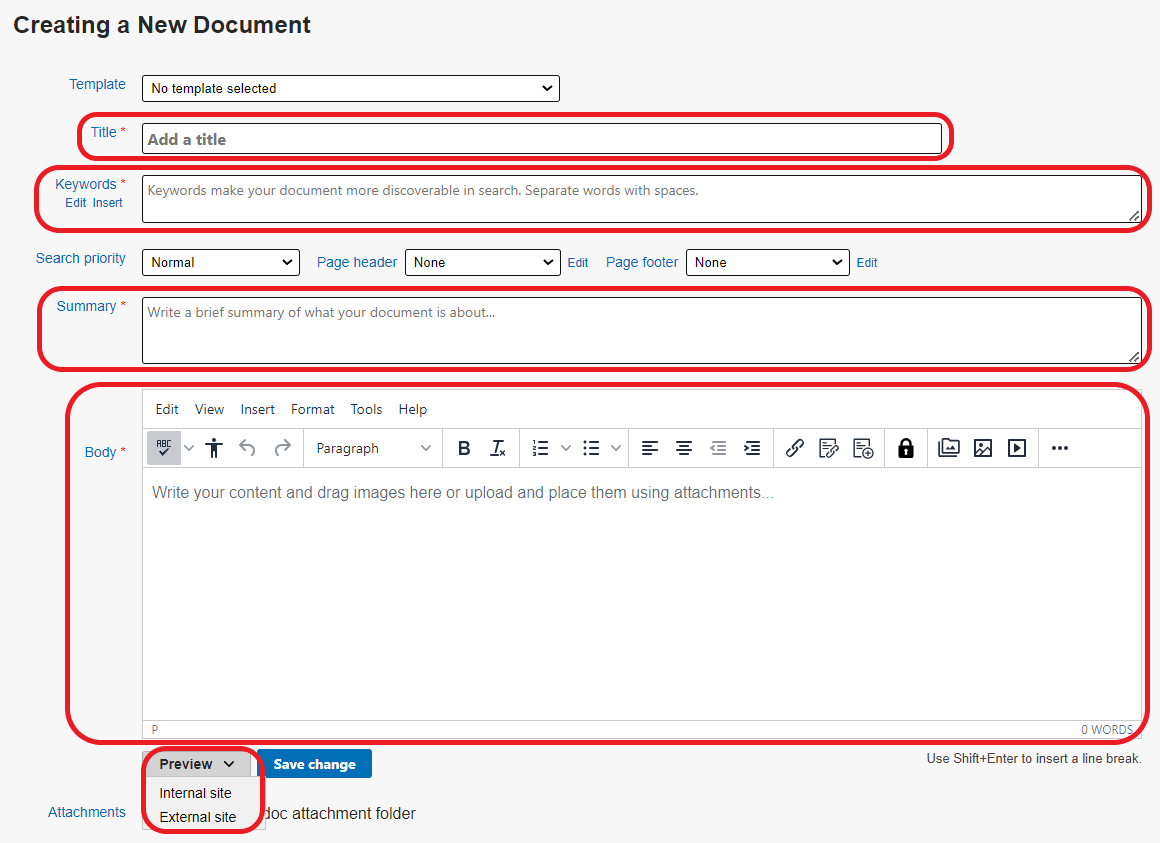
- All fields within the the document editor will be blank. Please note the screen is titled Creating a New Document, and there are four required fields. These four fields must be populated before your document can be activated.
-
Title - The title identifies the purpose and general content of your document. This also assist with searching for your documents.
-
Keywords - Keywords do not appear in the text of the document itself. Instead they establish which search terms will return your document when a user submits a search query via the KB search. Keywords can be separated by commas.
-
Summary - Summary field should provide a succinct description of the contents and/or the purpose of the document. Users should be able to quickly scan the summary to determine if this particular document is what they are looking for.
-
Body - The primary content area of your document that your visitors will see.
-
- Once these four items have been populated, you could now save your progress by clicking on the Save change button below. Any progress you have made will be saved. You can also preview the current state of your document by hovering over Preview then selecting Internal site or External site.
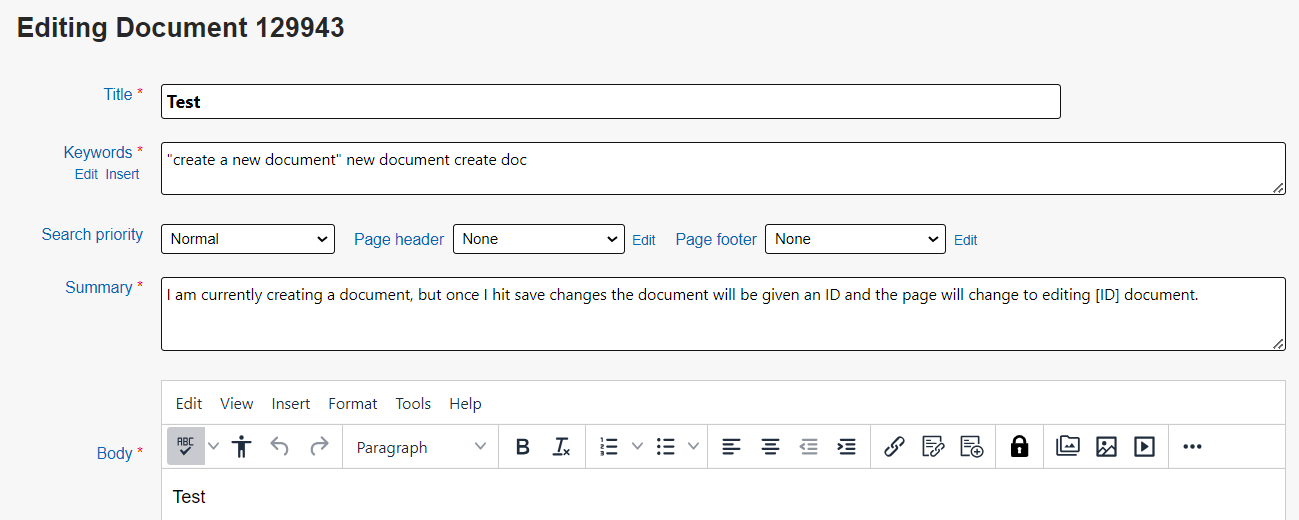
- Once your document has been saved for the first time, the top of the document will no longer say Creating a New Document, and will now instead say Editing Document with several numbers afterward. These numbers represent the Document ID, and will become part of the URL of the document publicly, as well as the way you can search f or document quickly while editing.
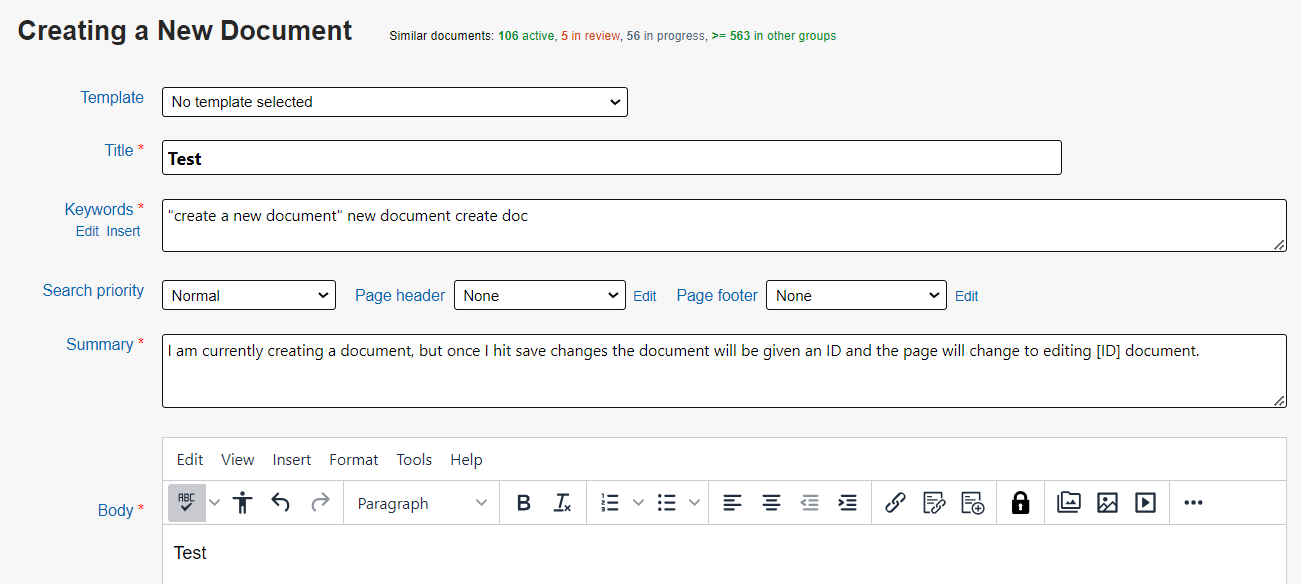
Note: Observe how the Template field (which appears on the left, in the image below) disappears (as seen on the right side of the image below) once the document is saved and assigned a distinct number. Please refer to this document for more information about Templates. - As you continue to make updates to this document, be sure to Save change often to not lose any of that work.
Activating your document
There are a number of additional options that exist within your document to be aware of as you are building it and preparing it for activation.
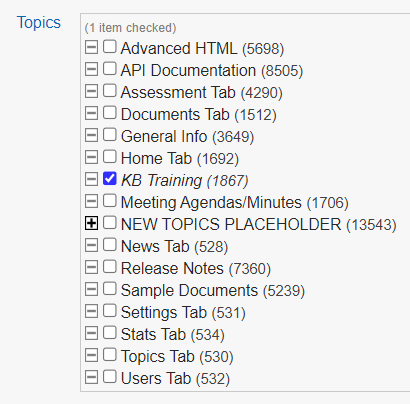
- If you have created Topics within your Knowledgebase space, you can specify which of those this particular document should be found under. Topics are another means of creating ease of navigation to documents a user might need.
- You will need to set the Site Access value for your site, which allows you to publish a document to one or multiple KB sites that you have been given permission for. Determine who the audience is for your document and select at least one KB site.
- You can then decide what status your document should be in.
- In Progress indicates that document is currently being worked on and is not ready for public use.
- In Review indicates that the document is finished, but needs to be reviewed by other parties for accuracy and approval to become active. This status varies from group to group. Some groups use 'In Review' as a holding bin for documents that are ready to be reviewed by another person before being activated for the KB Site. Please see KB User's Guide - Documents Tab - Document Workflow to see the life cycle of a KB document.
- You may not have full activation permissions for your KB site, and will need to choose In Review so that an approver can review and activate your document.
- Active is the value to use when you are ready for your audience to view the document. A document must be saved at least once before it can be set to Active.
- Inactive is the value that you will set for a document when you need to remove it from view
- Once you make your status choice, click the Submit button.
Training Video
Editing an active document
Once a document has been activated, you can access it to make any changes necessary.
- The first way to access is to make note of your Document ID value. This is the numerical value assigned to your document when you first create it, it also the URL value of your document when it is live.
- You can then type that number into your kbAdmin area and click Go to access that document directly.
- From here, you can click the Edit button to make any updates necessary.
- Alternatively, you can click on the Active link in the left menu to access all active documents, and click the Edit button in the row representing the document you want to access.


