Webex - How to Record, Share and Recover your Recorded Webex Sessions
- All recordings have a 150 day retention policy. Recordings older than 150 days will be placed into the trash where they can be recovered if needed for 30 days. Once the recordings are removed from the trash, you will no longer be able to access your recordings. This is in line with Zoom's recording policy.
- These steps apply to Webex Meetings and Webex Webinars
- Only the host or an alternate host can record a meeting. All Webex accounts have access to record their sessions in the cloud
- If an alternate host records the meeting, the meeting host still receives and owns the recording after the meeting ends
Recording Format
Recordings in the cloud are saved in MP4 format and use H.264.
Recording settings
- You can select the screen layout for your recordings so they fit the format and content of your meeting or event. You also have the option to record a transcript of what was said during the meeting.
- If your meeting is associated with a space, you can't change the settings.
Recording the Meeting
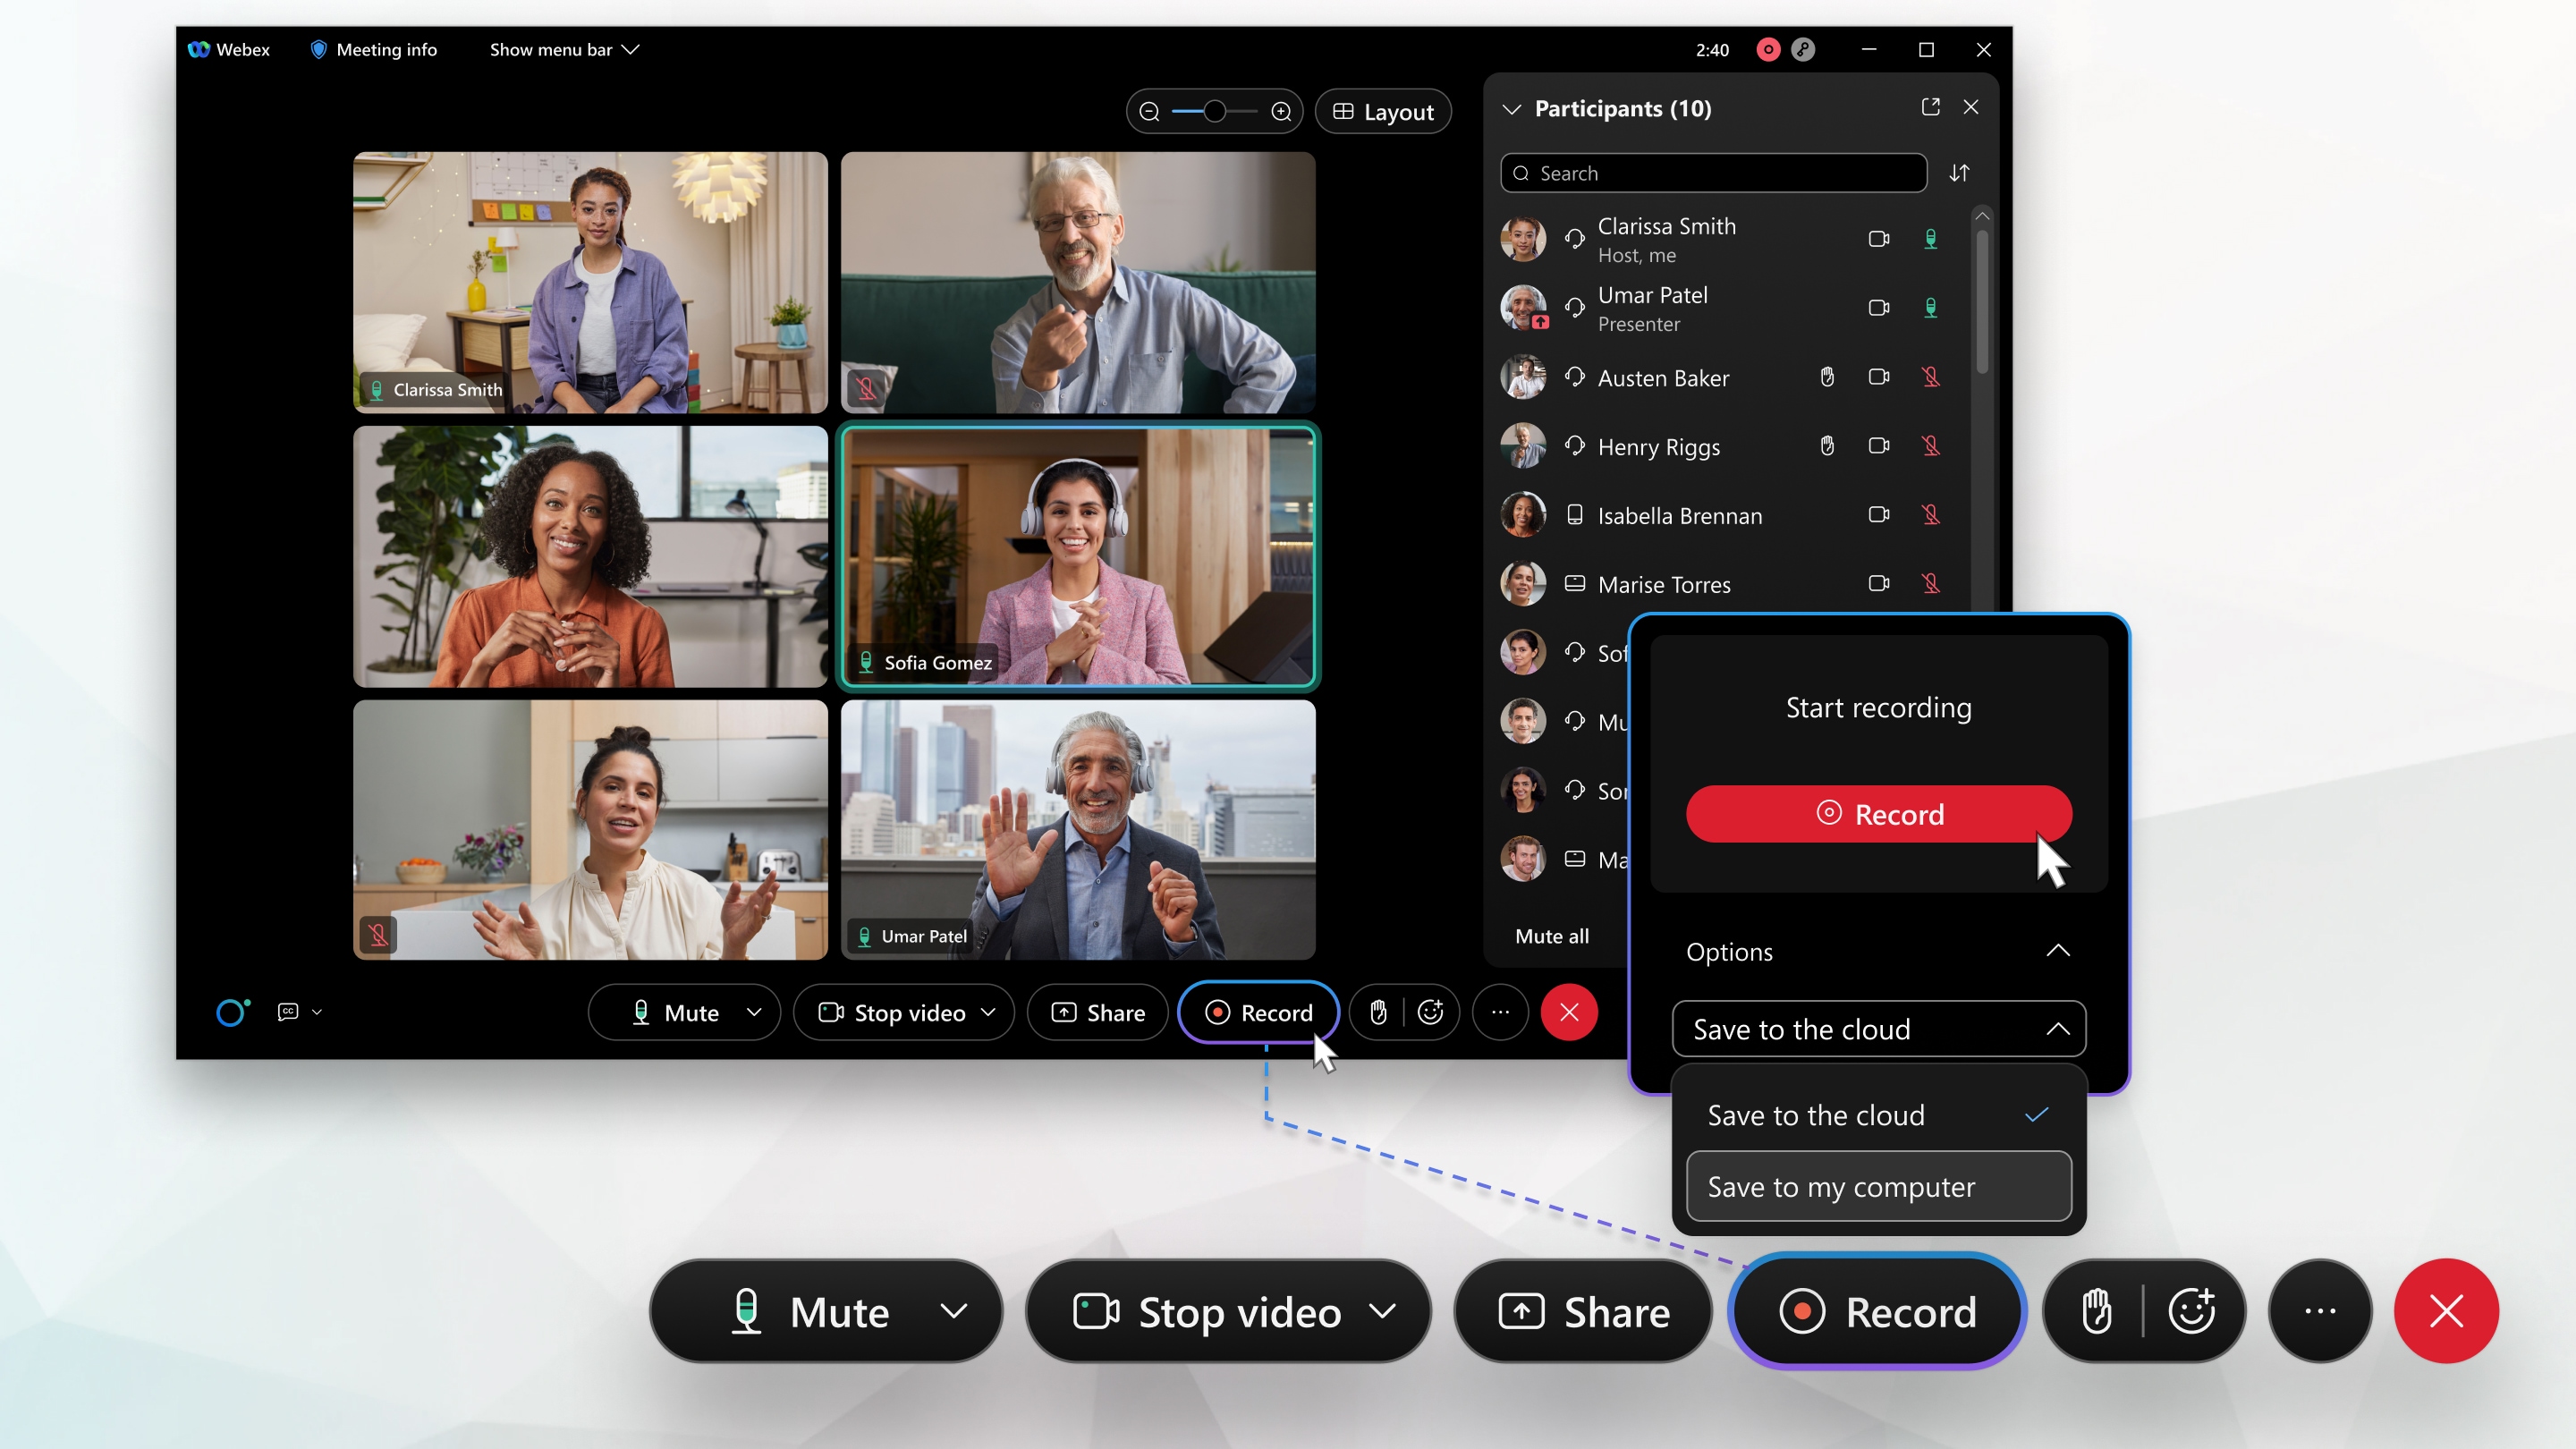
1. From the navigation bar, select the Record button outlined below.
2. Once you select the record button it will ask you to start the recording. Press Record.
3. Once the Record button is selected, an audio message is played saying, "This meeting is being recorded". In the upper right corner it states "Recording in progress" with a red record icon. The recording in progress words stay on only a few seconds, but the red record icon remains until recording is stopped.
Note - Participants that join late after recording has been enabled will have the audible message played as soon as they enter the meeting.

You may start and stop the recording during the meeting by going back to the navigation bar and clicking on the record button.
Note - If you choose to stop the recording and start it back up during the same meeting, two or more separate recording files will be created. If you only want one recording then use the Pause button.

When the meeting is completed you can access your recordings at UW-Madison Webex
Edit the Recording
Important Notes
- The Webex Recording Editor is not compatible with MP4 Files
1. Sign in to UW-Madison Webex using your primary email for UW Madison.
2. Select Recordings from the left navigation bar and your recordings will appear as a list from most recent starting at the top.

3. Download the recording file by clicking on the download icon.

4. To prevent users from downloading the recording themselves, select the edit or delete icon.
5. Checkmark the "Prevent Downloading" checkbox

Share the Recording
1. To share an internet link to your recorded session, click the share icon and add emails of who should receive the recording.

2. You can decide to turn off public access at any time so the recording is no longer available from the link by clicking the blue slider for Public Link.

Recover the Recording
Important Notes
- Recordings are automatically moved to the Trash Bin after 150 days
- Owners of the recordings have 30 days to restore any deleted recording before they are purged from the cloud
1. Navigate to UW-Madison Webex and sign in
2. Select Recordings | Change filter to Deleted | Select the Recover icon to your recording you want to restore

This is a Cisco product- for more information see https://help.webex.com