Using Globus to Move Data In and Out of Silo
In order to use our Globus server, you must have a UW NetID. If you don't have one, the SSCC Help Desk can help you make one--it's very easy.
Globus is accessed by going to app.globus.org. If you anticipate transferring one file at a time and the files are relatively small, you don’t need to install anything. But if you have large files or entire folders to move, we suggest installing the Globus Connect Personal client. It runs as a service and manages transfers initiated using the web app. It will continue transfers even if you close the web app completely, or resume transfers if they are interrupted. See Installing and Configuring the Globus Personal Connect Client for more details, but you need to log into the Globus web app at least once before setting up the client. Globus also has a Python API if you're interested in automating transfers.
If you need to transfer hundreds of files or more, please use zip, tar, or a similar utility to combine them into a single file and then transfer it. Globus is very slow if it has to transfer very large numbers of very small files.
If you want to upload data to or from your own computer you'll need to first connect to the UW-Madison network using VPN.
The first time you log into Globus you will be prompted to create a Globus account that is linked to your UW-Madison NetID. The instructions under Logging into Globus for the First Time will walk you through the process. This account is also linked to your SSCC account. Note that we needed to create a separate "collection" (more on collections in a moment) for SSCC members whose username does not match their NetID, but you'll still be able to use Globus normally.
Transferring Data To and From Silo Using Globus
Installing and Configuring the Globus Personal Connect Client
Logging into Globus for the First Time
Transferring Data
Globus organizes data into "collections," which can be both sources of data and places to put data. The SSCC has three collections that mirror the folder structure of the Silo file system. You can move data into or out of any folder you have access to. Globus will ask you to confirm your identity before you carry out certain tasks, or after enough time has passed.
If you install the Globus Connect Personal client, you can designate certain folders on your computer (including network drives) as a collection that only you can see. Then you can use that collection to transfer data from your computer to Silo. However, you can also use the web app to upload data from your computer without installing the client or setting up a collection. Keep in mind that transfers from your computer will be limited to the speed of the network you are using at the time.
If you need to get data from or move data to a location that does not use Globus, moving the data to your computer may be a useful intermediate step. However, do not download restricted data to your computer unless your computer has been approved to store such data. Contact the SSCC Help Desk and we'll work with the IT staff at the other location to identify an alternative method, such as transferring the data between their servers and Silo using Secure FTP. You will also need to contact the Help Desk before using a Globus collection that is not on the UW-Madison network.
Transferring Data To and From Silo Using Globus
To move data to and from Silo, log in to Globus and open the Silo collection that corresponds to the location your data is stored. Navigate to the right directory and either upload or download a file depending on whether you are importing or exporting data or open a second collection and transfer the data.
To transfer data into Silo, the first step is to locate the collections associated with Silo. In the Collection Search box, search for ‘Silo Transfer’. Three different options will appear:
- SSCC Silo Transfer Collection – corresponds to the V: Drive or /project in Silo. Use this if you're a non-SMPH SSCC researcher and your SSCC username matches your NetID.
- SMPH Silo Transfer Collection – corresponds to the S: Drive or /smph in Silo. Use this if you're an SMPH researcher.
- SSCC Silo Transfer Collection for Unmatched Usernames - corresponds to the V: Drive or /project in Silo. Use this if your SSCC username does not match your NetID.
Choose the appropriate collection, open the project folder, and then navigate to the folder you want to put your data in.
If you are uploading files from your own computer without using a collection, next choose Upload and then Select Files to Upload. You'll see the upload begin immediately.
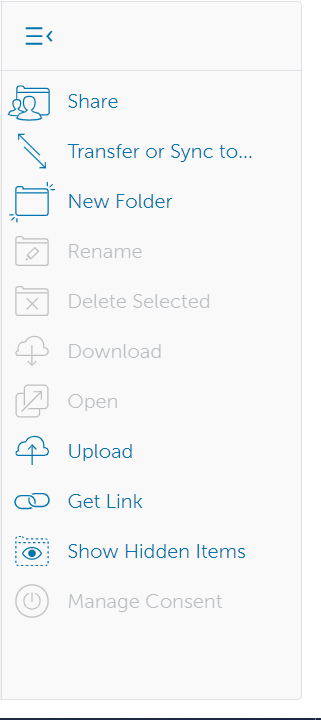
If you are transferring files from a collection, either on your computer or elsewhere, use the second Collection Search box to find it and then identify the file or folder you wish to transfer. Select Transfer or Sync to... and then the Start button that's pointing in the appropriate direction. Because the transfer will be managed by the Global Connect Personal client you won't see it happening, but you can check on its progress by clicking Activity. Globus will send you an email when the transfer is complete.
Installing and Configuring the Globus Personal Connect Client
The Globus Connect Personal client makes it easier to move large amounts of data through Globus. If you are using a managed computer, talk to your local IT department before installing any new software. You also need to log into the Globus web app at least once first.
Download Global Connect Personal (all operating systems)
Full Documentation for Windows
Most of the installation process is straightforward (see the full documentation for details) but we will highlight two items.
The Collection Details page will ask you to name your personal collection. Choose something that is likely to be unique so it will be easy to find in a search. Including your username in the collection name will probably work well. Make sure the "High Assurance" box is unchecked.

Adding New Folders Your Collection Can Access for Windows
- Right-click the Globus Connect Personal icon in the taskbar and select Options.

- The "Access" tab lists folders that will be accessible via Globus for file transfers. By default, the only folder listed is your home directory. Add folders by clicking the "+" icon and selecting the folder you wish to make accessible. To remove a folder click on the desired folder in the list then click the "-" icon to remove it from the list.

Adding New Folders Your Collection Can Access for macOS
- Click the Globus Connect Personal icon in the main menu bar.

- After you click on the Globus icon a menu will appear and you should select Preferences.

- The "Access" preferences tab lists accessible directories for file transfers. By default, your home directory (e.g.: /Users/demodoc) is listed.

- Click the " " icon and select a folder to make it accessible for transfers. If you remove everything from the access list, no files will be accessible on your Globus Connect Personal endpoint and you will be prompted to add accessible paths. You can either click " " and add directories and files or click Reset to Defaults.

Logging into Globus for the First Time
- In a browser, go to app.globus.org
- On the Globus home page, under the Use your existing organizational login header, select the University of Wisconsin - Madison and hit the Continue button.

- You will be redirected to the University of Wisconsin – Madison login page. You will need to use your NetID and password to log in.
- The first time you log in you will need to link your Globus account with your NetID and take a few other steps. If you already have a Globus account not linked to UW-Madison, you can link it to your UW-Madison account at this time. Otherwise, click Continue.
.png)
- You'll then be asked to confirm some information about your account and to state its purpose. In the Account will be used for section, choose the non-profit research or educational purposes option. You will also have to click the checkbox that acknowledges you have read and agree to the Globus terms of service and privacy policy. Then click Continue.
.PNG)
- You will then be brought to a page where you can set permissions for Globus. Click on the Allow button.
.png)
At this point, your account is ready for use and you will be brought to the Globus dashboard. You can verify that your identity has been successfully linked by clicking on the Account button in the sidebar on the left-hand side of the screen. On the account page, on the right-hand side of the screen, there is an option to Manage Identities and Link Another Identity. Click on the Manage Identities button to see what your primary identity is.
.PNG)