Webex - How to Schedule Webex Webinars
As a host, you can schedule webinars. Webinars are interactive and highly engaging; if your event calls for a simpler attendee experience, webinars in webcast view are the way to go. You can get these scheduled quickly with the basics, or take a little bit more time to customize them using advanced options to tailor webinars to your needs.
After you schedule a webinar, you get a confirmation email, as well as an email to forward to attendees.
Instructions to Schedule a Webex Webinar
| 1 |
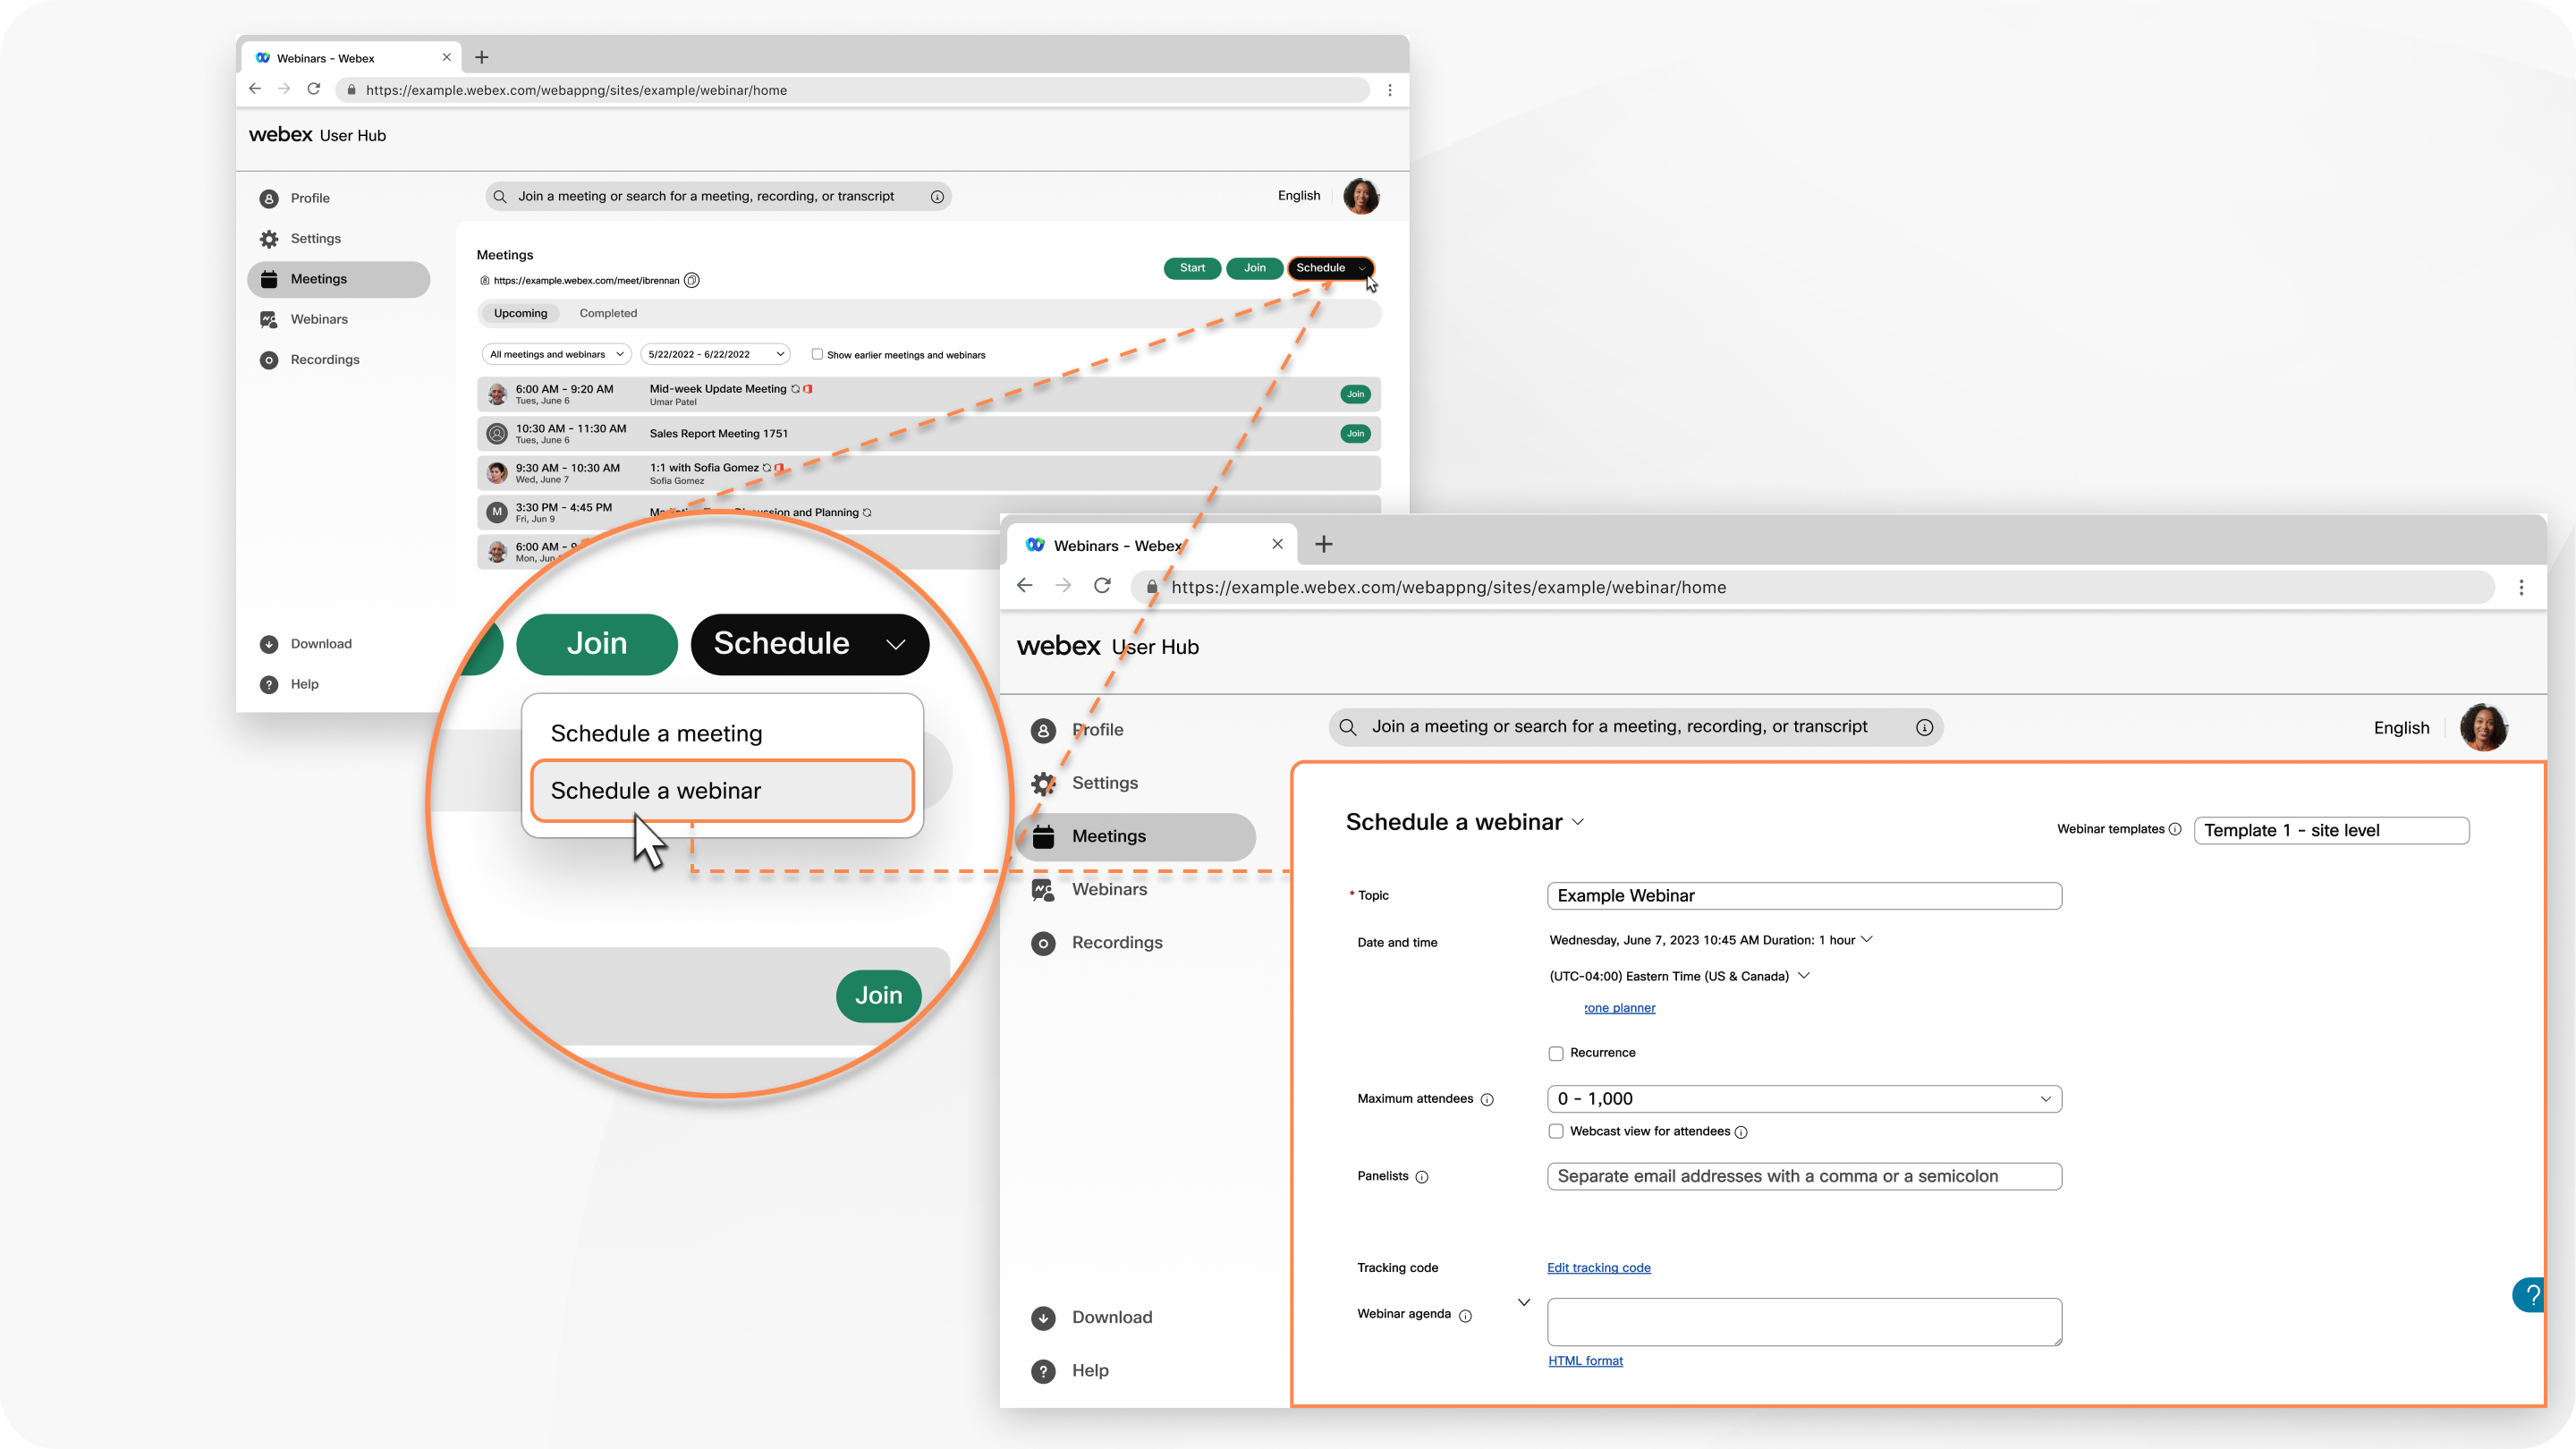
Sign in to your Webex site, then select Schedule a webinar.
|
| 2 |
(Optional) If you have any saved webinar templates, select one from the Webinar templates drop-down menu.
|
| 3 |
Add the basics by providing the following information:
- Topic—Choose a topic that people will recognize and get excited about.
- Date and time—Indicate when the webinar will be taking place. If you're inviting people from different time zones, click the Time zone planner so you can find a time that works best for everyone.
- Maximum attendees—Choose the maximum number of attendees and whether you want a webinar in webcast view. See Compare experiences in Webex Webinars for more information.
- Panelists—Enter the email addresses of the people you’re inviting to help you run your webinar. You can have up to 500 panelists in your webinar. If they have an account on this site, you can select
 next to their name if you want them to be a cohost. next to their name if you want them to be a cohost.
- Webinar agenda—Add any context or details that you want your attendees to have about the upcoming webinar.
|
| 4 |
In the Security section, add the following information:
|
| 5 |
In the Audio & Video section, add the following information:
- Audio connection type
- Webex Audio—Choose to support call-in, call-back, and computer audio options. You can then also include toll-free and global call-in numbers and set entry and exit tones to hear when someone joins or leaves the webinar.

|
When using Webex Audio with the Announce Name feature, panelists who select the Use computer for audio option can't record and announce their names
|
- Use VoIP only—Limits all panelists to using computer audio.
- Other teleconference service—Allows you to enter third-party teleconference information.
- None—No audio.
- Mute panelist
|
| 6 |
Click Advanced options to add a practice session, enable breakout sessions, turn on simultaneous interpretation, require registration, send email reminders, and more.
|
| 7 |
Click Save as template to save these options as a template for future use.
|
| 8 |
Click Schedule to schedule your webinar.
|
When you schedule a webinar, email reminders are automatically sent to attendees using the default template. If you prefer to customize your email template and send reminders later, uncheck the check box next to Automatically send email invitations to all participants after clicking Schedule, then follow the instructions in Customize email templates in Webex Webinars.
|
|
| 9 |
Once the webinar is scheduled, you can click  to download an .ics file, or add the webinar to your Google or Microsoft Office 365 Calendar. to download an .ics file, or add the webinar to your Google or Microsoft Office 365 Calendar.
|
| 10 |
You'll receive an email to forward to attendees to invite them to the webinar.
|
