
Paint.NET - Capturing and Editing Screenshots
This document explains how to capture and edit screenshots in Paint.NET.
Capturing and Editing Screenshots in Microsoft Paint.NET
- Open the program you want to screenshot.
- Make sure that program is the active window by clicking in it and pressing Alt + Print Screen.
- Open Paint.NET.
- Click File.
- From the drop-down menu, select New.
- The dimensions will automatically match the screenshot. Click OK.

- Press Ctrl + V, or click Edit before selecting Paste.
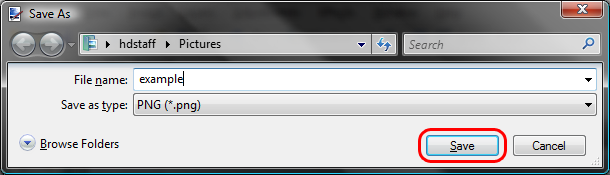
- Click File, and select Save As... from the drop-down menu.
- In the text box, enter a File name. Before saving, make sure that the location (located in the address bar) and file type (indicated beside the "Save as type" drop-down) are correct.
- Use PNG (will save with a .png file extension) for graphics and screenshots of programs.
- Use JPEG (will save with a .jpg, .jpeg, .jpe, or .jfif file extension) for photos.
- Then click Save.
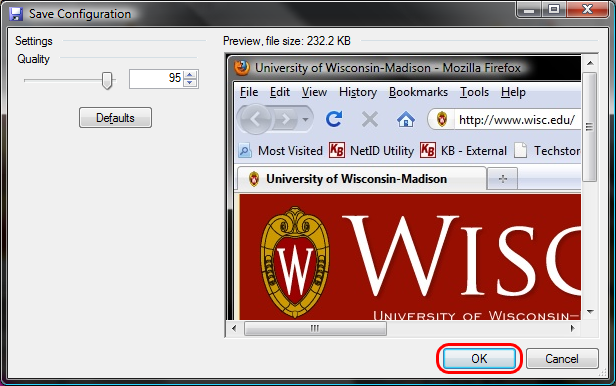
- Select the appropriate options. The defaults are fine unless you have a specific reason not to use them.
- PNG: Choosing a lower Big Depth than the default Auto-detect will result in a smaller file size. A higher Dithering level results in better image quality but a larger file size.

- JPG/JPEG: Choosing a larger value for Quality than the default 95 will result in better image quality at a larger file size.
- PNG: Choosing a lower Big Depth than the default Auto-detect will result in a smaller file size. A higher Dithering level results in better image quality but a larger file size.
- Click OK.