Topics Map > Building/Facilities & IT > VPN Information
Remote Access Self-Install Instructions
SoHE VPN w/ the Palo Alto Global Protect Client
First, you will need to make sure you have our new VPN, GlobalProtect, installed. it can be downloaded from the web from DoIT, Click on this link using any web browser to download the VPN. That will take you to a UW login page. The new VPN system uses your NetID login as credentials, so use that to login.
Once you log in you will get a choice of
- Download Windows 32 bit GlobalProtect agent
- Download Windows 64 bit GlobalProtect agent
- Download Mac 32/64 bit GlobalProtect agent
Download the Mac one for a Mac, On a PC you should use the 64-bit version.
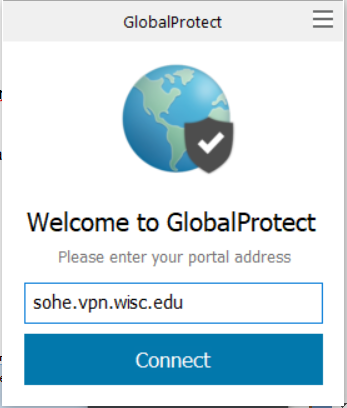
Go to your downloads folder and run the GlobalProtect agent that you have downloaded. See https://kb.wisc.edu/helpdesk/page.php?id=73117 for step by step instructions, but you will need to enter sohe.vpn.wisc.edu rather then uwmadison.vpn.wisc.edu as the Portal.
Then, enter your NetID login to connect to the VPN. If this is your first time using the VPN and you cannot connect, email BITS at bits@sohe.wisc.edu and we can get you added to the VPN group.
Once you have connected and installed the client the first time through the website, you can launch the VPN from your local computer. Search for "GlobalProtect" in your Windows/Mac search to pull up the application. You can also open the VPN from the bottom right icon bar in Windows, and the top right task bar in macOS.
After connecting via the VPN, you will be able to map the S: and U: drives if you are on a non-domain laptop and print to SoHE printers.
macOS Security Settings


macOS Drive Mapping
Open Finder and go to the “Go” menu. Click “Connect to Server” and type “smb://files.ad.sohe.wisc.edu/sohe2” This will connect you to the server where it will ask for your username and password. Use your NetID login credentials in the form “AD\NetID” and password. You can access your user folder in the “Users” folder or map another folder at “smb://files.ad.sohe.wisc.edu/sohe2/users/”.


Windows Drive Mapping
The steps to open the page to map a network drive are different for Windows10 and 11. However the information you enter is the same
Windows 10

Windows 11
Navigate to 'This PC' using the Windows search function, or File Explorer. The icon for 'Map Network Drive' has been removed so you will need to click on the '...' icon, which then presents 'Map Network Drive' as an option. You can also right-click on 'This PC' to bring up the option to map a drive as well.
Windows 10 and 11
Choose an available drive letter and in the folder box, type “\\files.ad.sohe.wisc.edu\sohe2” and check the boxes for “Reconnect at logon” and “Use different credentials.” Click Finish and enter in your NetID login as '"AD\NetID" and then the password. To access your user folder, either click on the “Users” folder in the S: or map “\\files.ad.sohe.wisc.edu\sohe2\users\<Your username>” to another drive letter. See the following link for more instructions (as well as Windows 7): https://support.microsoft.com/en-us/help/4026635/windows-map-a-network-drive


