Webex App - Getting Started using the Webex App
Download
- Webex Download Page
- Choose the appropriate download for your Operating System
- Software Library
- Login
- Navigate to Productivity
- Select Cisco Webex, Productivity Tools, plus Jabber and E911 Softphone Locator
- Choose Cisco Webex for your appropriate Operating System to begin downloading
Login Process
- Enter your primary UW-Madison email address (Office 365 - What is a primary address?)
- This will log you into the Webex App to access Meetings and Messaging.
- Navigate to the Calling Tab in this document for accessing the phone service to utilize your UW-Madison Campus phone number
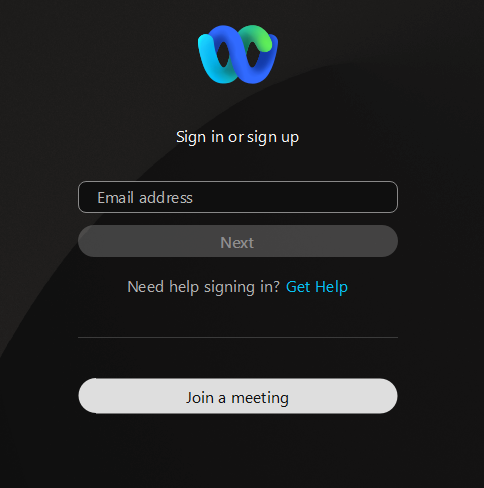
- Proceed through Single Sign On when prompted for your NetID and password
- NOTE: If you receive a Single Sign On error, double check that you are using your primary address (Office 365 - What is a primary address?). If you are using the correct address, please clear your web browser's cache and cookies, and attempt to sign in again (Clearing Browser Cache and Cookies).
- You should also be prompted for your multi-factor authentication. If you are, complete the request.
UW-Madison Primary Email Address
Webex accounts are created based on an enduser's Primary email address. The account owner can view their Primary email address at the Wisc Account Administration site as described in Office 365 - Change your Primary Address
Welcome to Webex
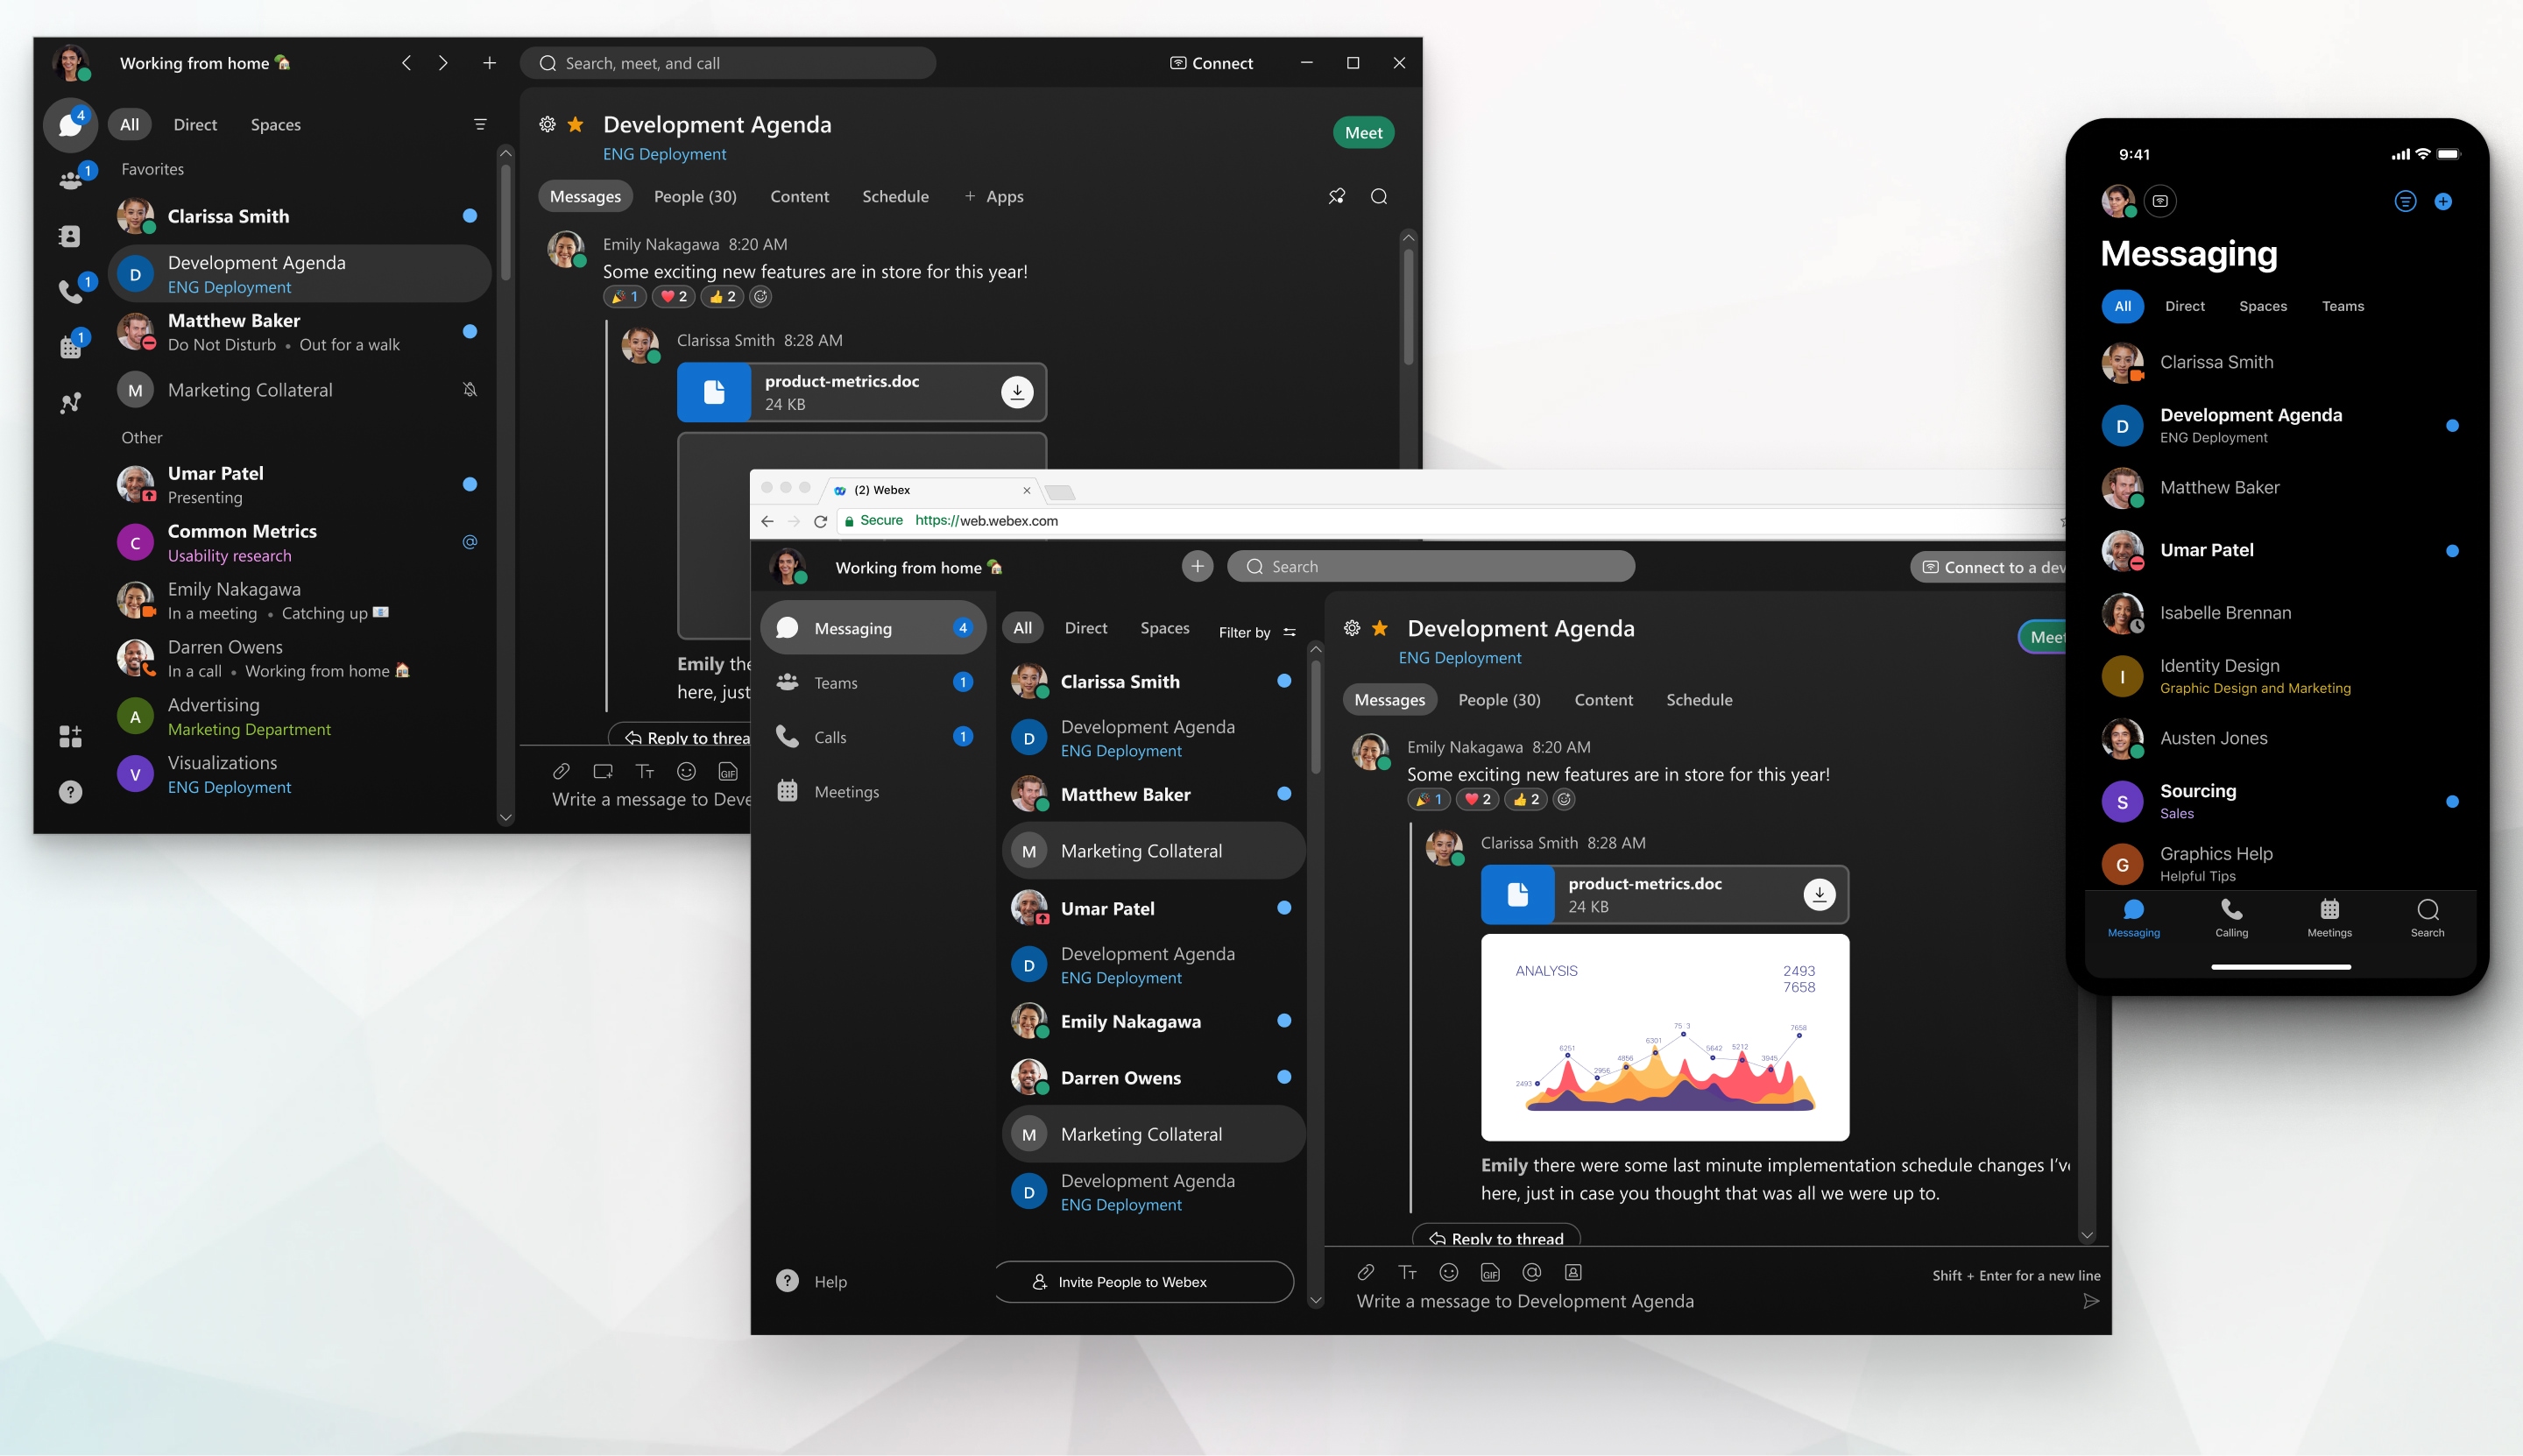
The all new Webex is one easy-to-use and secure app you can use to call, message, meet, and get work done:
-
It brings everyone together to do exceptional work.
-
It makes you smarter; it’s personalized to you.
-
It gives you options to choose how you work.
-
It moves fluidly while you call, message, and meet.
|
Our tips here focus on how to do things with the desktop app, but details about how to do these same things on web and mobile are included in the links. You can do some things the same way no matter which app you use, but for others you need to use the desktop app. |
|---|
Start working together
When you start a conversation with someone, it creates a space between you and the people you invite to the conversation. You can invite anyone (including people outside your organization) to join in on a conversation. All you need is their email address.
All your work takes place within spaces and teams. Spaces give you a place to collaborate on a specific topic or project. In a space, you can send messages, schedule meetings, and call other people.
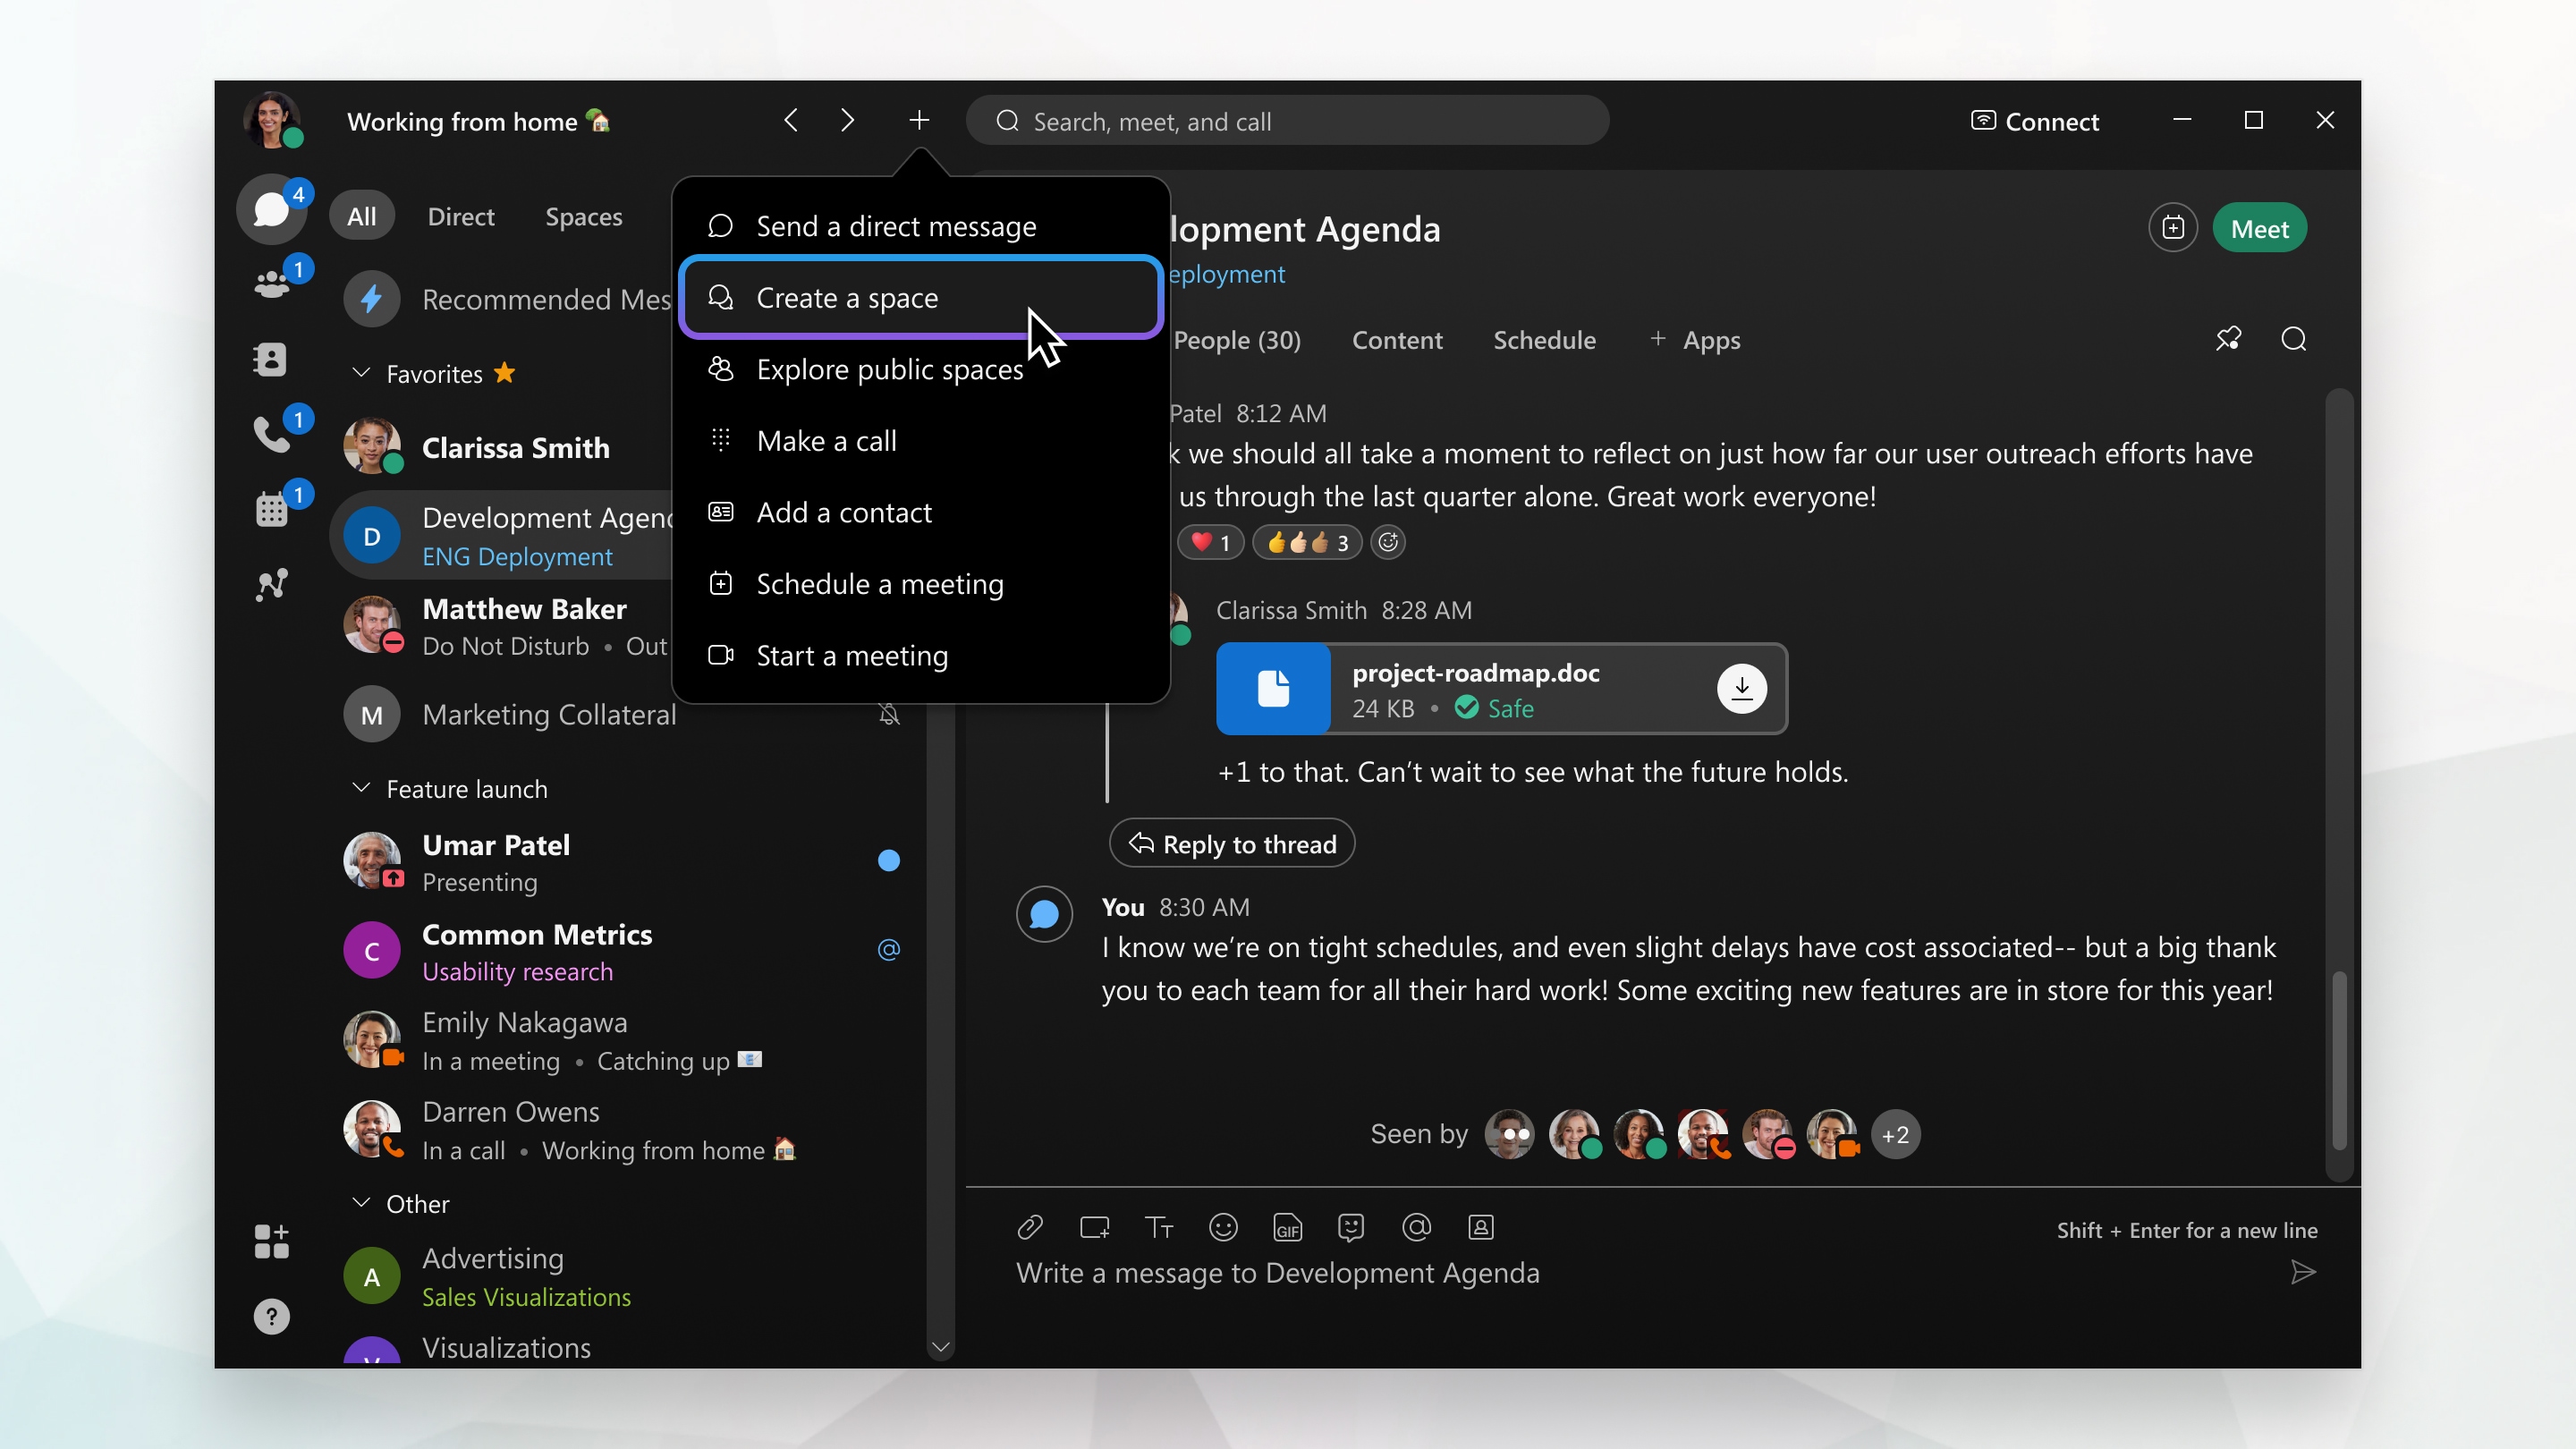
If your original intention changes and your project outgrows its original purpose, you can create a team and then move a space into a team. Teams help you keep everything organized by putting multiple spaces under a common theme. Teams are great for a consistent group of people who are going to be working on something for a long time. That something can involve many activities or can be subprojects happening at the same time.
And you find that you're in too many spaces and some of them don't require your input or you don't need to keep up with that particular conversation, you can leave any space at any time.
Elevate important information
Right away, you're notified about all messages coming your way. Work smarter by keeping track of what's important to you. You can play around with your notifications until you figure out what works best for you. For example, you can set it up so that you're only notified when you're @mentioned in any space or when any message gets posted in your most important spaces. And if you're not interested in a particular space, you can leave it or hide it so that you're no longer notified about messages posted to that space and it doesn't show up in your Spaces list.
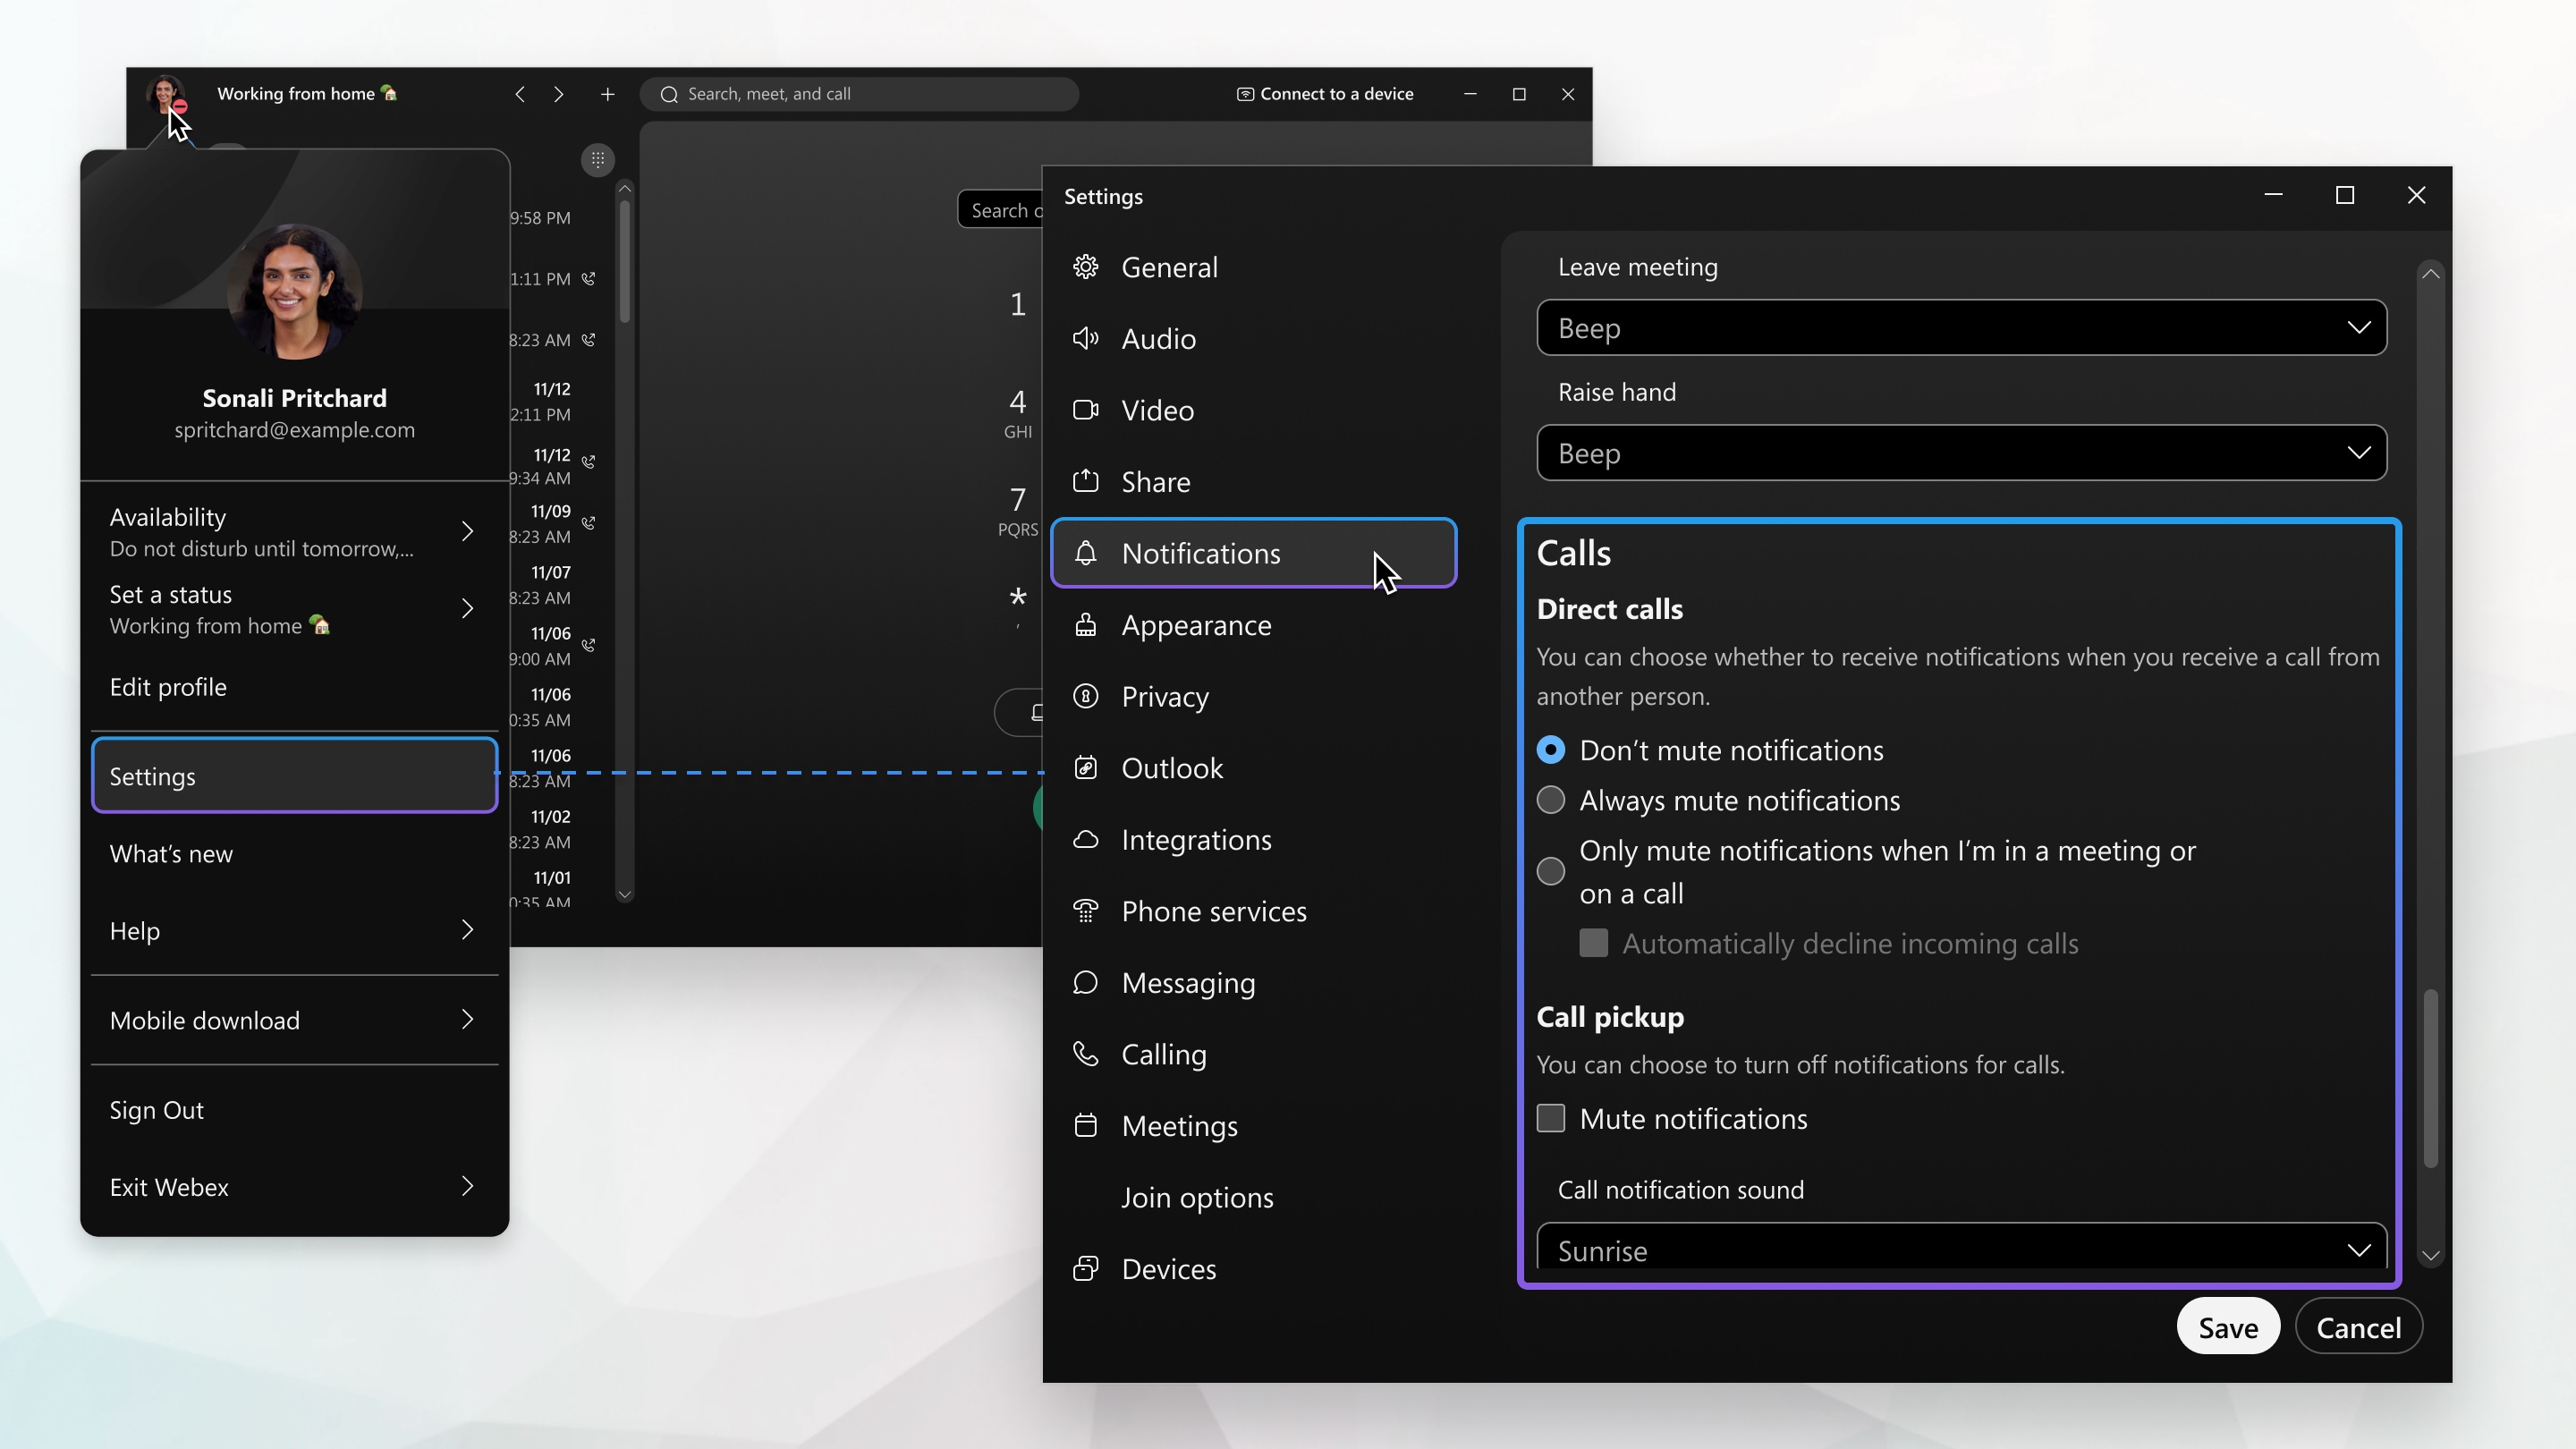
You can also see other people's availability so that you can find the right time to connect with them. For example, if you see a green circle around someone's profile picture, it means they've been using the app within the last 10 minutes so chances are, you'll get a response if you reach out.

On the other hand, if you see someone doesn't want to be disturbed, you might want to wait before reaching out.

Personalize Webex
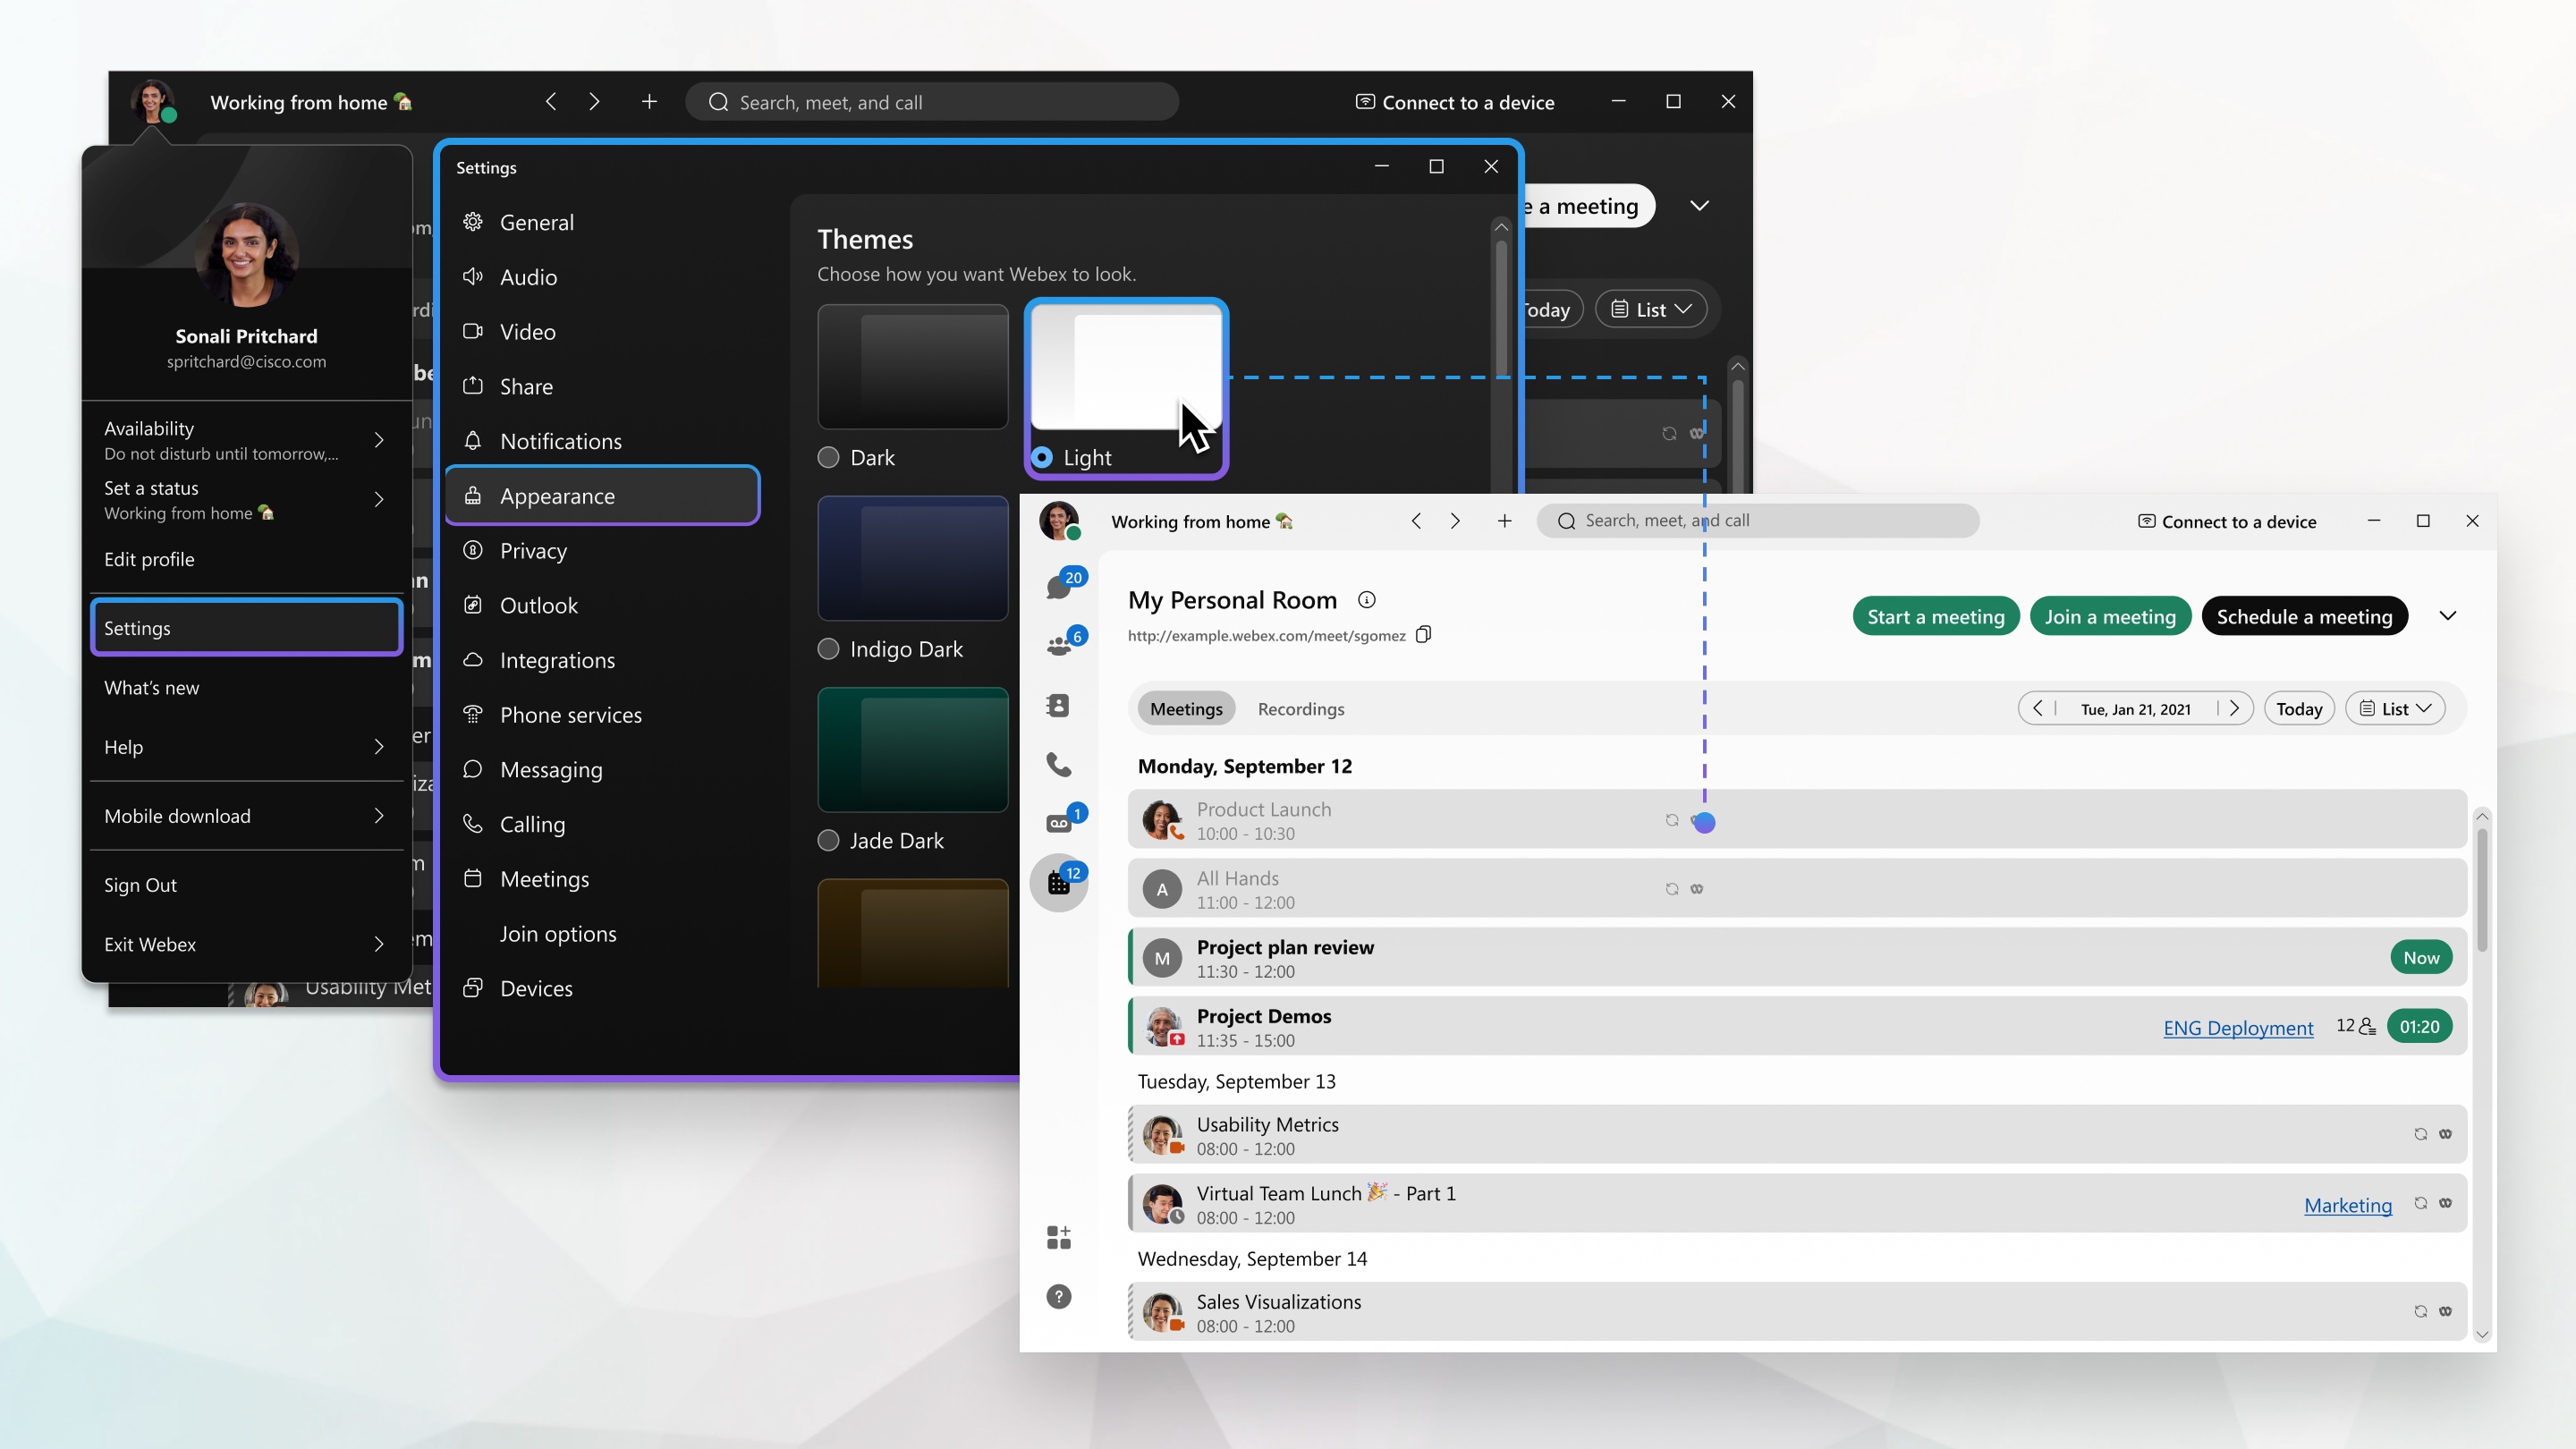
Make Webex feel more like your own by personalizing it a bit. Start by adding your own photo as your profile picture so that other people can recognize you.
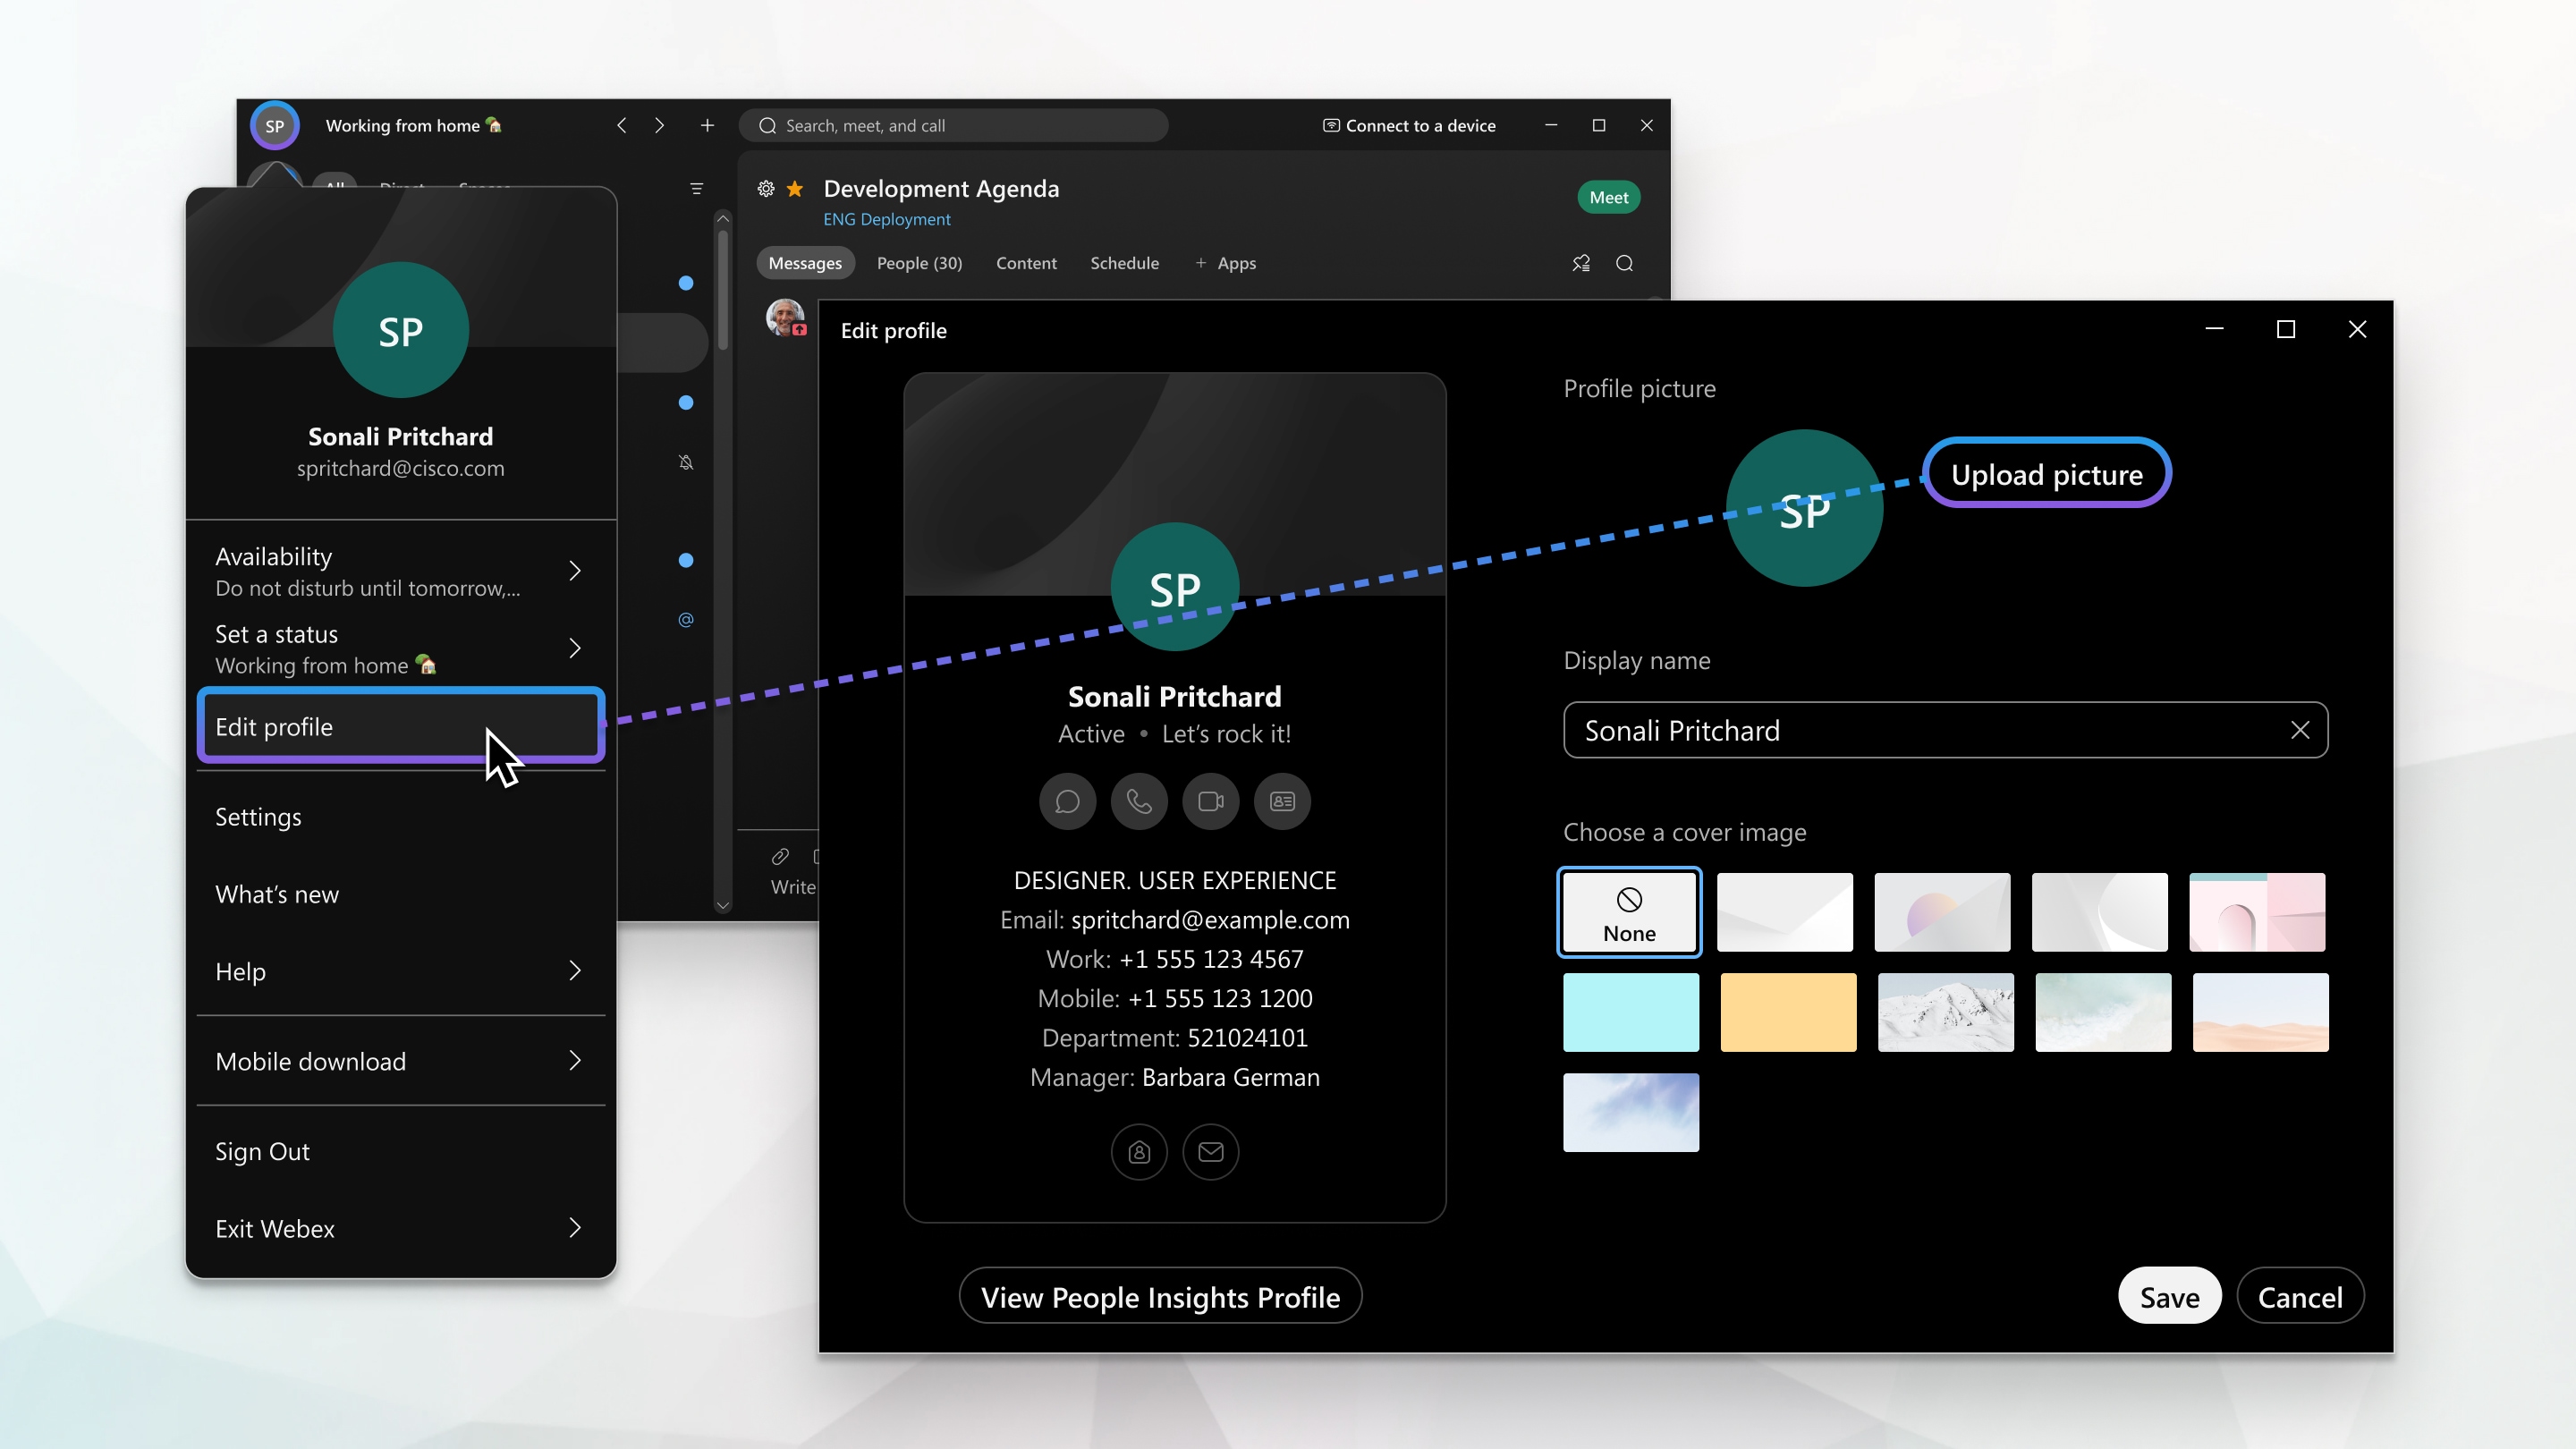
Add more color to your view by choosing your preferred color theme.
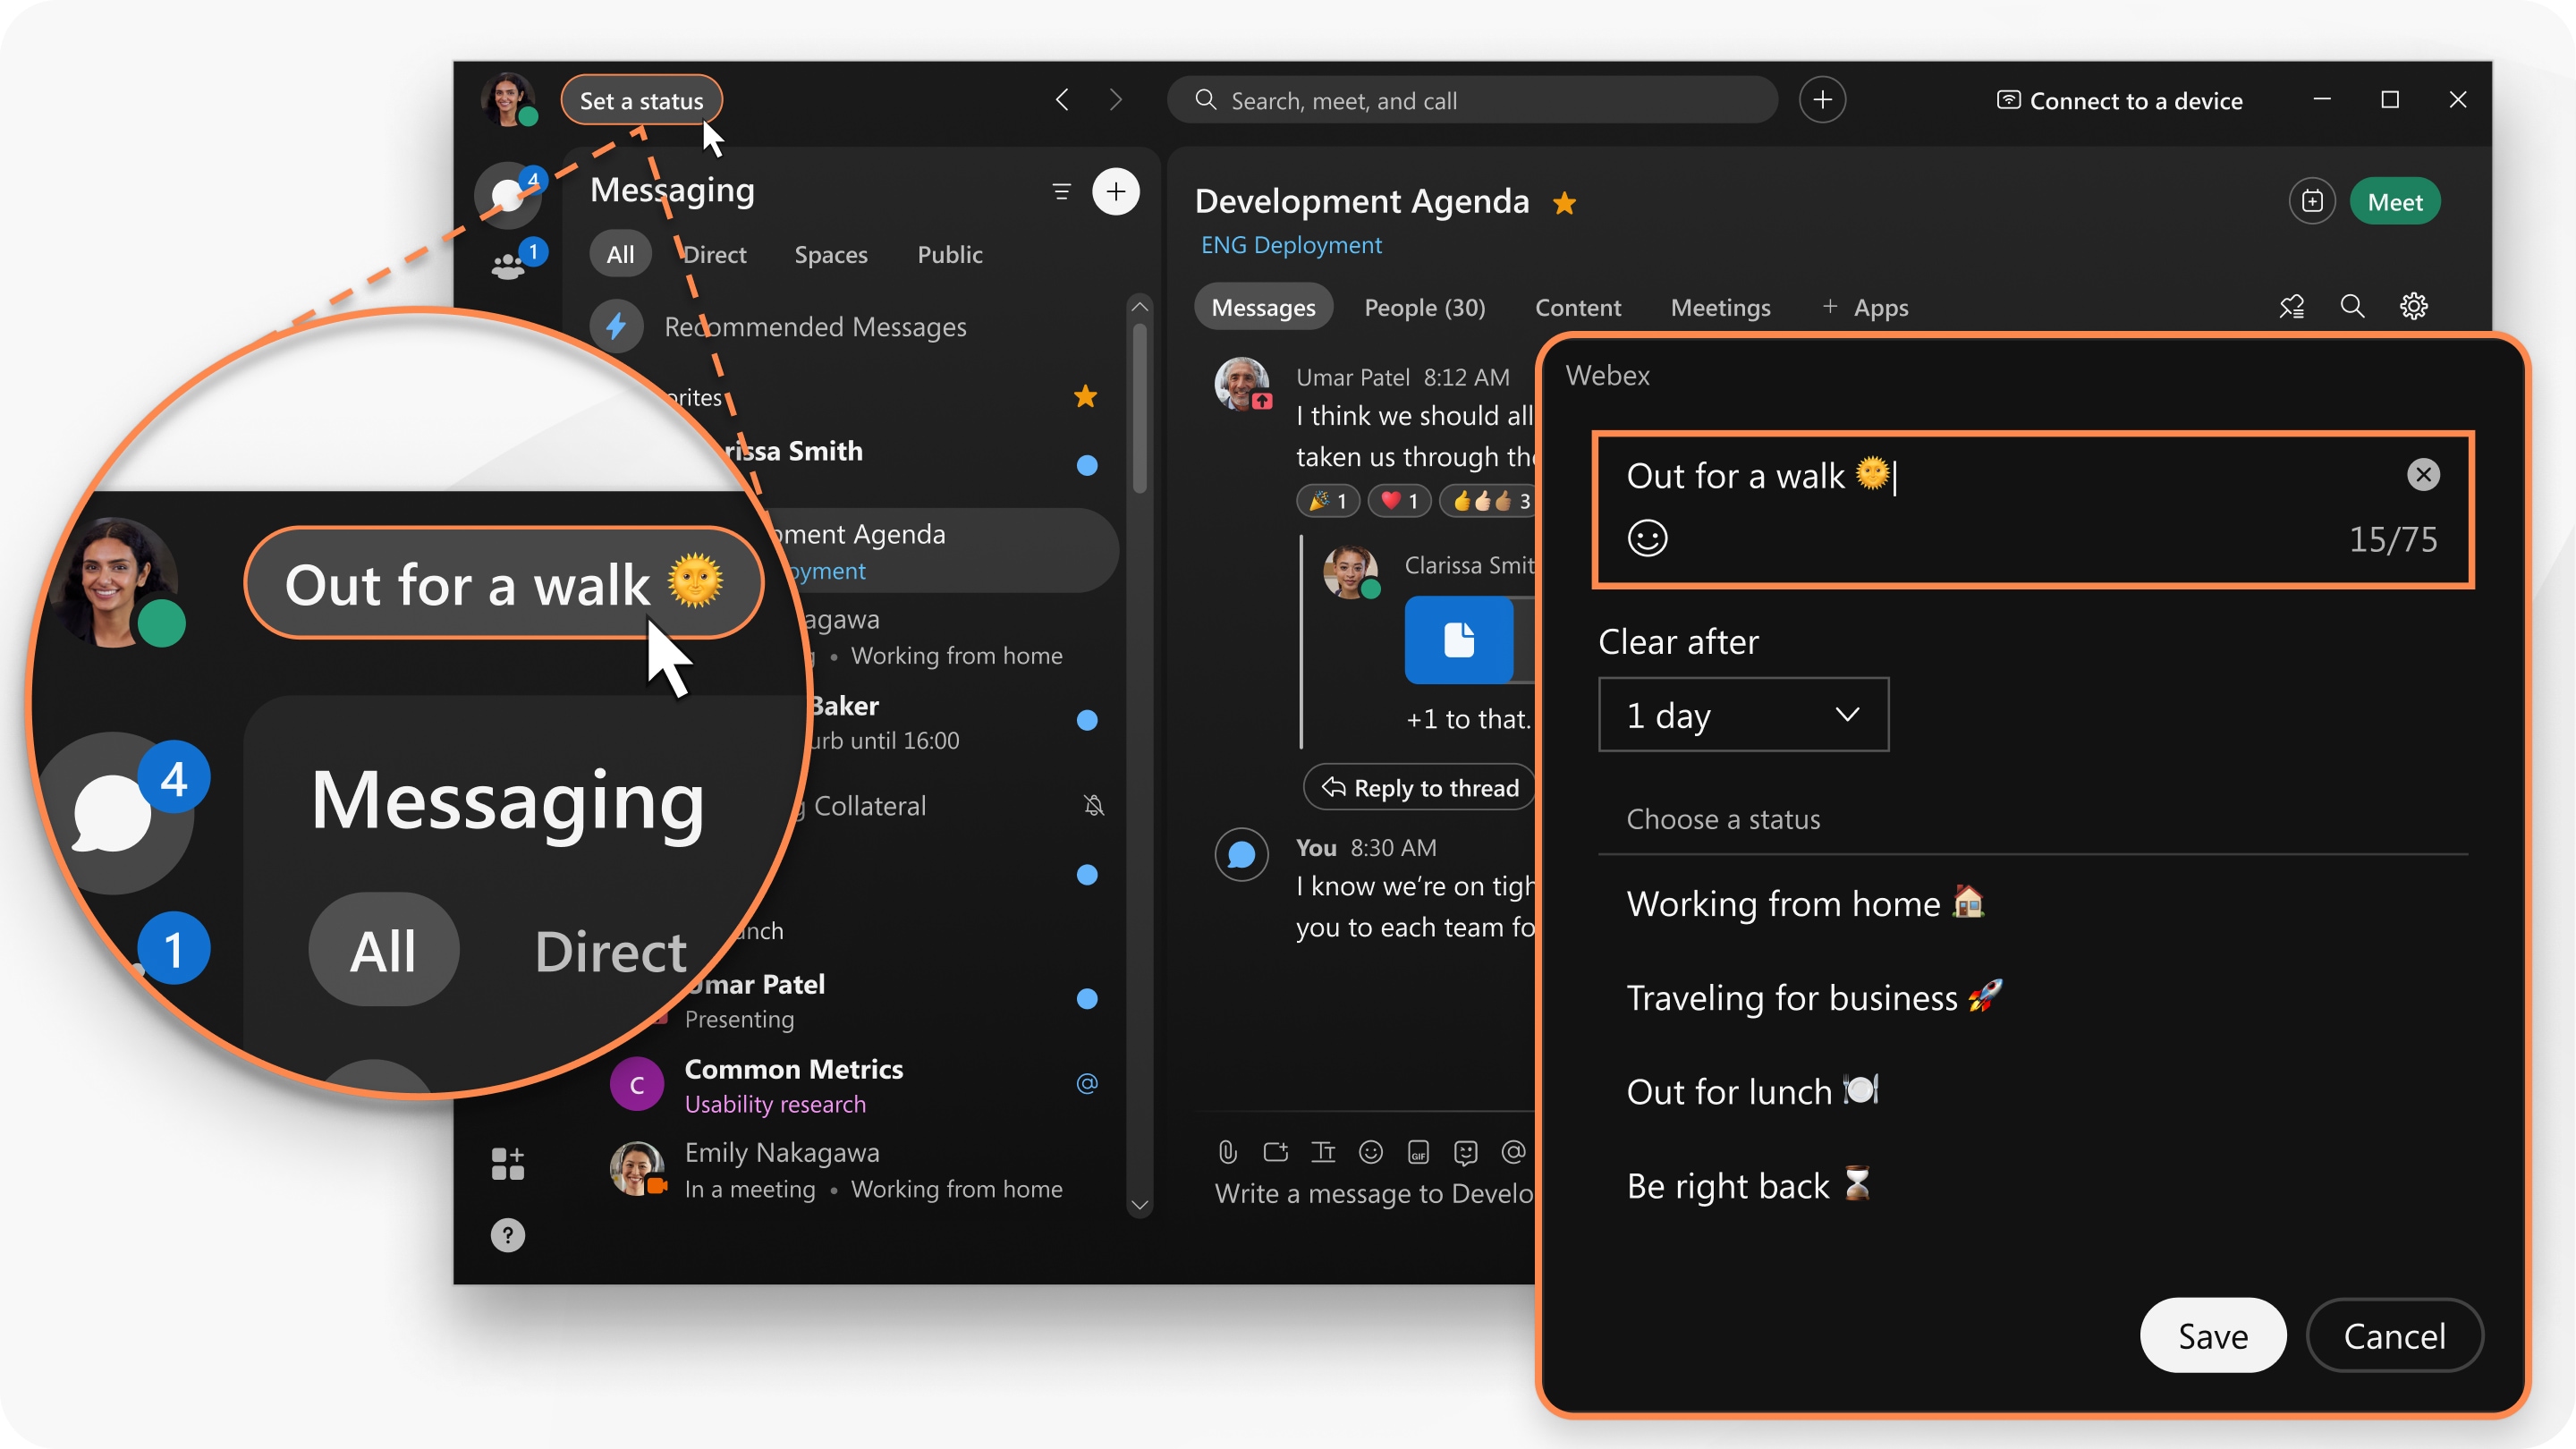
You can change your status to be something more descriptive. If you have to step out for a bit or you're busy, you can let people know just by changing your status in the app. For example, you can set it to Be right back or let people know you don't want to be disturbed. You can also make up a custom status so people know what you're up to.
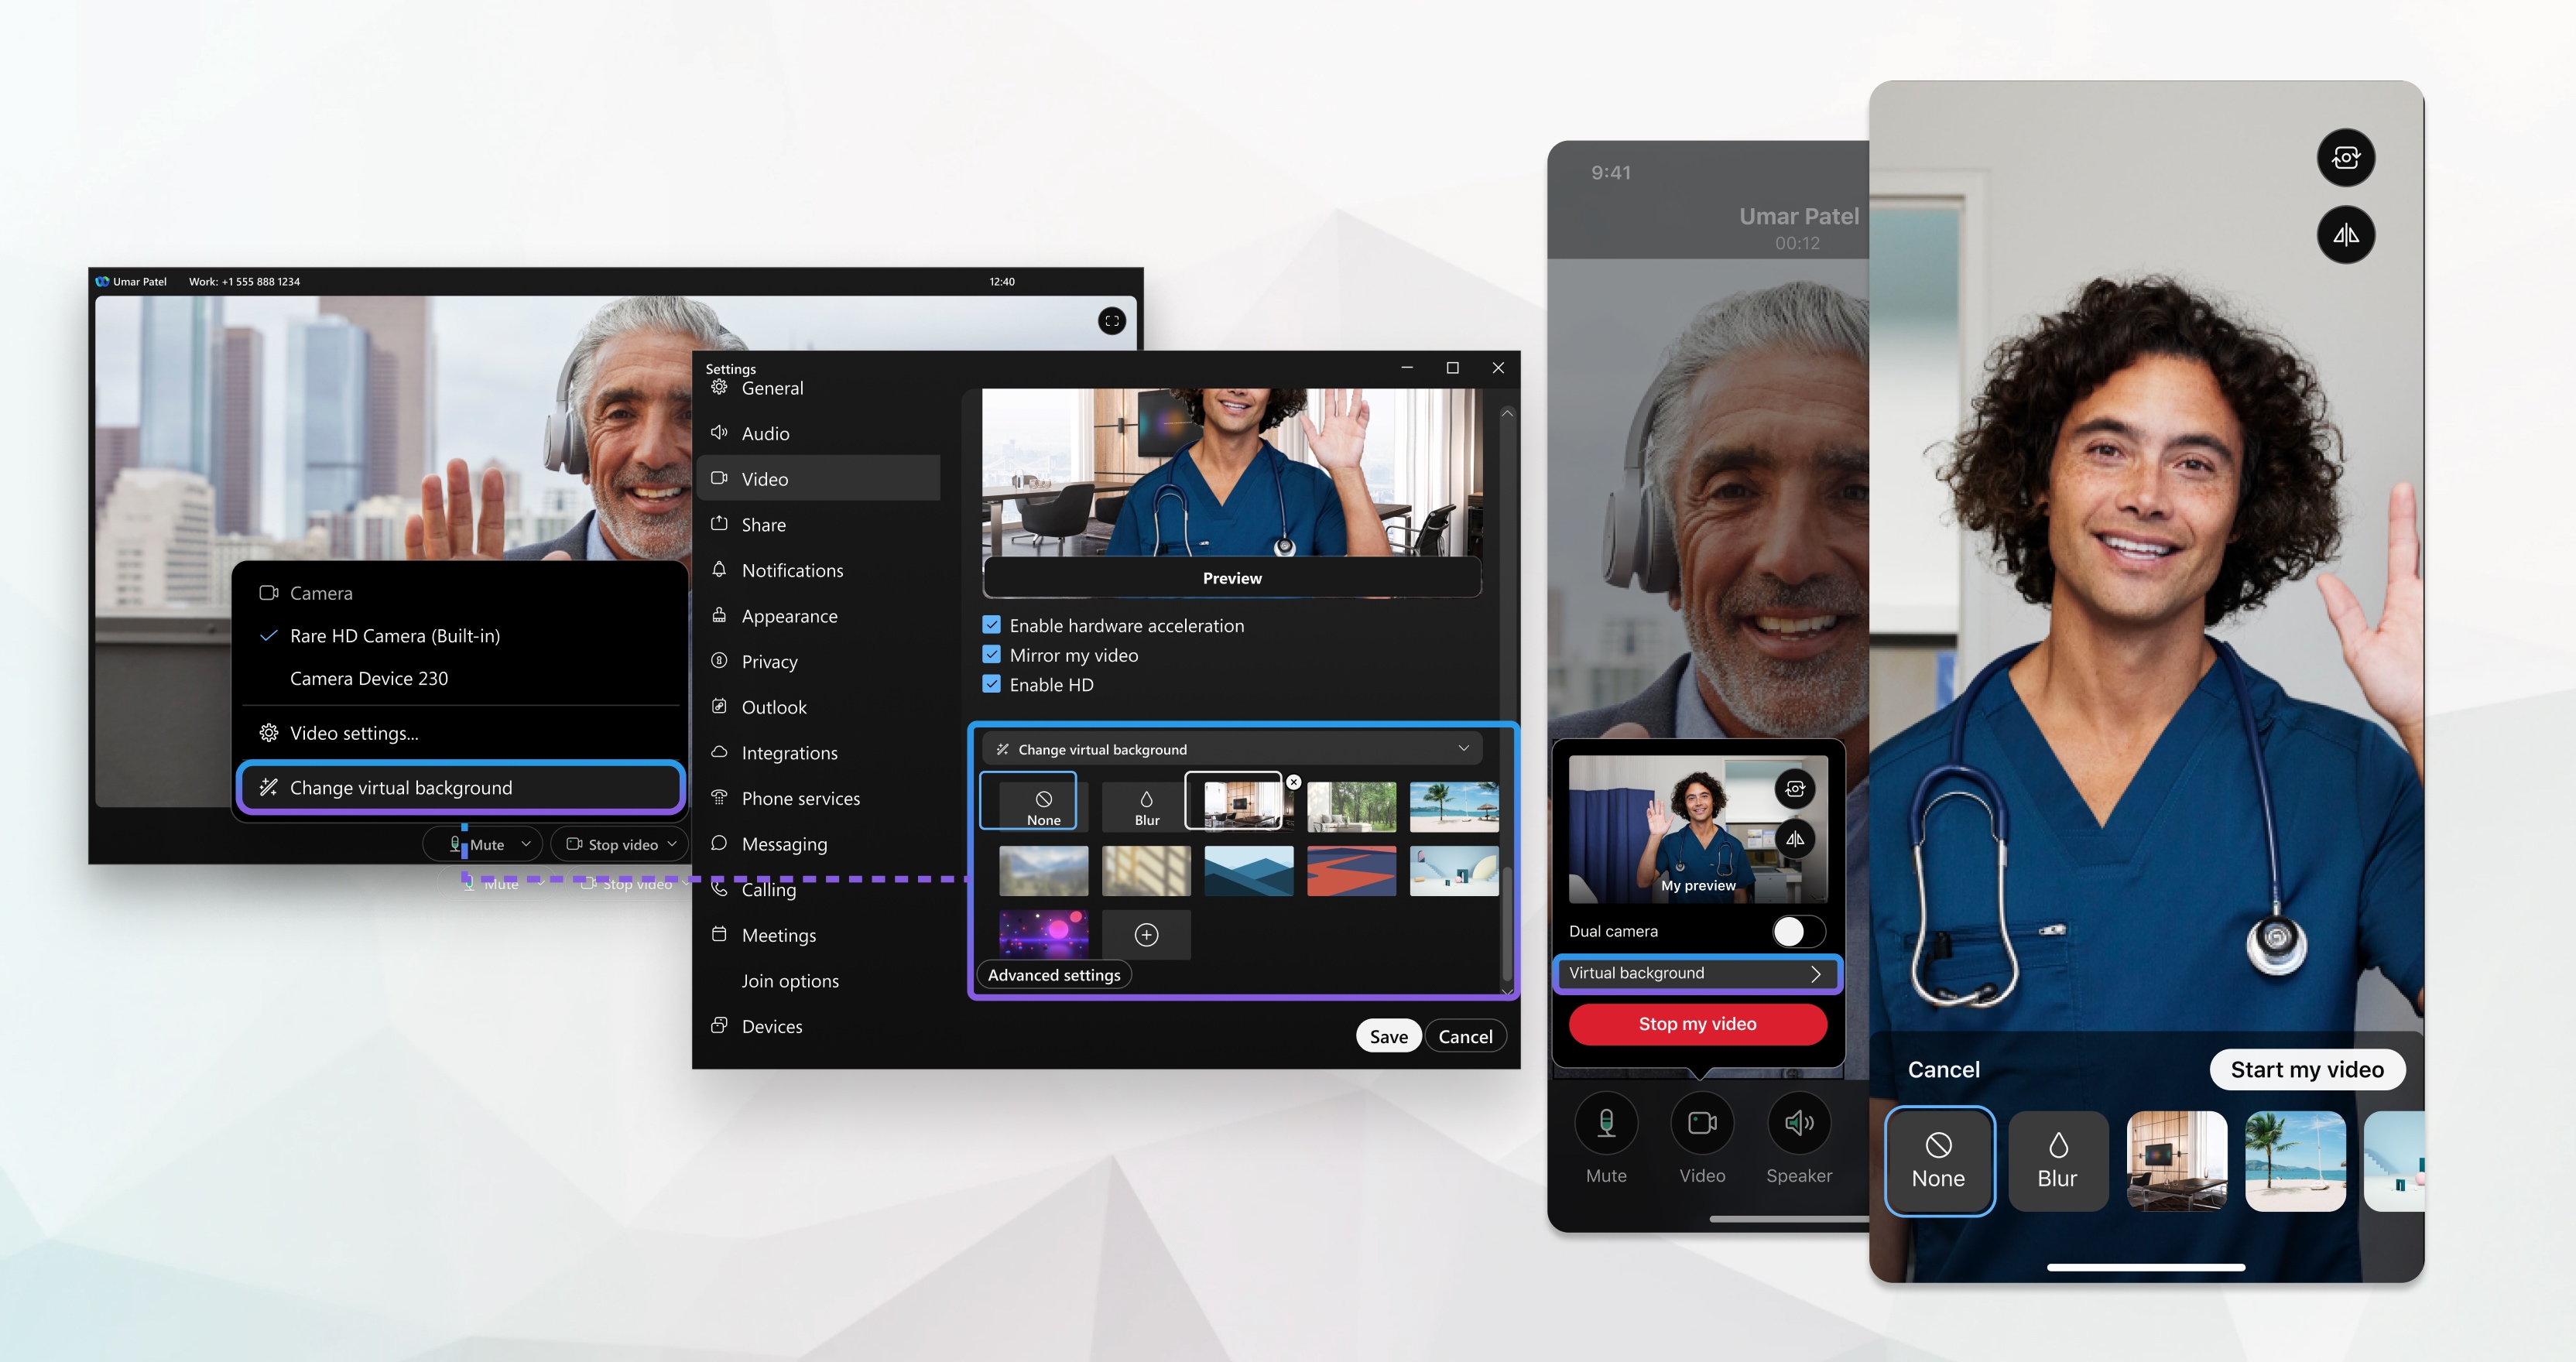
If you're in a call or meeting and you're sharing your video, you can blur your background to hide anything around you or even use a fun virtual background.
Messaging
Send a message
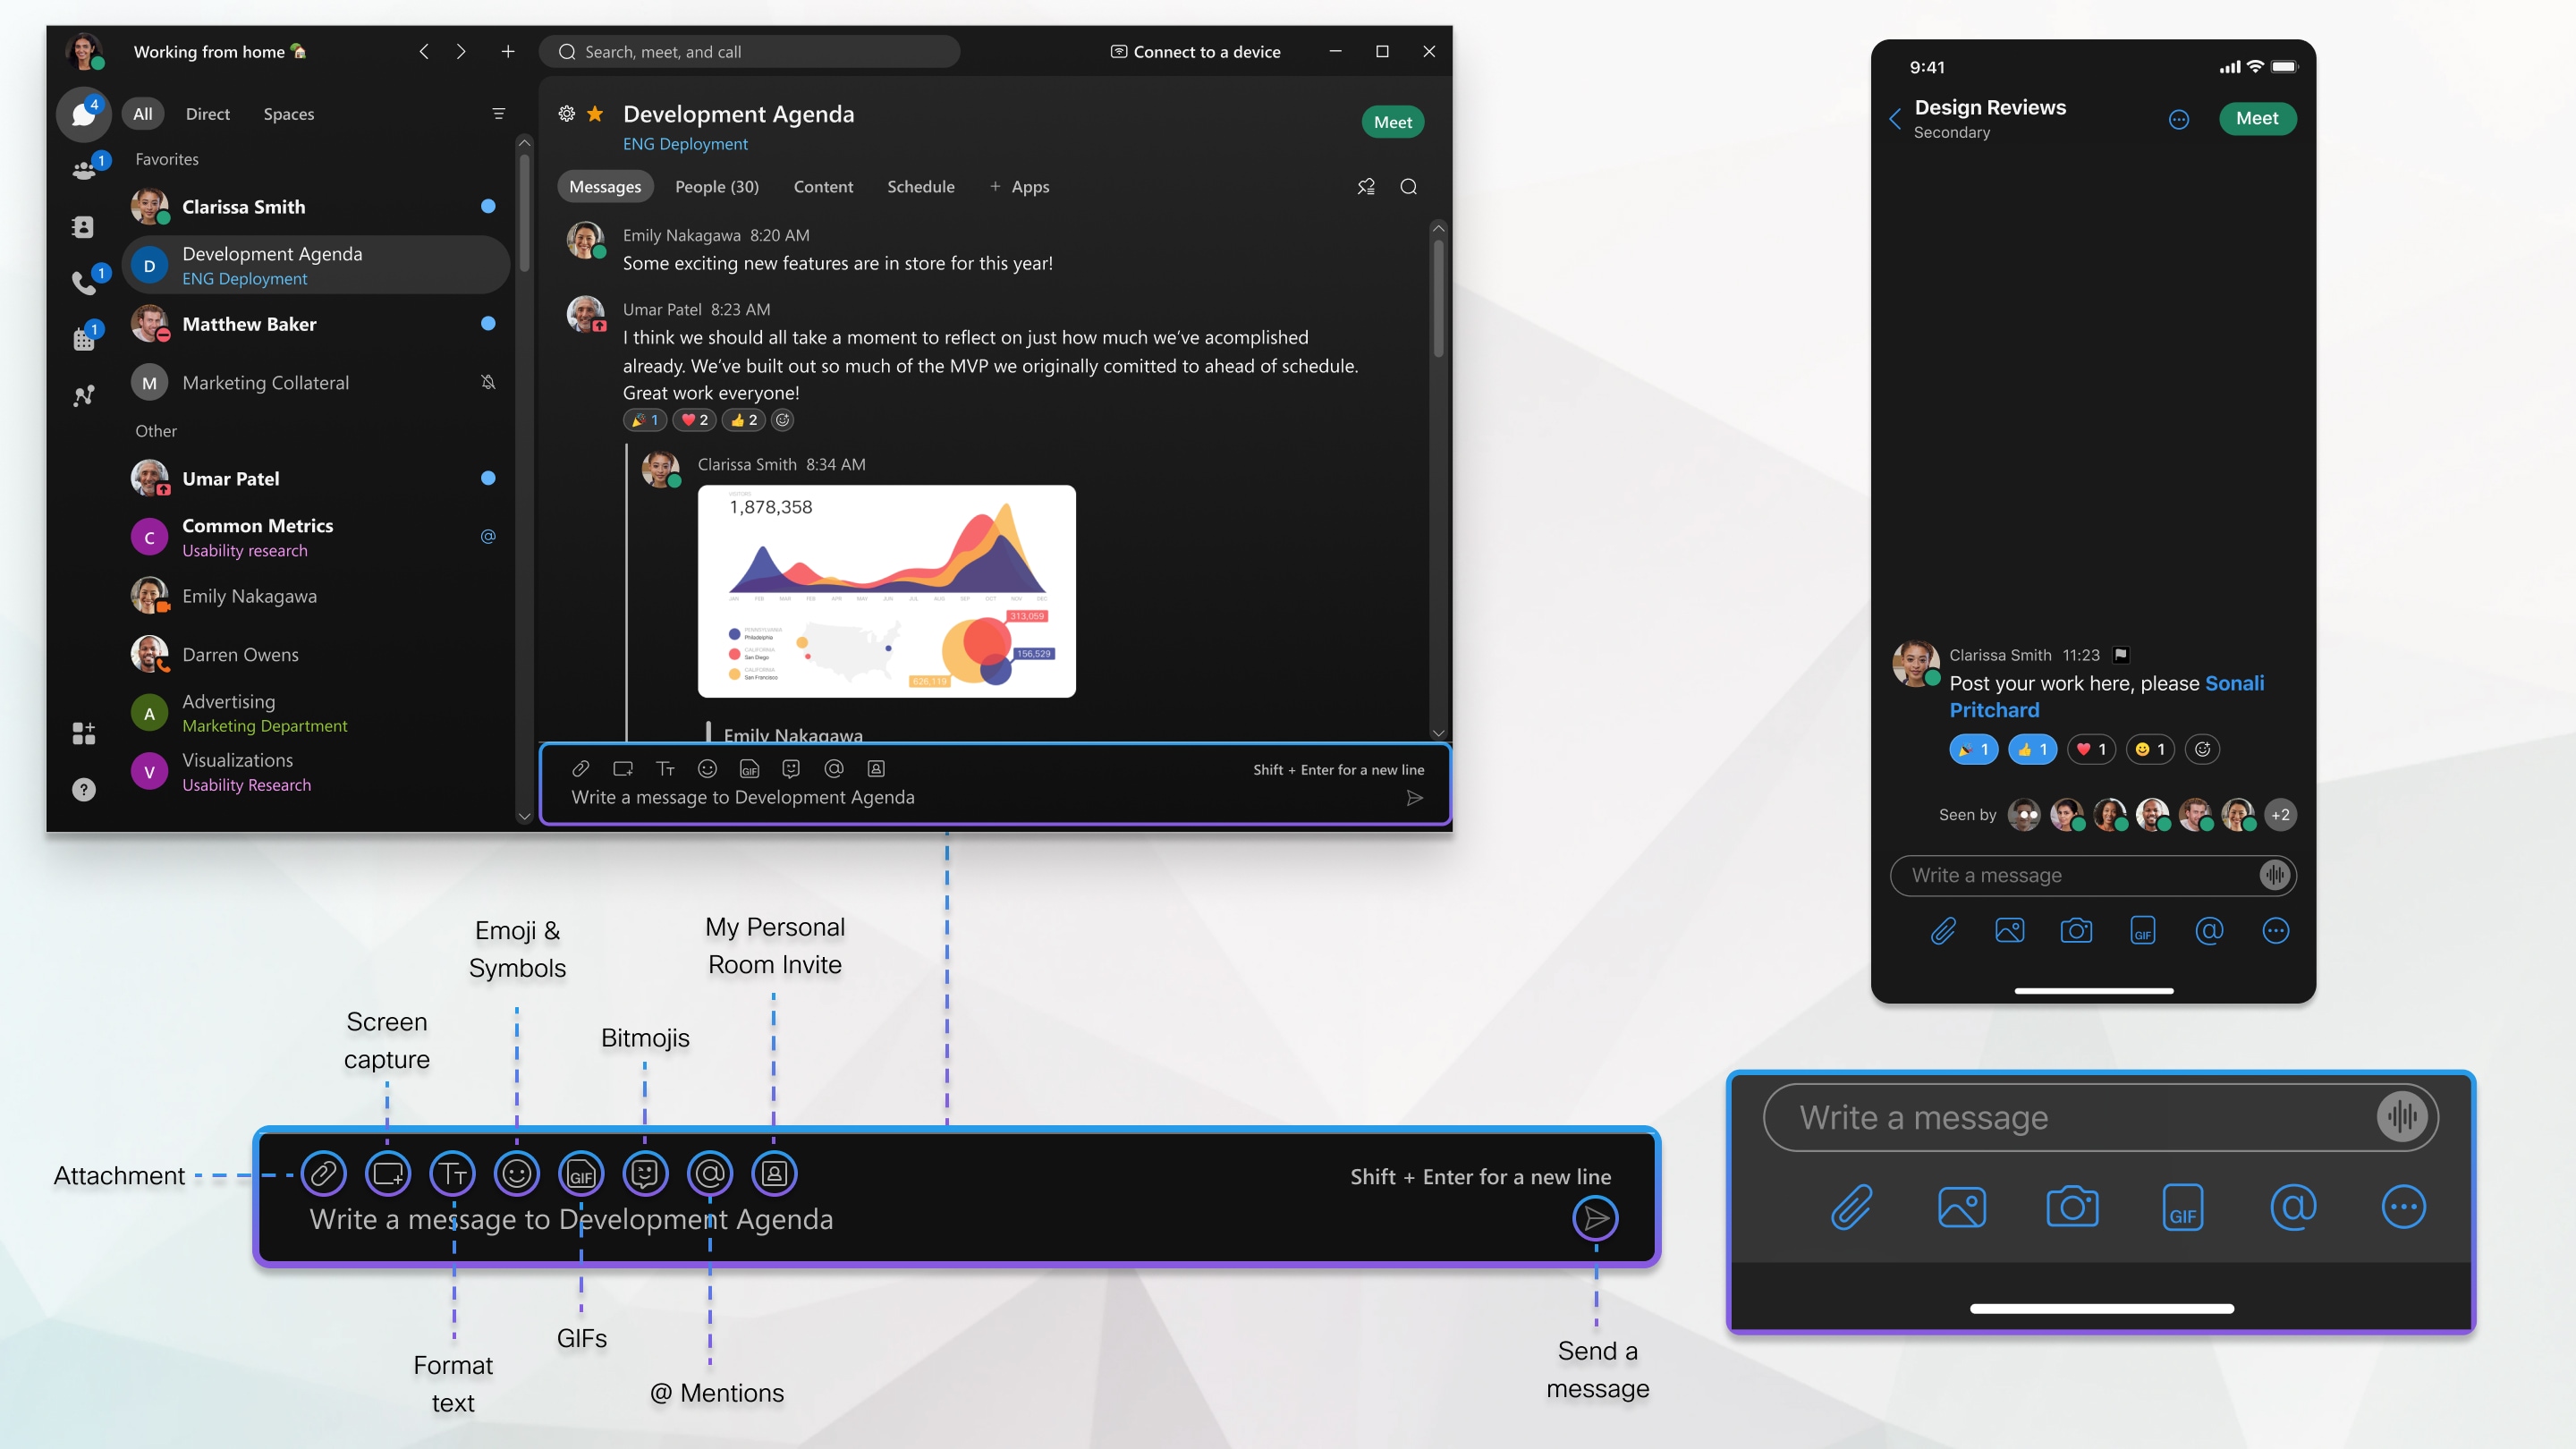
When you write your messages, you can send a quick one, or make it stand out with more text formatting and emojis. You can also share files, pictures, videos, and even gifs. Webex App keeps a list of all the content shared in a space, so you'll never lose track of them. Use @mentions to make sure the right people see your message. Don’t worry if you’ve made a mistake and need to edit it or if you’ve pasted in the wrong space and need to delete the message entirely.
Your messages are persistent. The next time you message the group, your conversation picks right up where you've left it. And after you send a message, you can see who's read your message.
Read and respond to messages
When you get a new message, you're notified right away. If you’re too busy to respond but want to see someone’s message, you can just take a quick peek instead. People won't know that you've seen the message.
Organize your messages
Another way to help keep you productive is by organizing your messages. You can filter your messages so that you can focus on just your unread messages, for example, or just spaces where you've been @mentioned.
You can also make it easy for yourself and others to follow a specific train of thought using threading, quotes, and even forwarding a message to someone else.
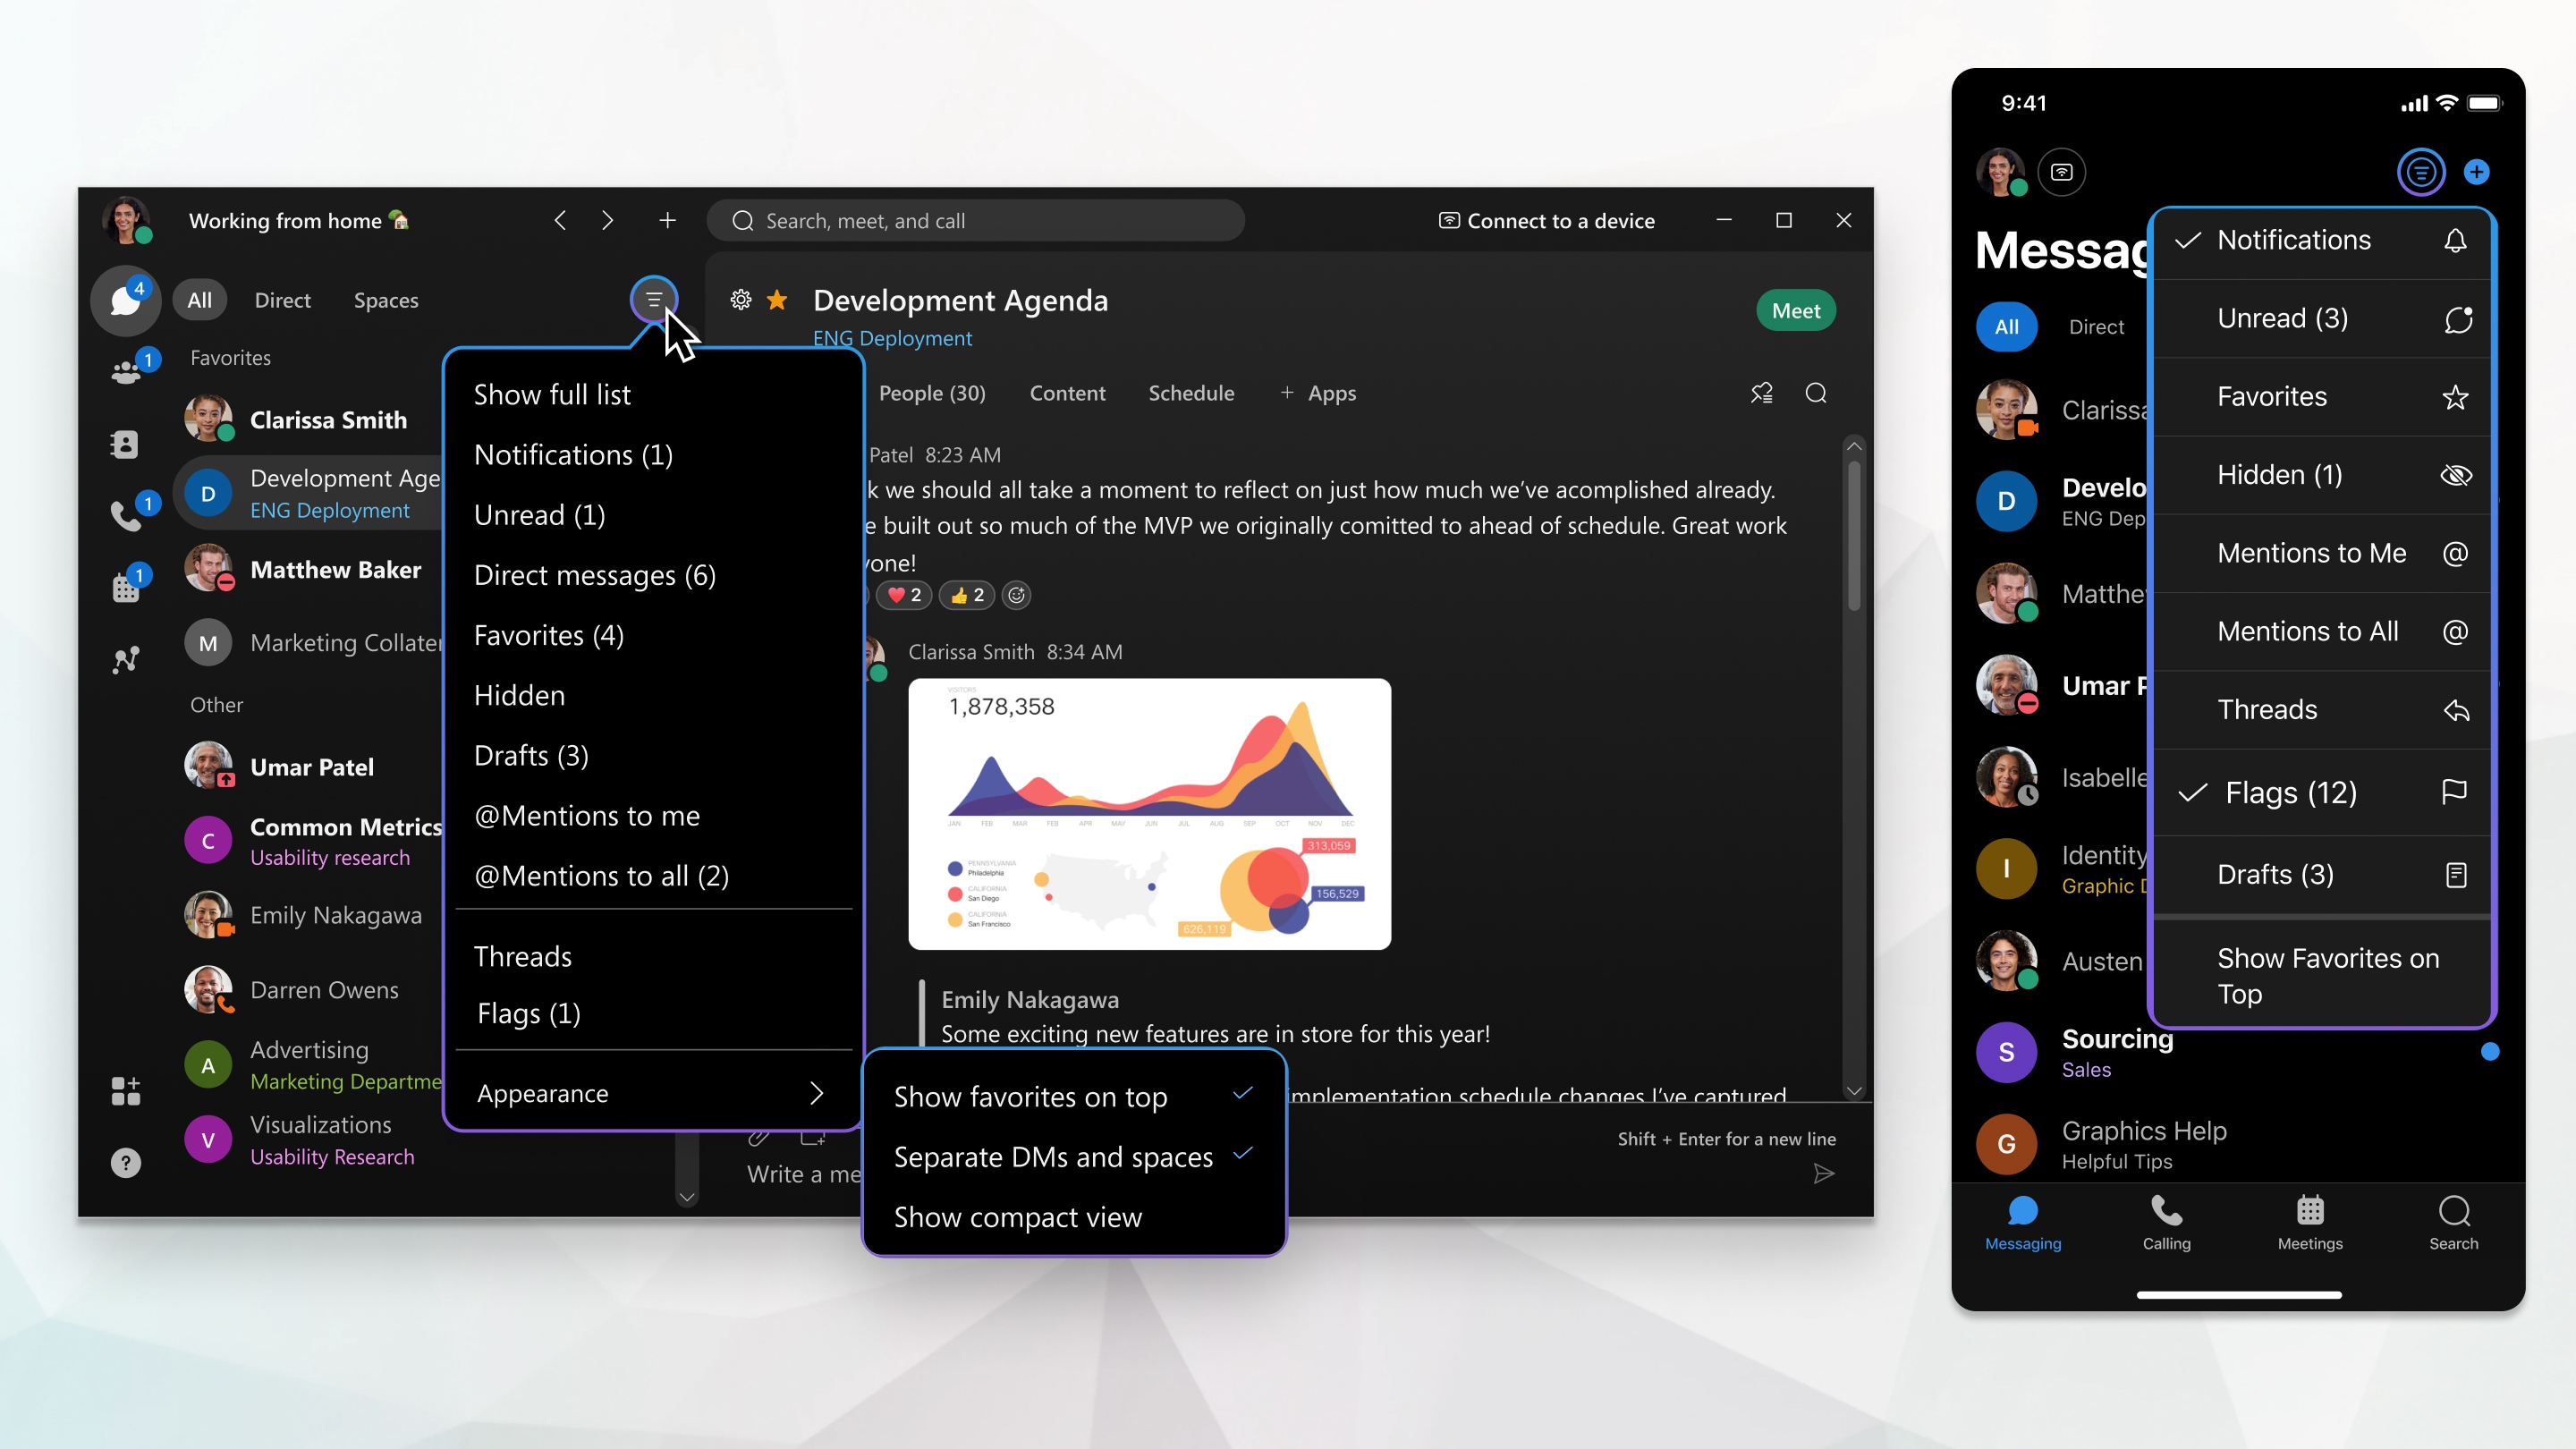
You can also flag important messages so that you can refer back to them easily.

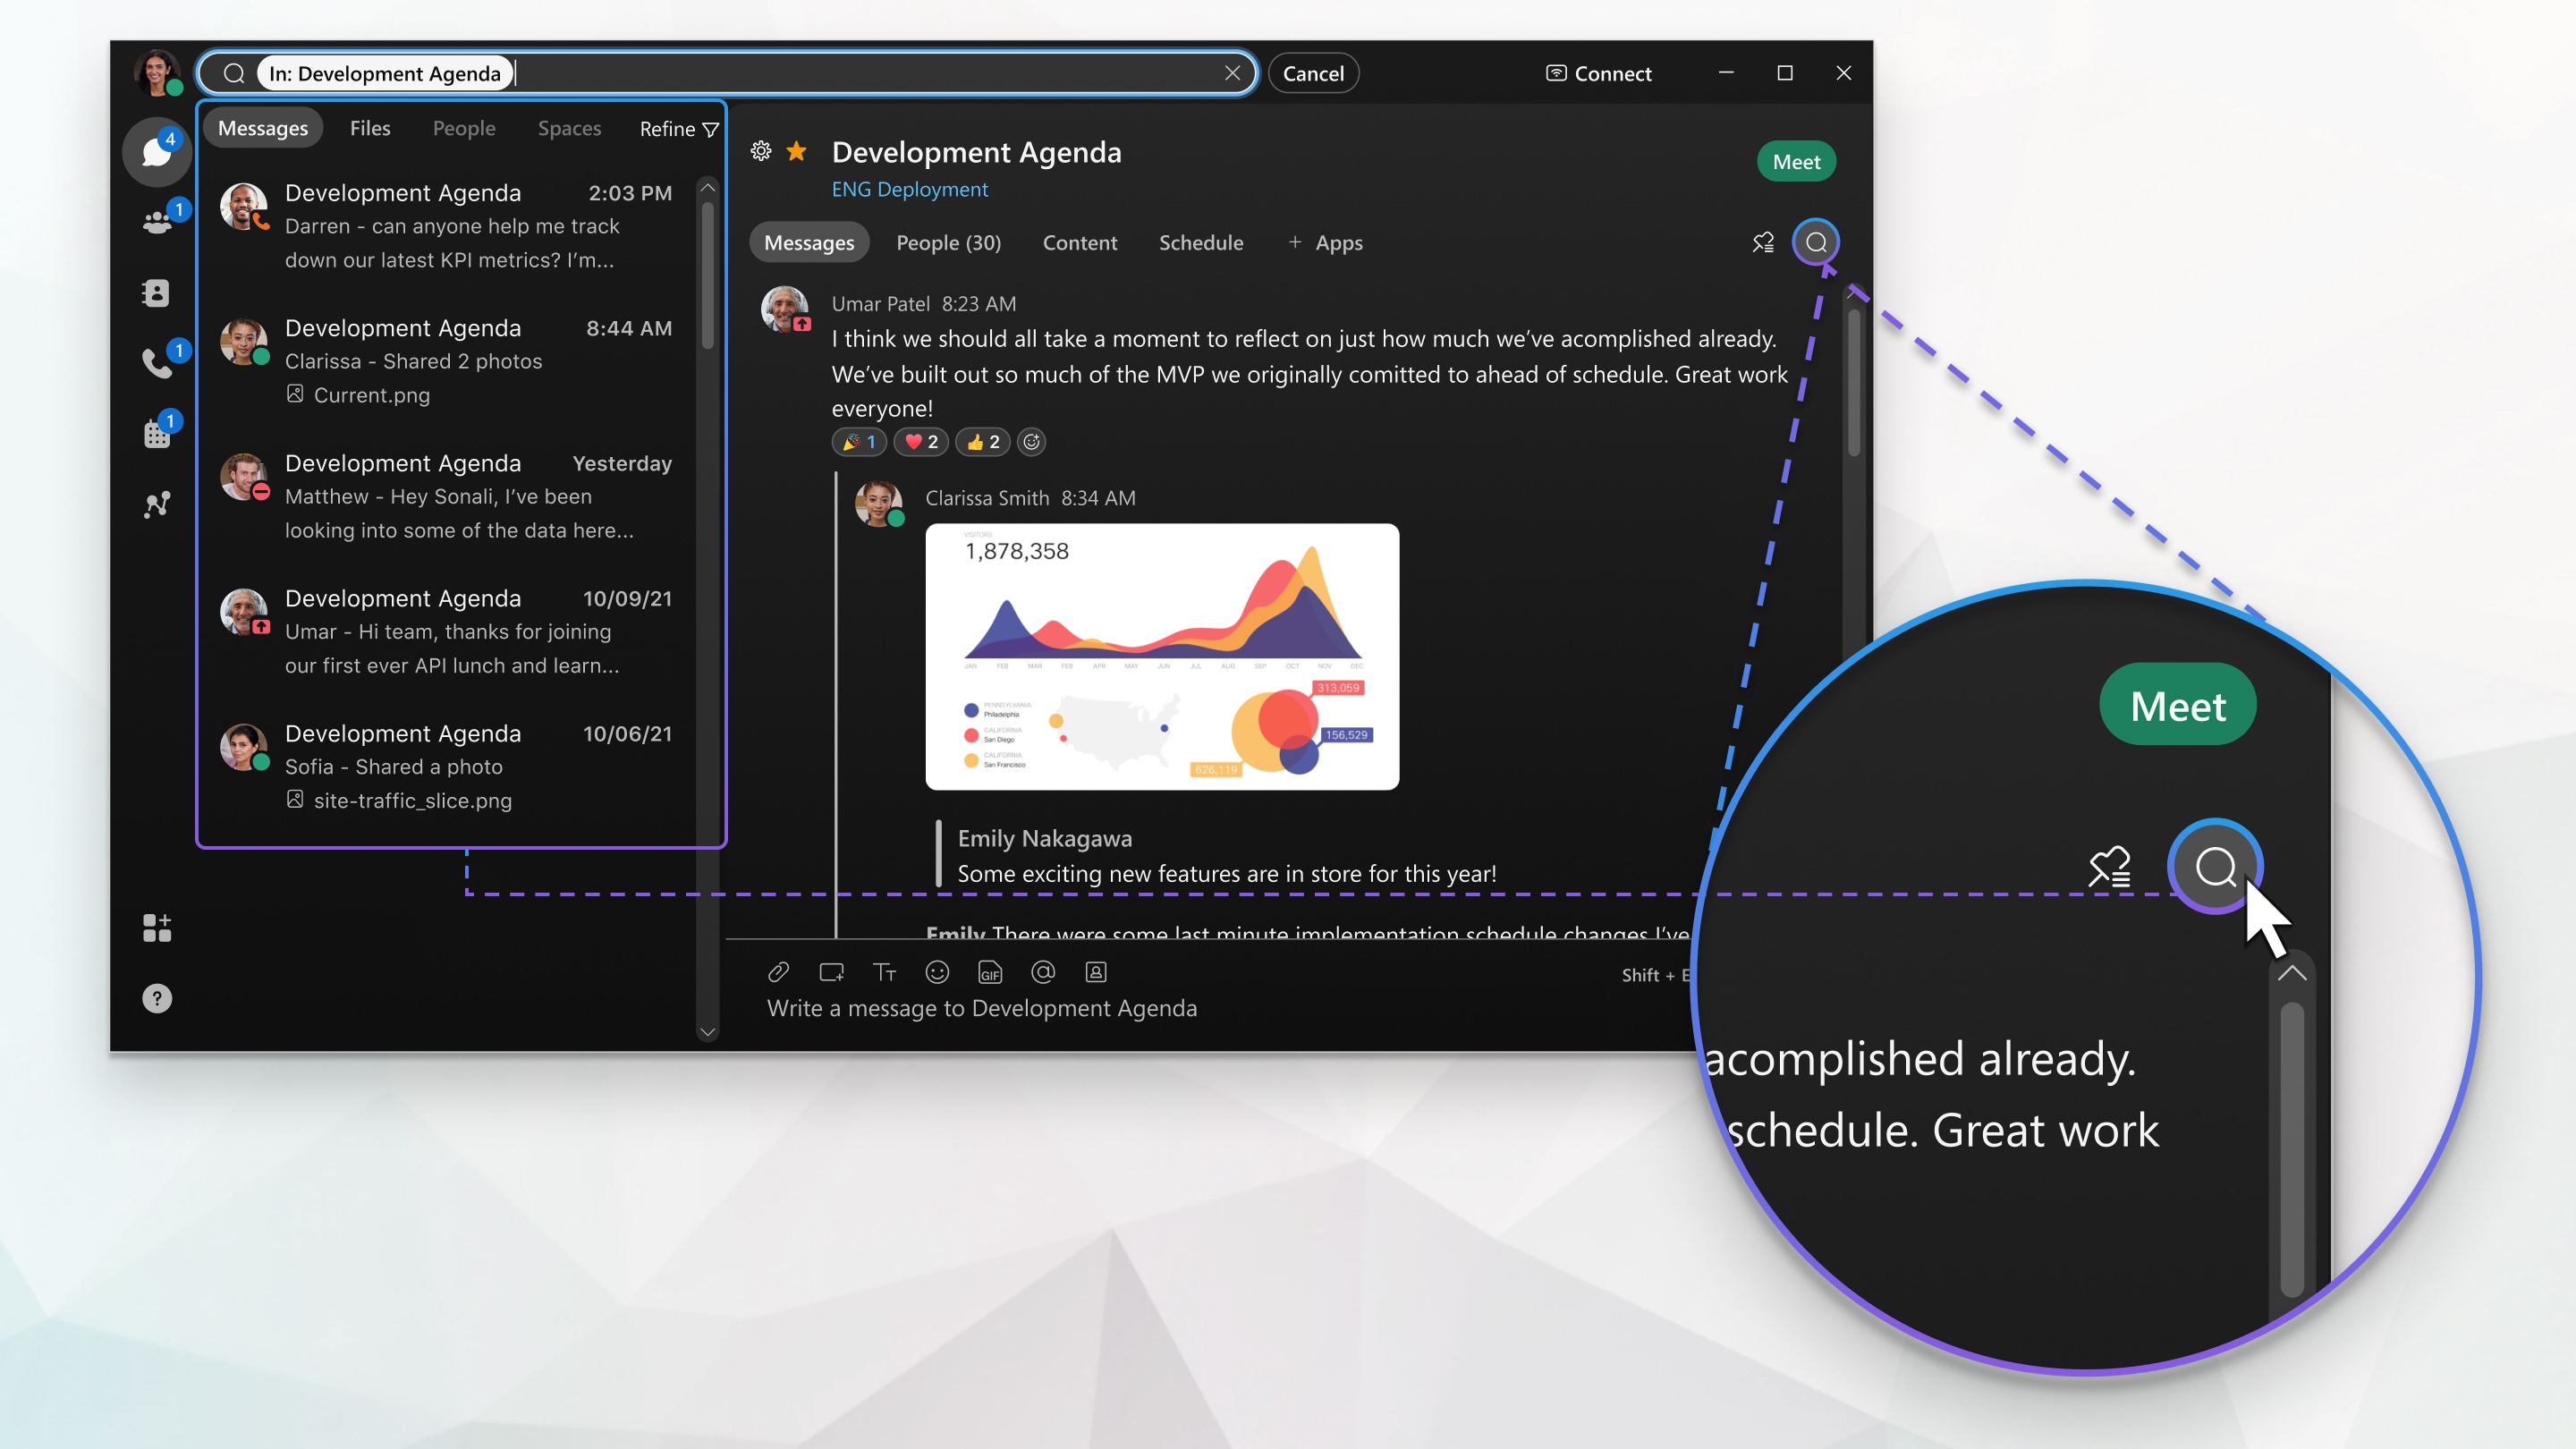
And if you're looking for a message or a file that was shared but can't remember what space it was posted in, you can search for it.
Meetings
Start your first meeting
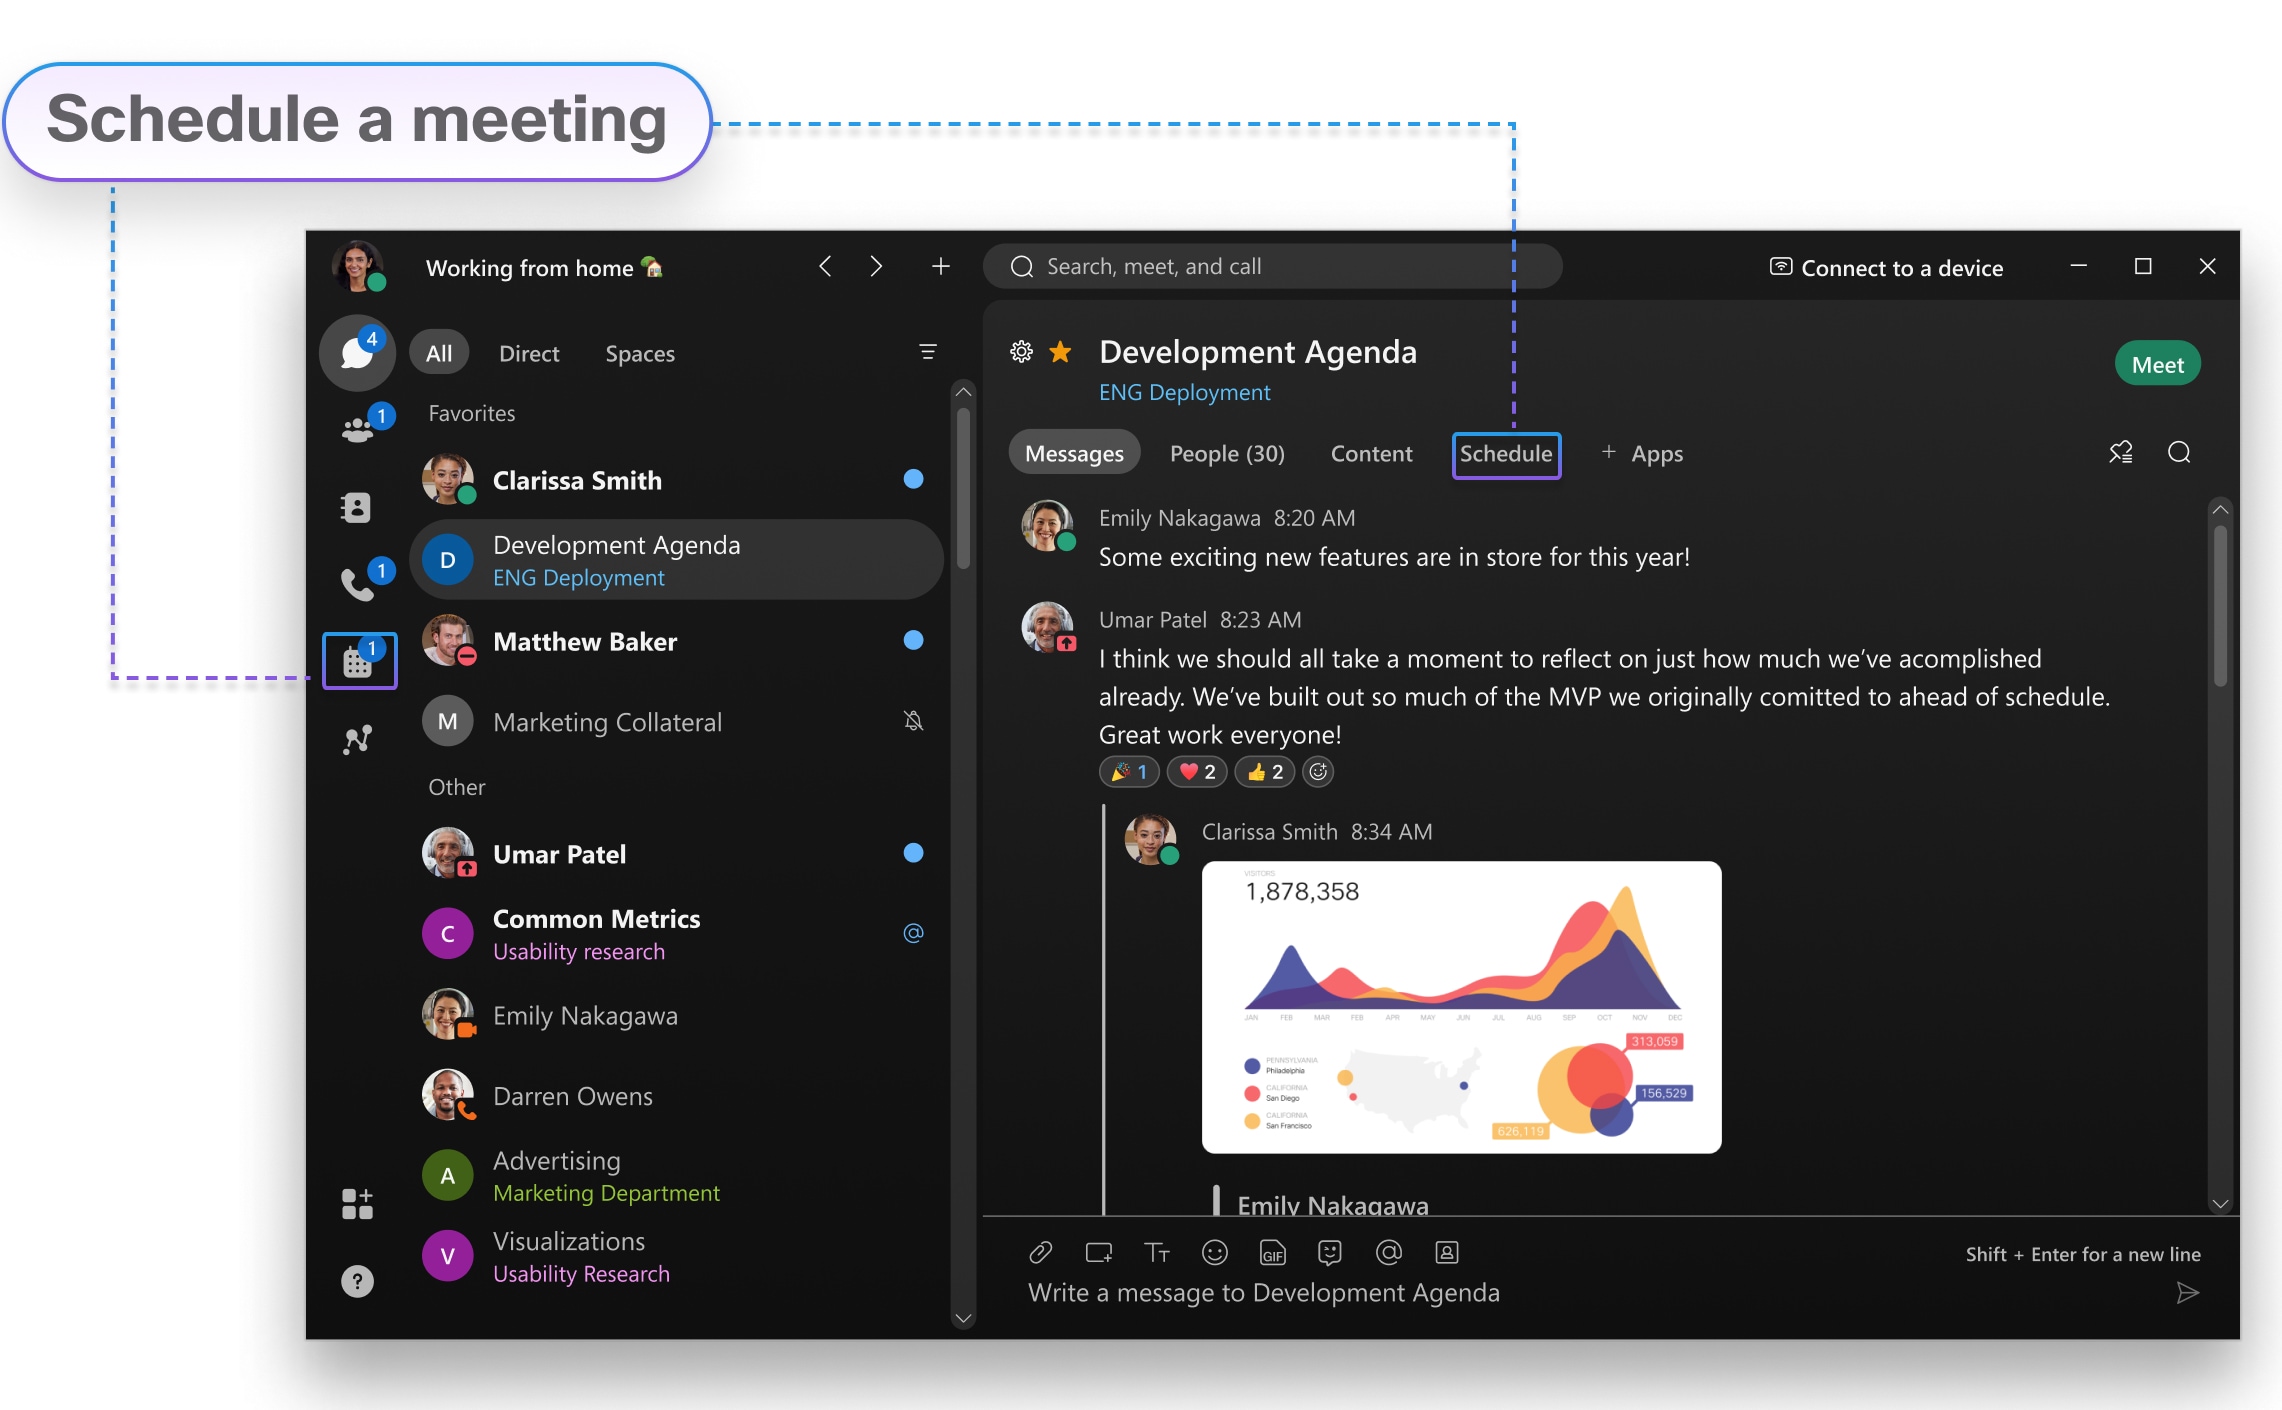
With Webex App, you can meet whenever you need to—right away or later. There’s two ways to start or schedule your meetings in the app, either from the calendar or from your spaces. No matter which you choose, you can connect with video or just audio, record your meetings, set your virtual background, get rid of distracting background noise, and share your screen during your meeting.
From a space
If you’re already working together in a space, anyone can start an instant meeting to meet right away or schedule one for later. With these types of meetings, everyone in the space gets invited automatically and gets treated like a host. So, during the meeting, everyone can let people in, mute people, and record. Since you’re meeting in the same space where you’re working, you get easy access to your messages, files, and whiteboards, and you can work on them while you’re in the meeting.
From a calendar
From your Meetings calendar, you can start a meeting right away in your Personal Room. You’ll see this option if you have a host license, and it gives you a virtual conference room assigned just to you. Because it’s your own room, your link’s always the same.
If you don’t see that choice, you can still schedule a meeting with anyone else. You don’t need to be connected to them in the app, and they don’t even need to have a Webex account. Plus, you or anyone you assign as a cohost can start the meeting, invite people to it, start breakout sessions, enable recording transcripts, and more.
See your upcoming meetings
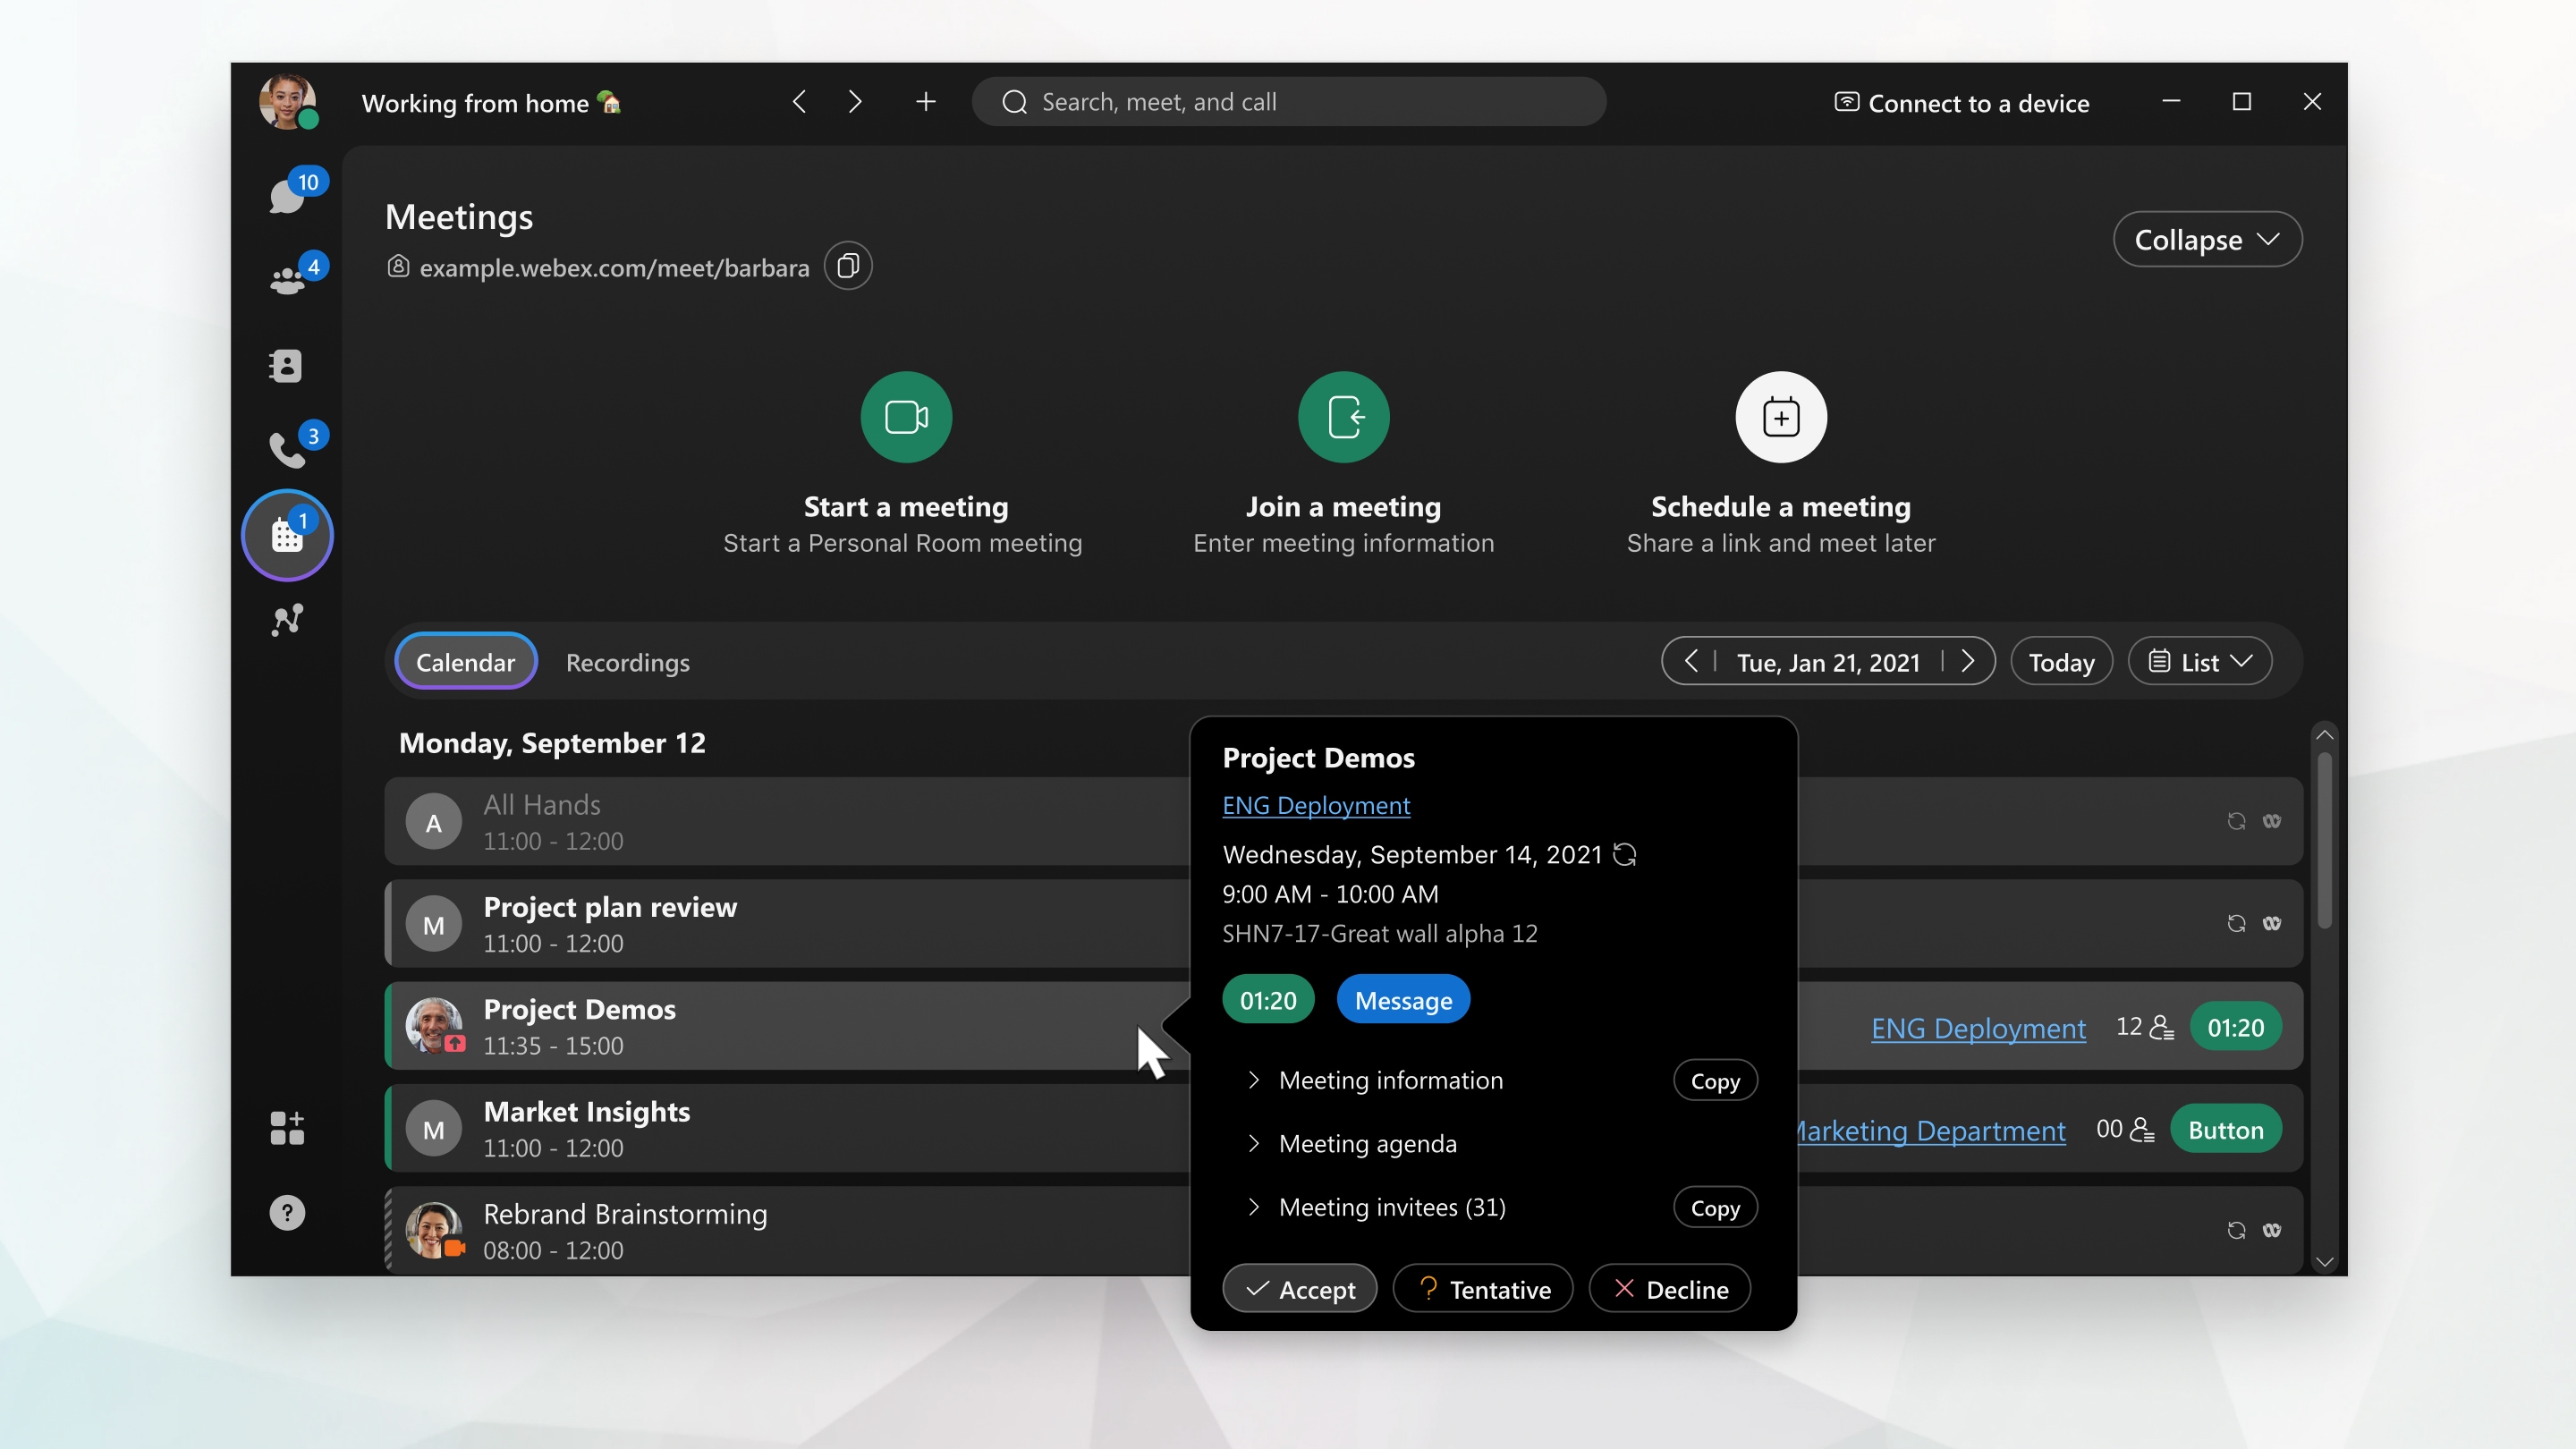
Knowing what meetings you have can help you plan your work day. You can view details about your upcoming meetings in your meetings list, like what the meeting is about, when it's happening, who's invited, and who scheduled the meeting. When it's time for a meeting to start, you can join it from the meetings list, too.
Customize your audio and video preferences
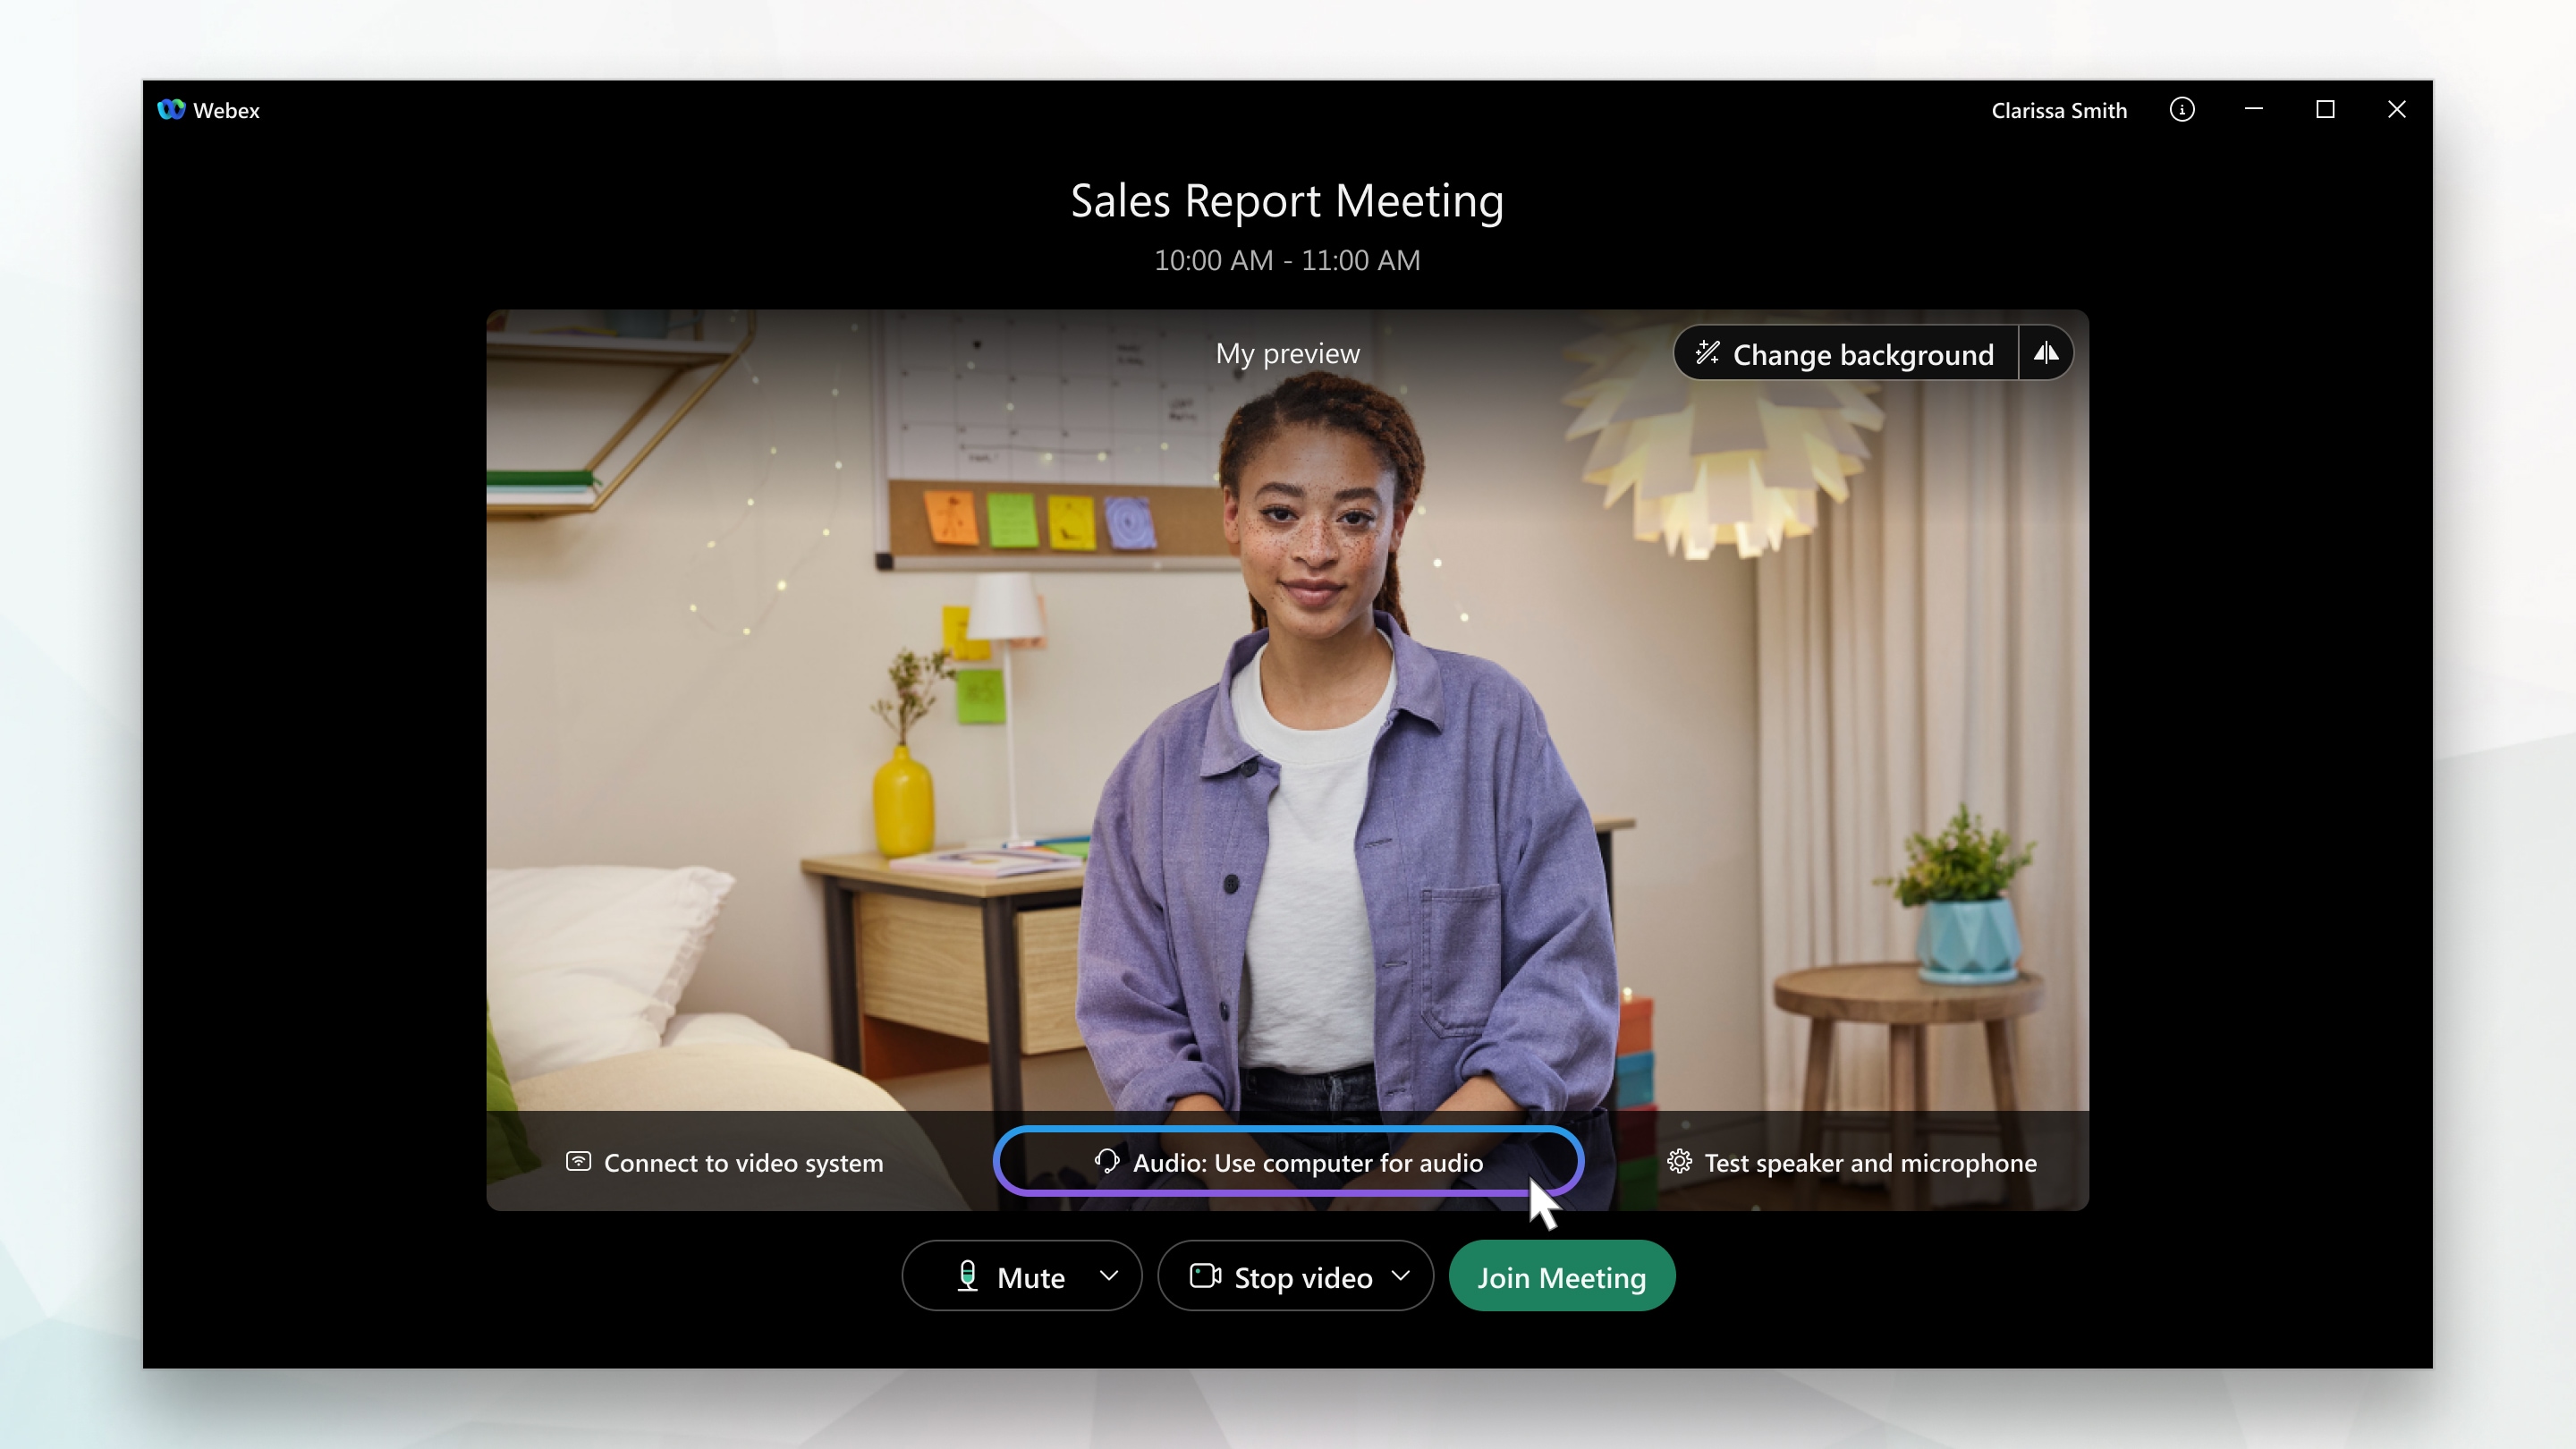
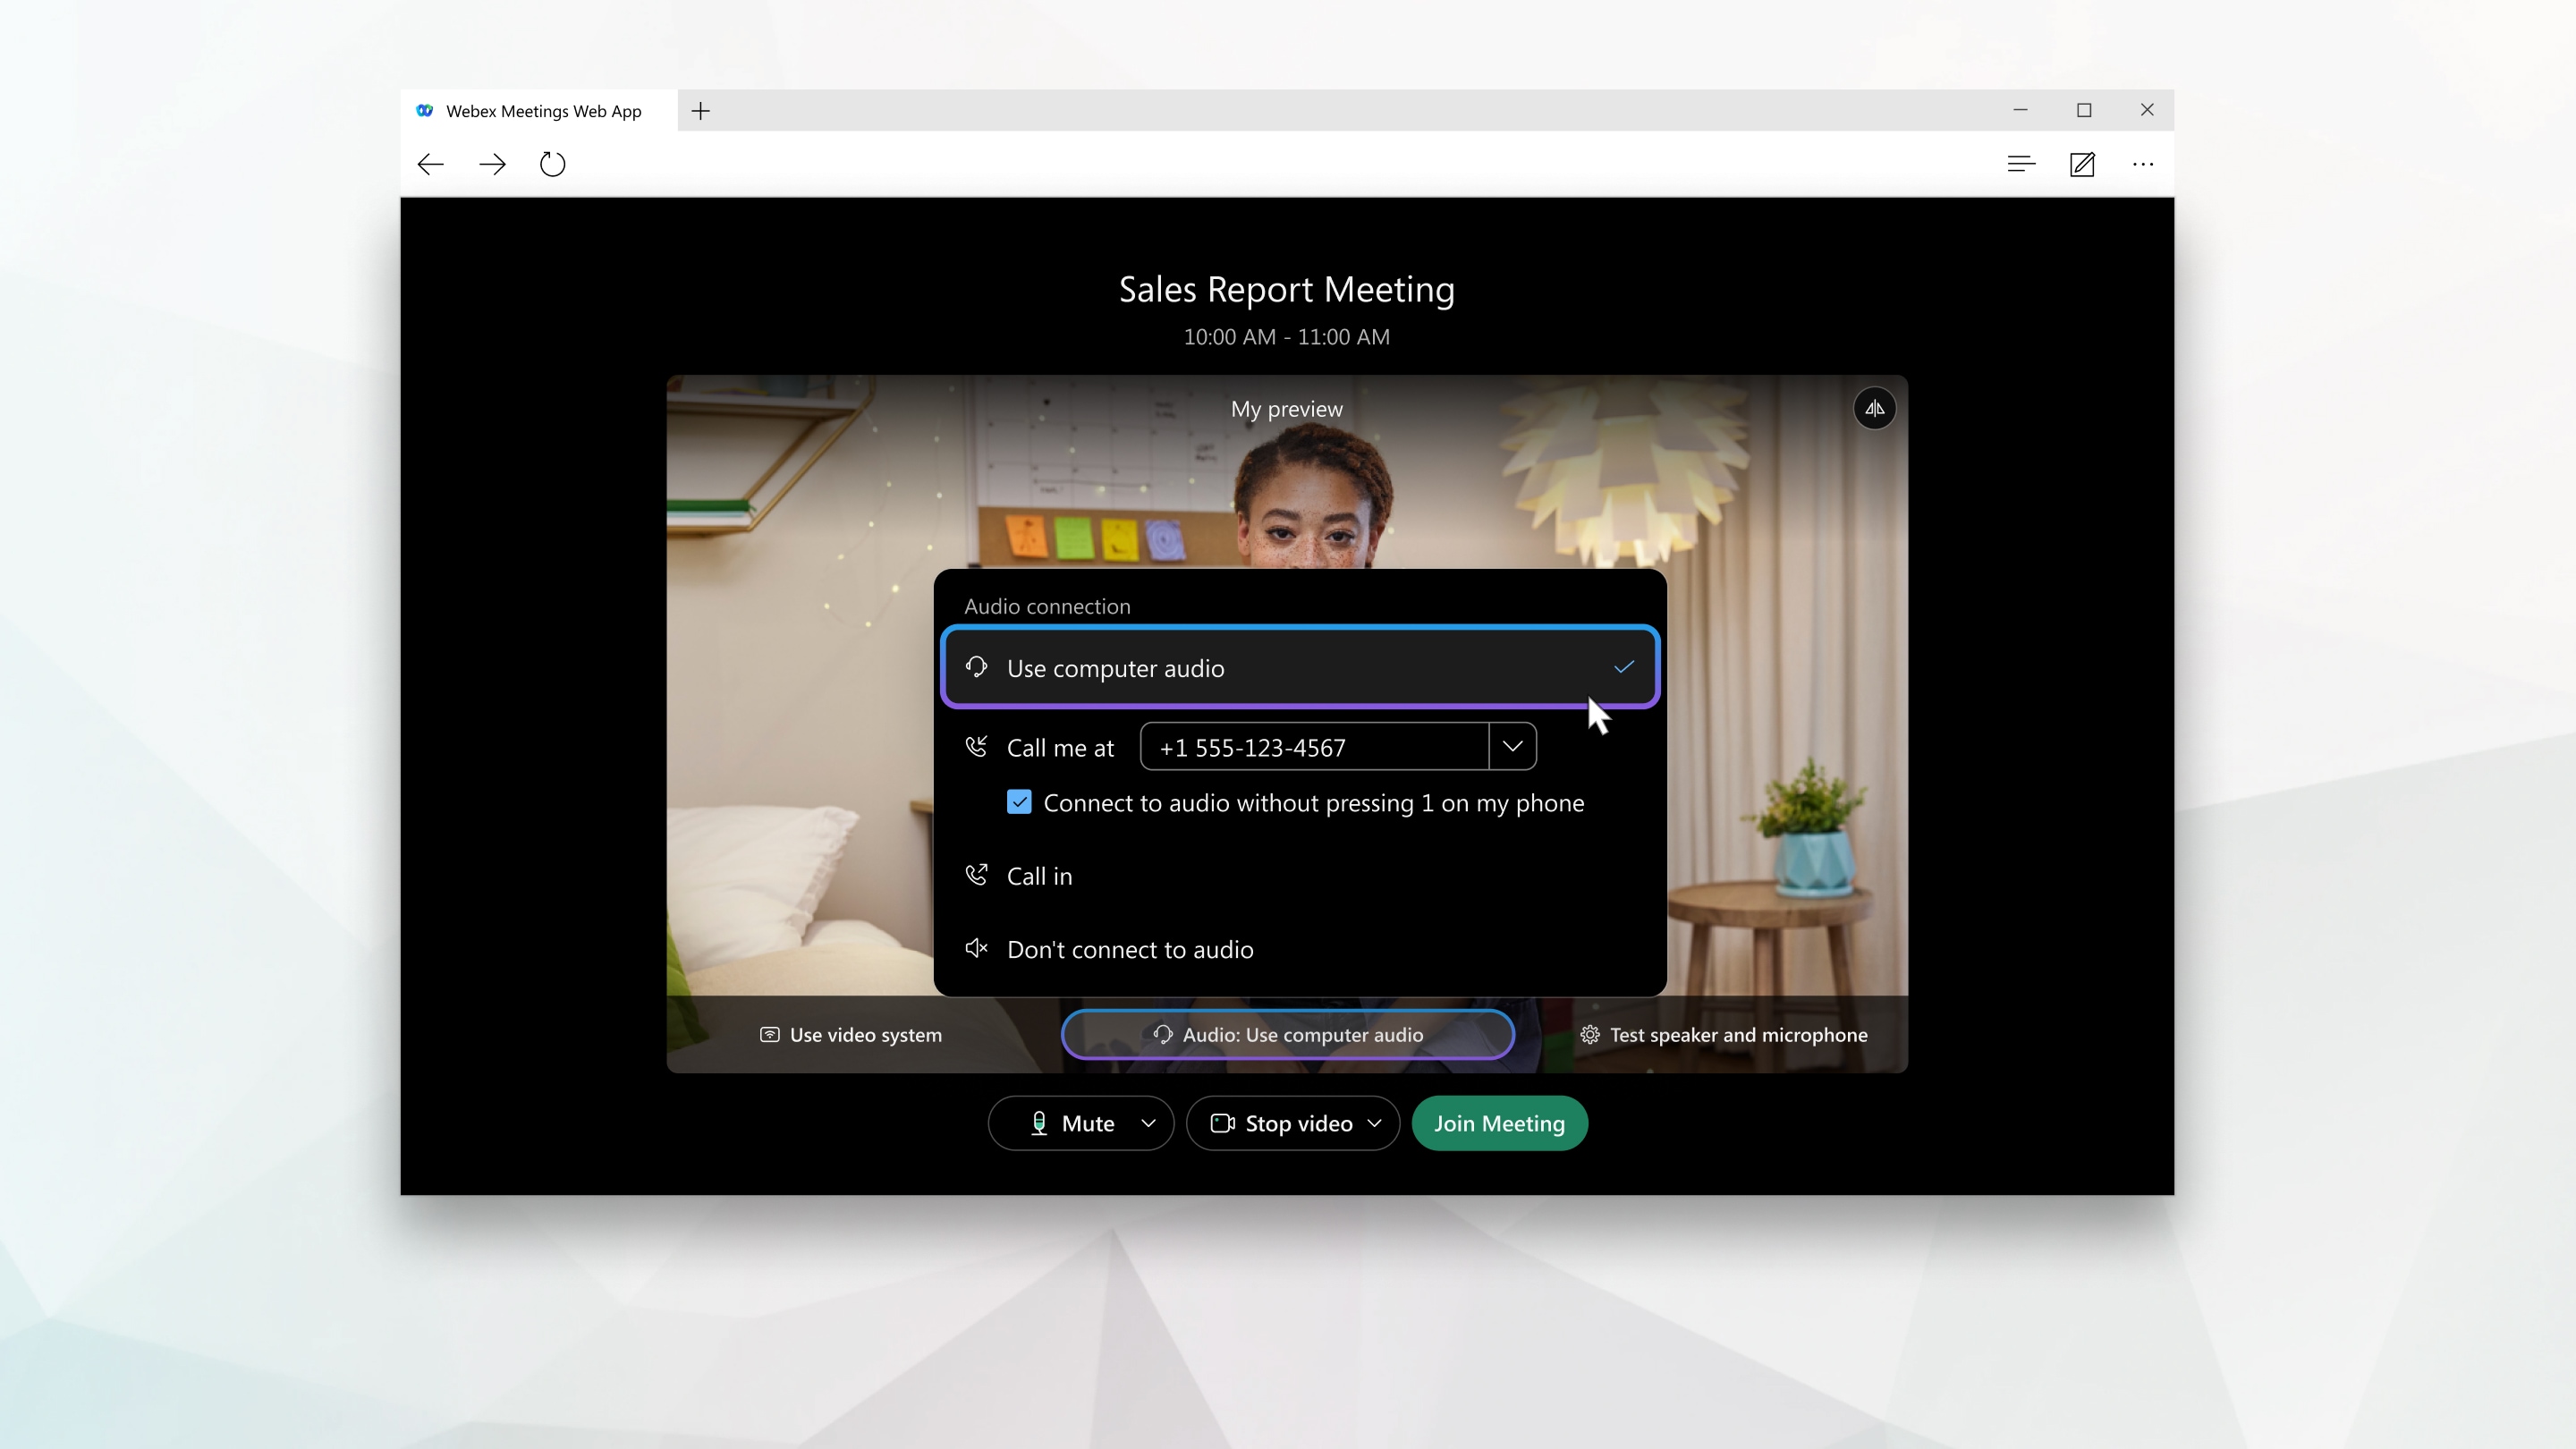
When you join a meeting from your computer, the app automatically detects the audio and video devices you have connected to your computer, such as a headset. You can change your settings right before you start or join a meeting, like if you want your video on or you just want to dial into a meeting with audio only.
-
Use computer audio—Use your computer with a headset or speakers. This is the default audio connection type.
You can change your headset, speakers, and microphone.
-
Call in—Dial in from your phone when the meeting starts. A list of global call-in numbers is available after you join the meeting.
-
Don't connect to audio—You won't hear any audio in the meeting through your computer or phone. Use this option if you're in the meeting room but want to use your computer to share content in the meeting.
 .
. when your microphone is muted. Click Unmute
  when you want to speak in the meeting.
Start Your Video
Before you join or start a meeting you can choose the settings you use for video in the meeting.
1. If you want to join the meeting with your video turned off, click Stop video  .
.
You'll see  when your video is turned off. Click Start video
  when you want to show your video.
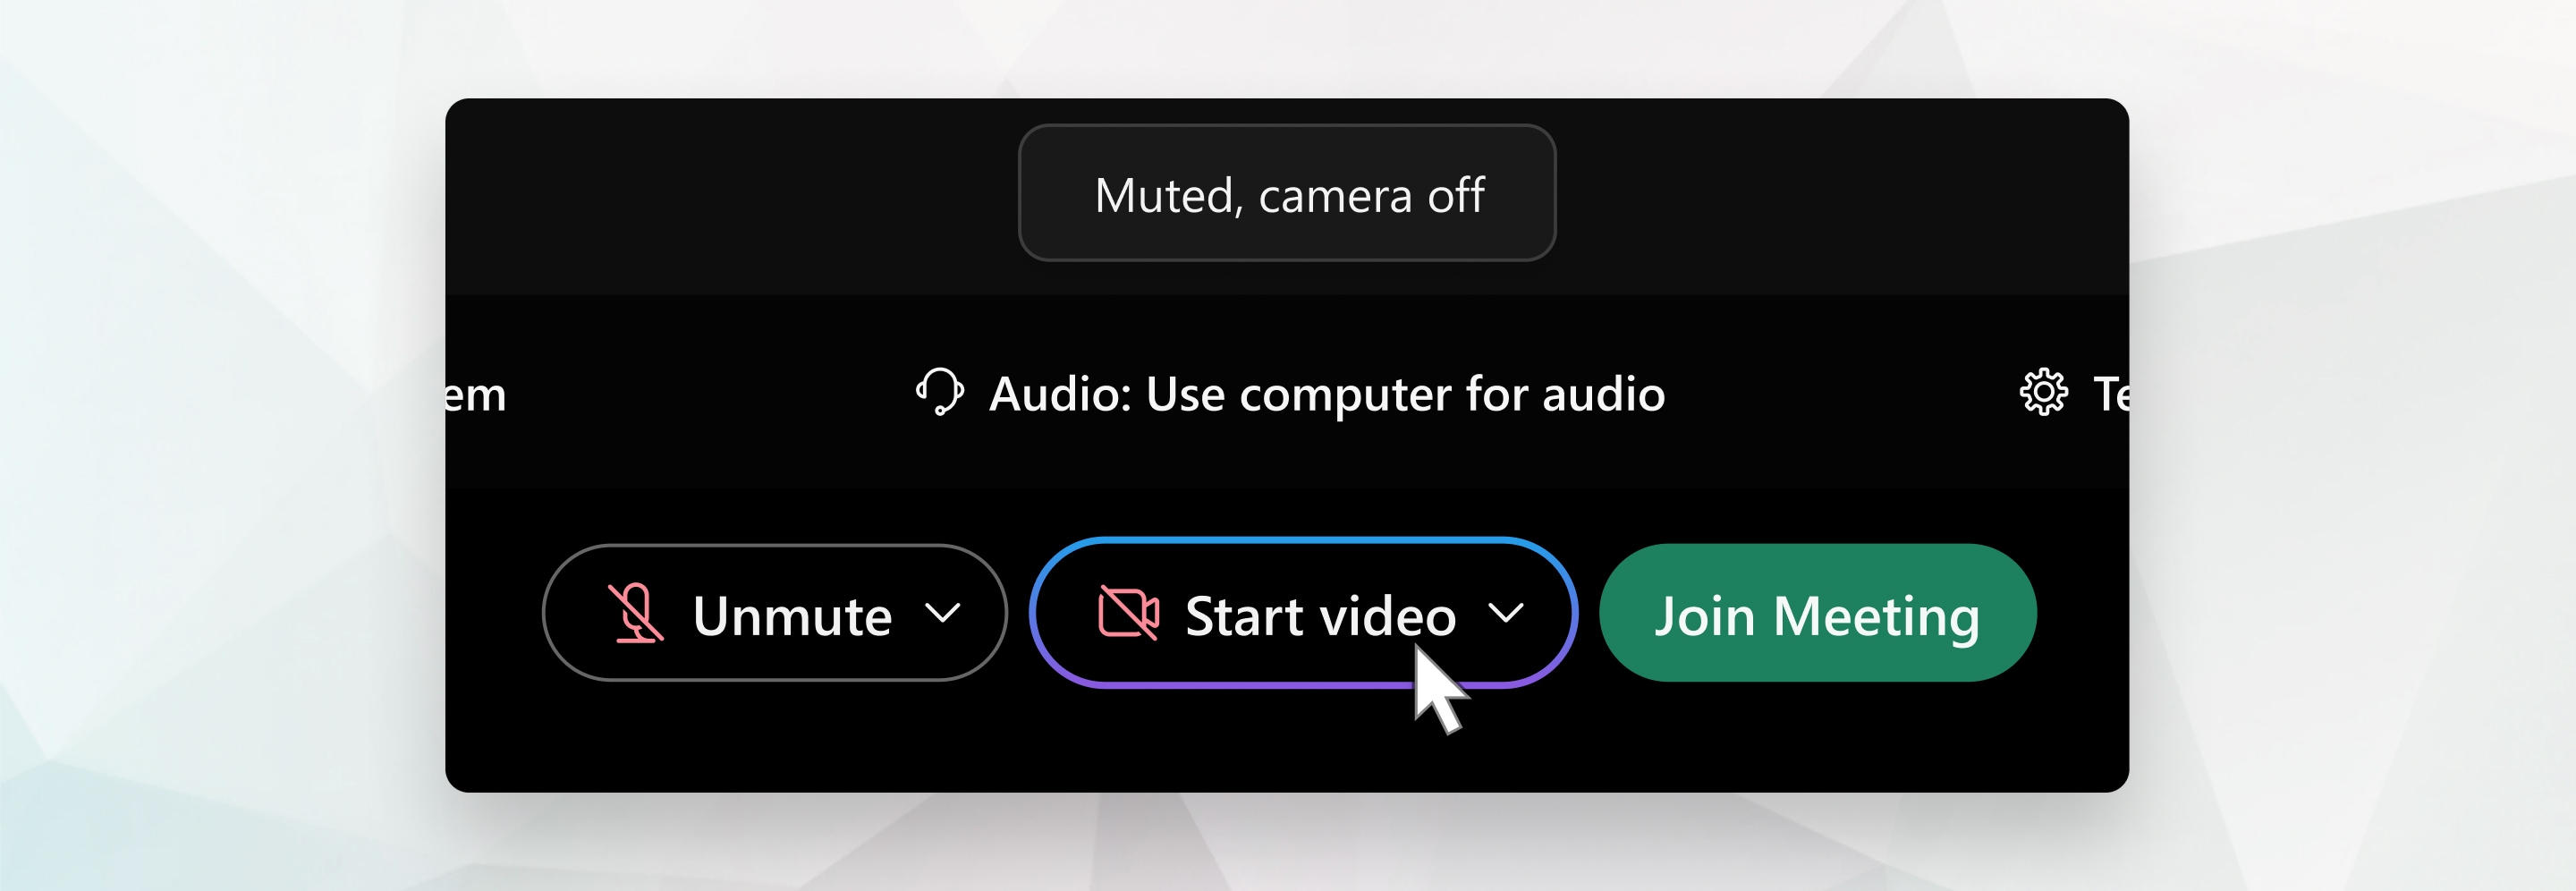
2. By default, your self-view video shows in mirror view. You can turn off mirror view if you want to see yourself in your self-view video the same way that other meeting participants see you.
If you're happy with the audio and video seetings that you chose for this meeting, you can save them for your next meeting.
3. If you want added privacy or to limit possible distractions from your video, you can use a virtual background. Click Change background, and then choose to blur or replace your background.
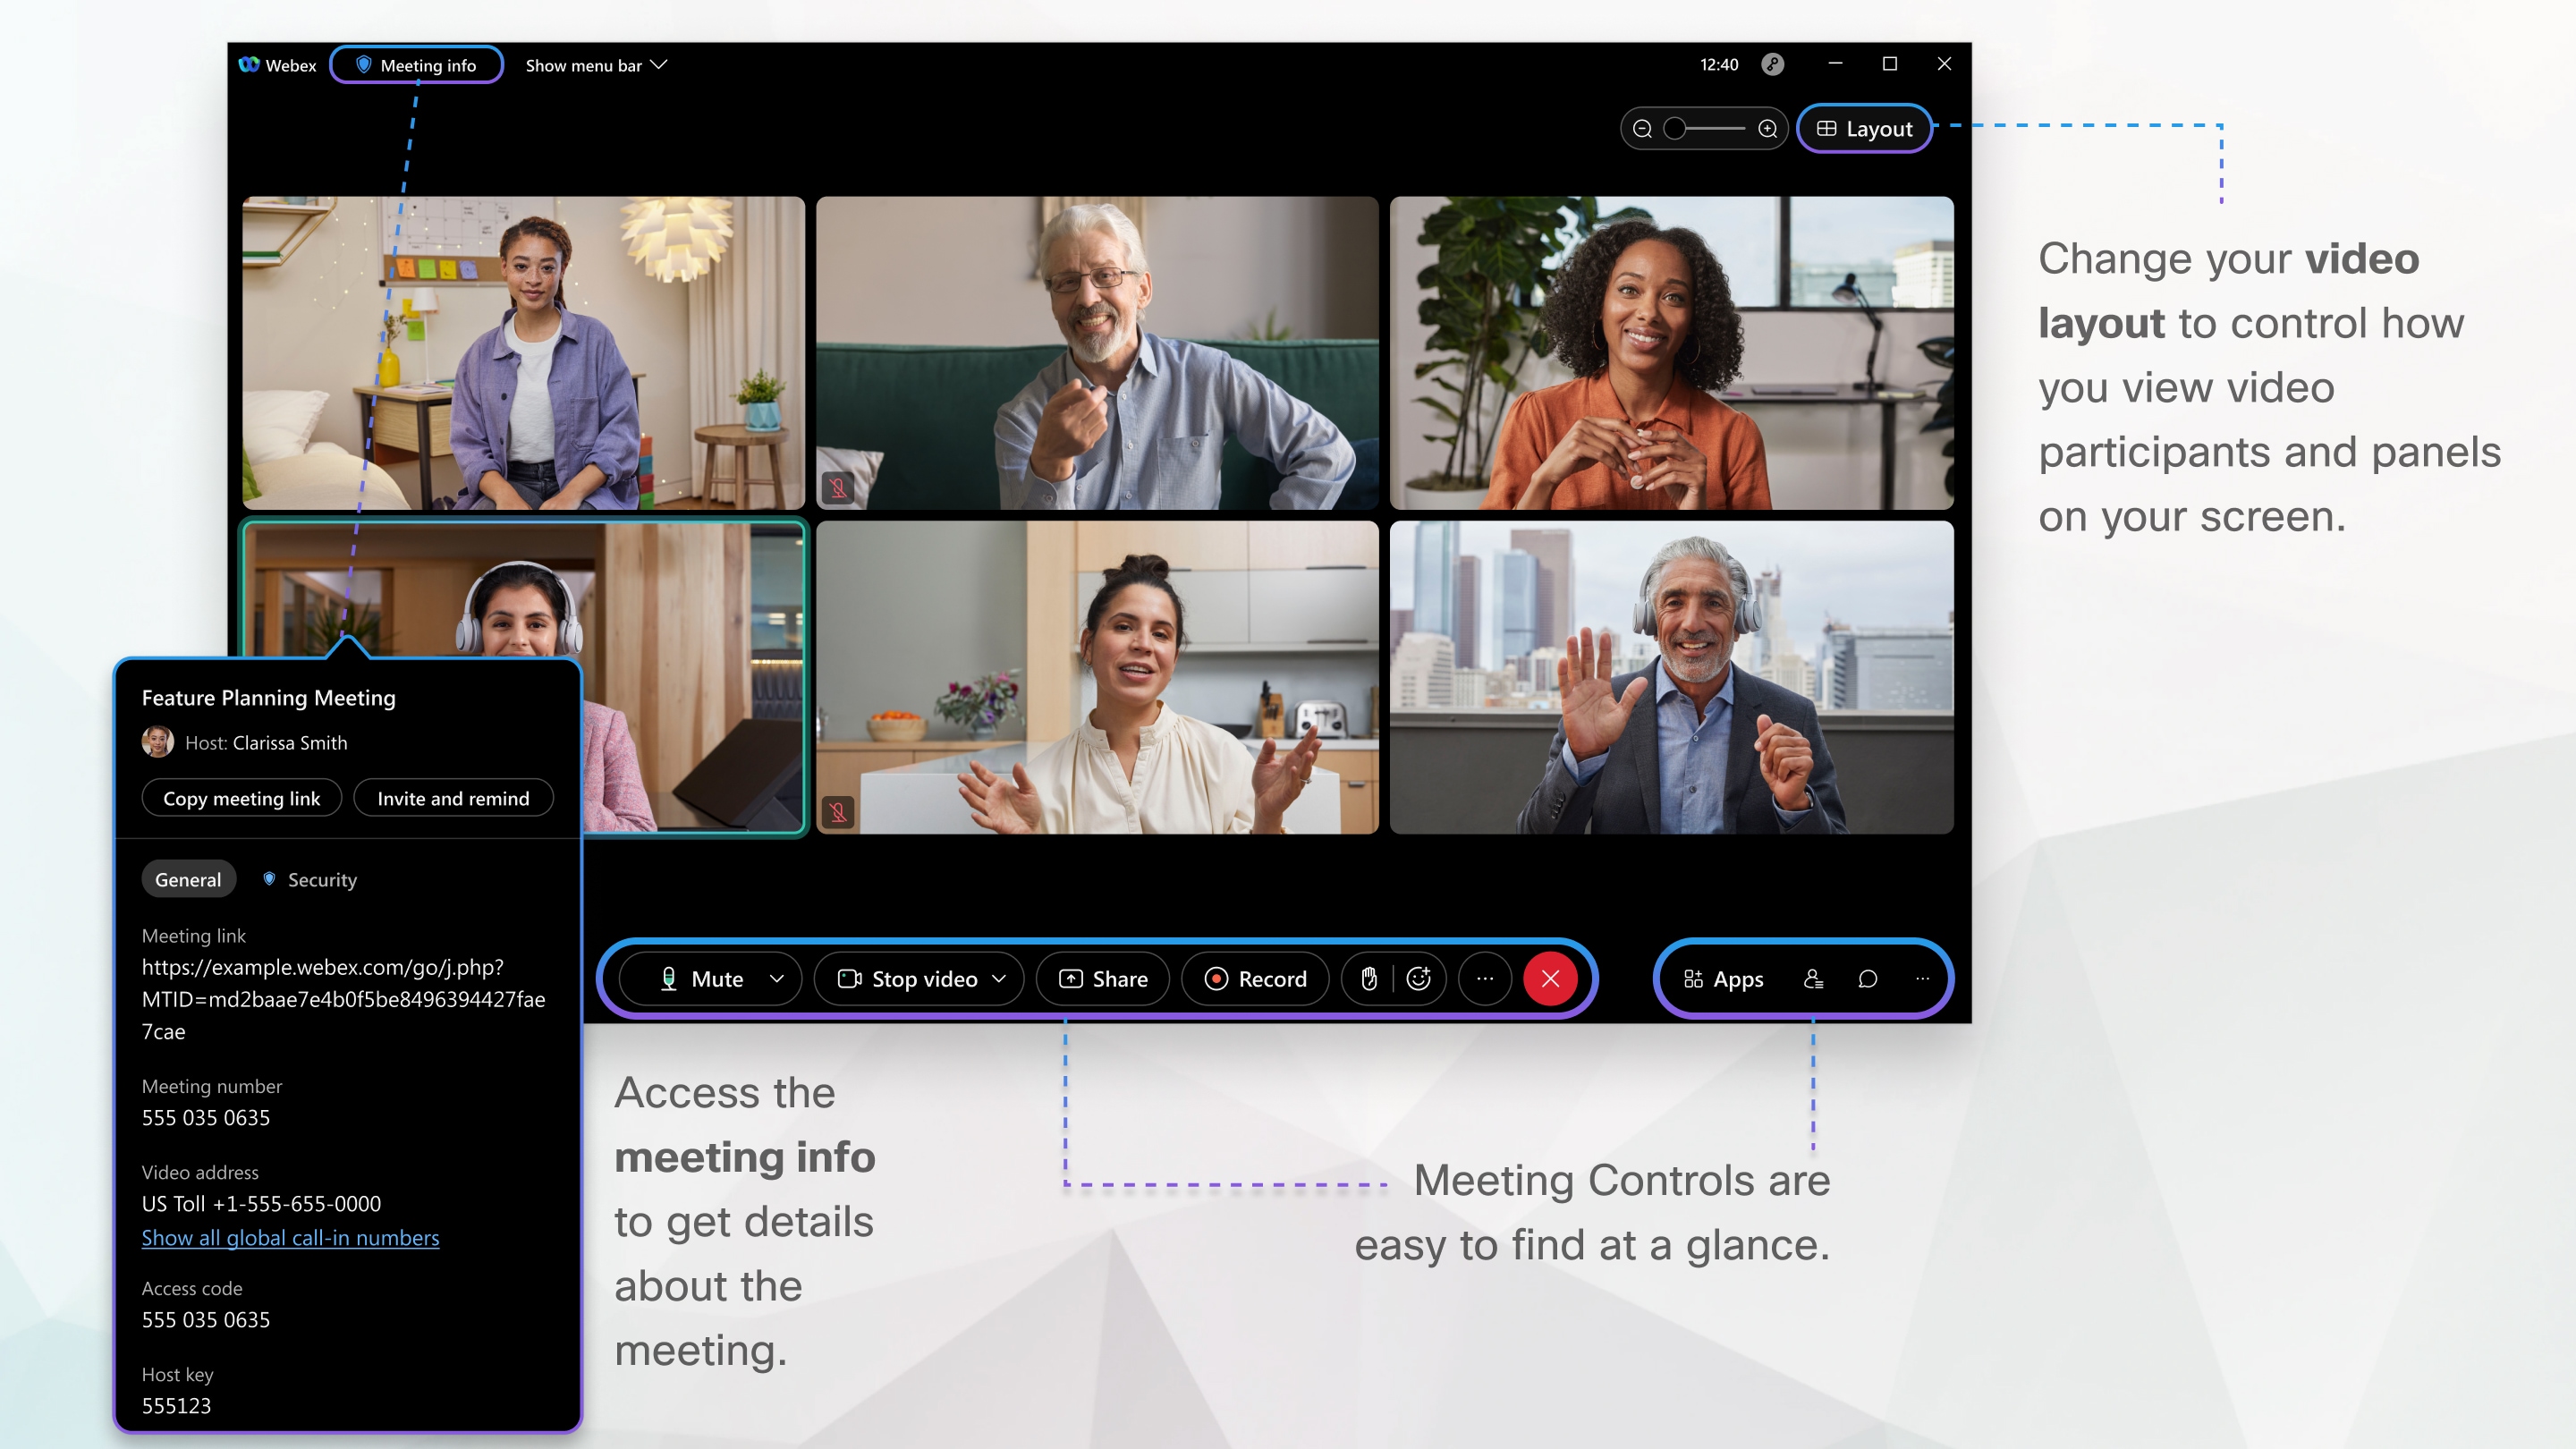
Navigating the Meeting Controls
Share Content
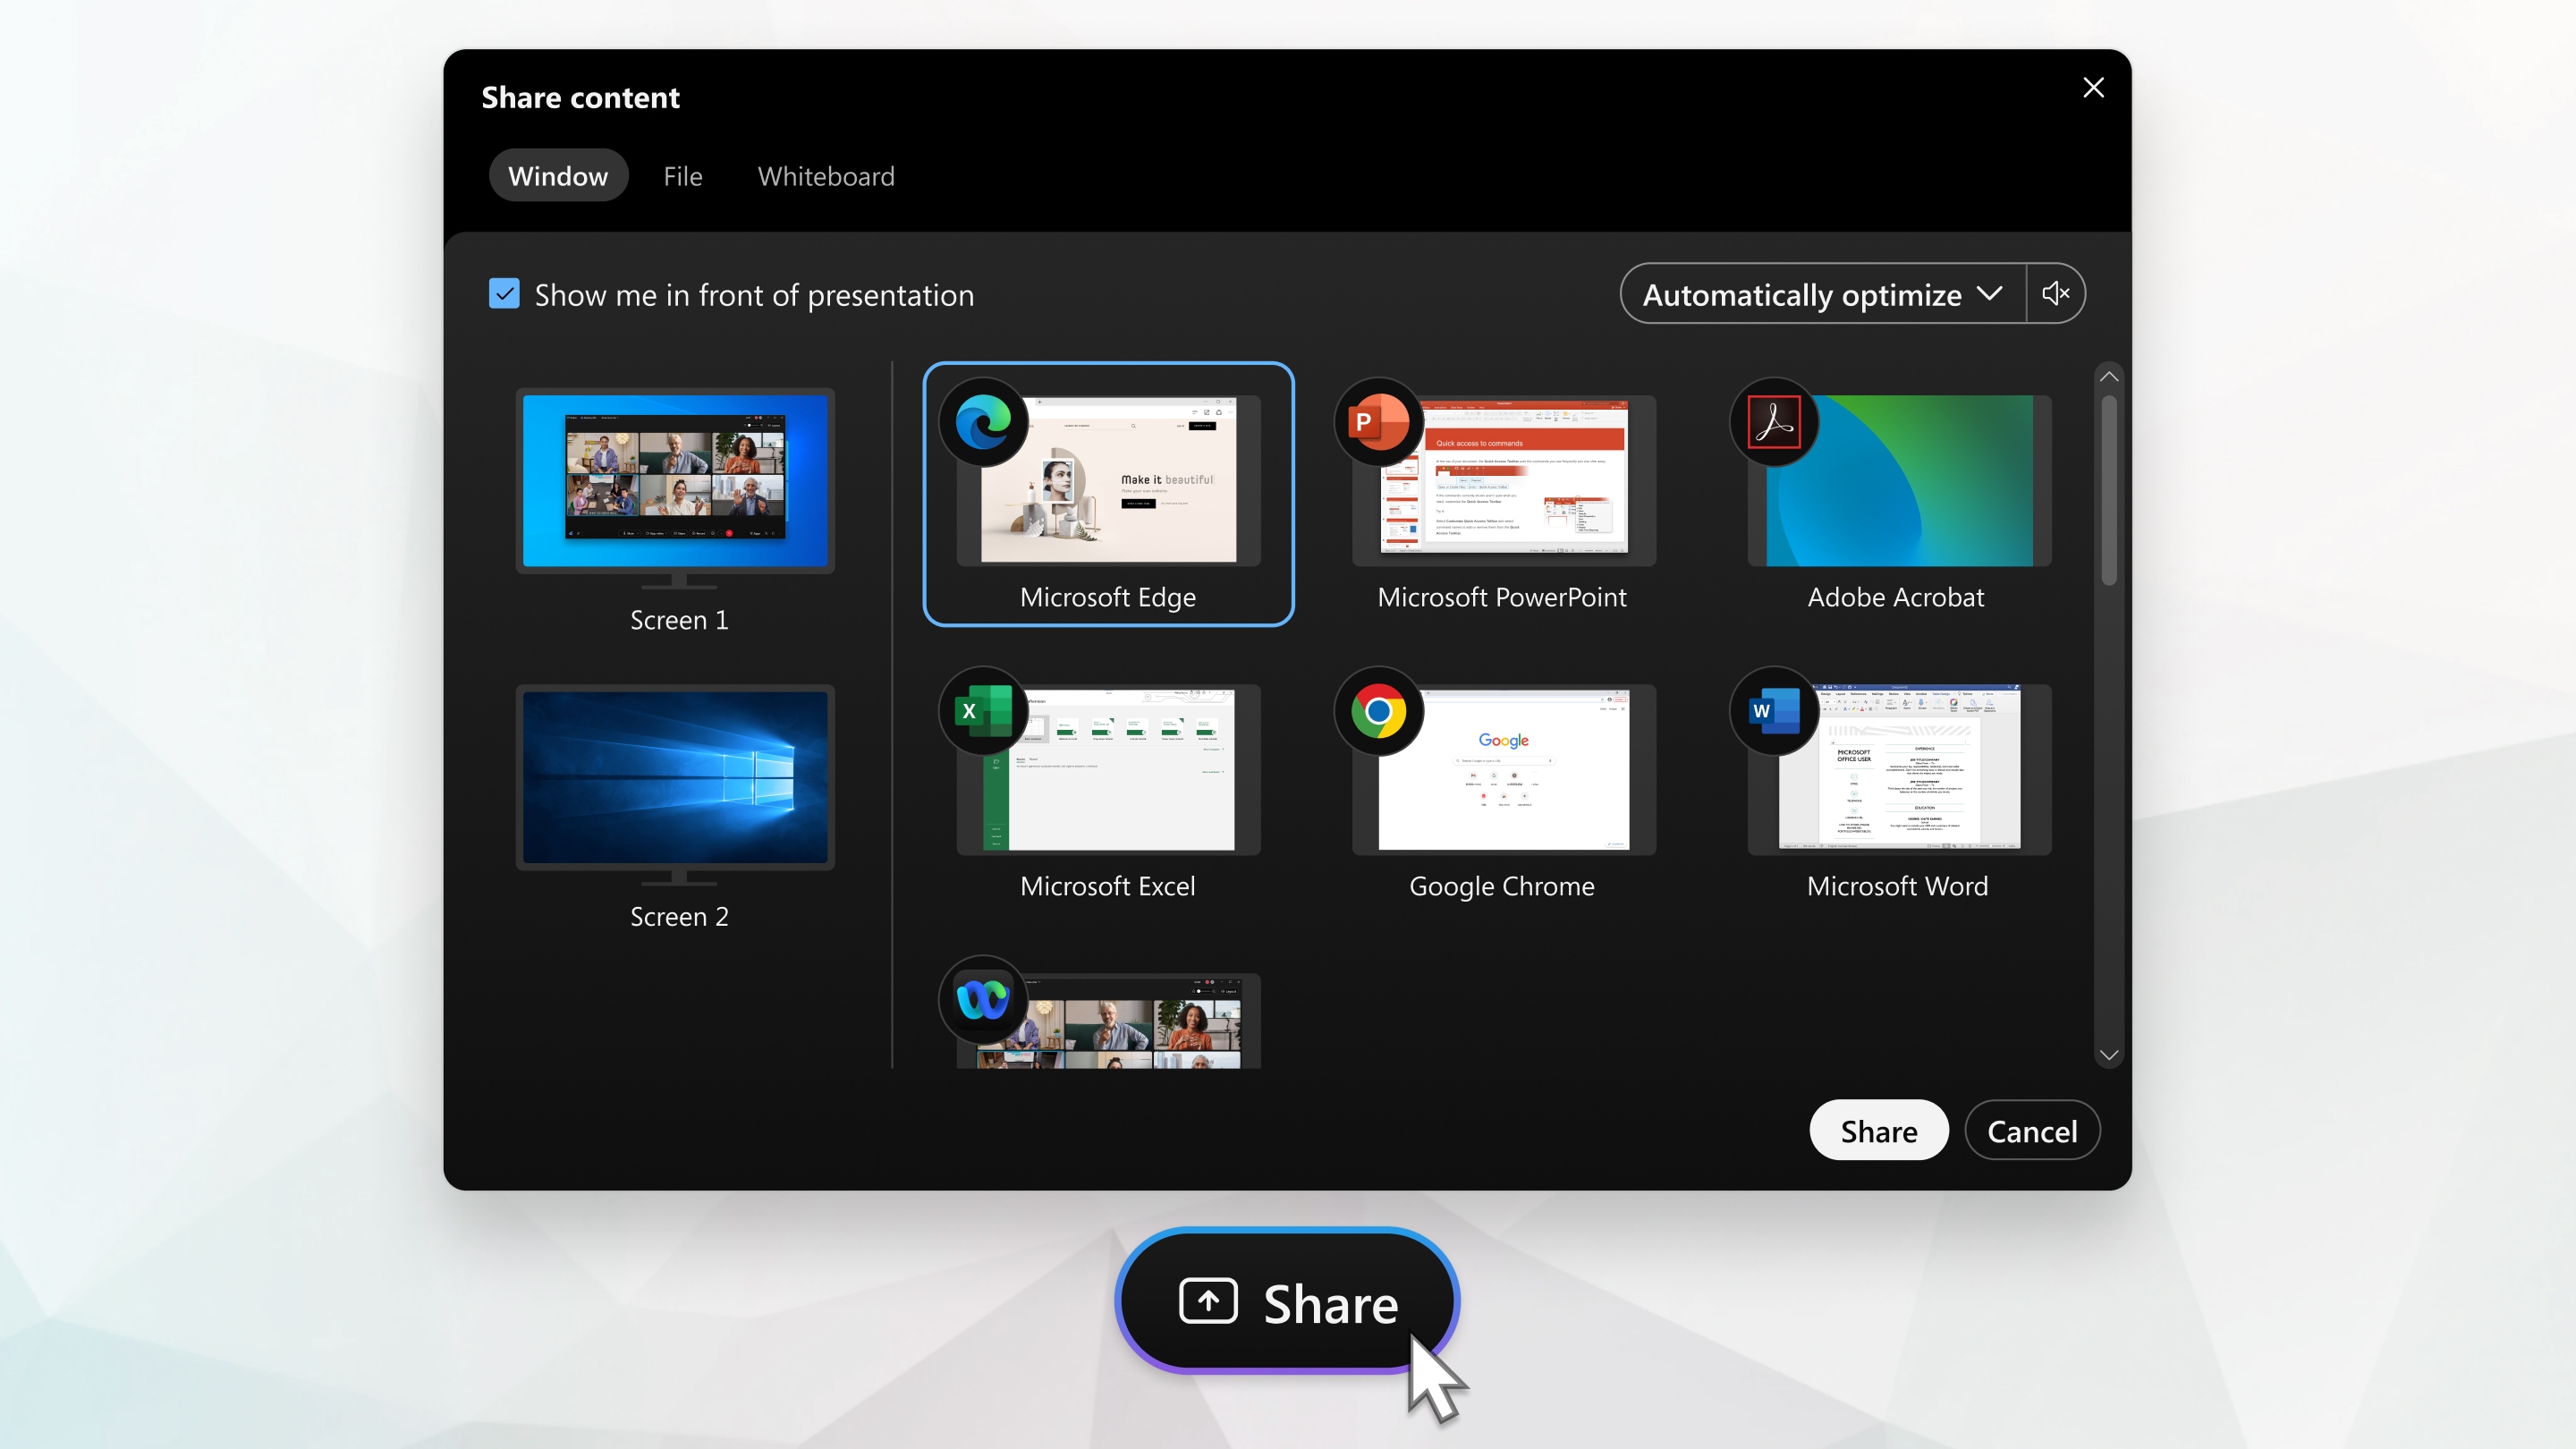
To share content during a meeting, from the meeting control panel, select Share  .
.
|
Go to the Share menu for more sharing options.
|
If you select Screen you will share your entire desktop. If you select an application you have open like Firefox, then you are sharing only the application Firefox and they will not see your desktop and will see a grey privacy screen instead. If you want to switch between different applications seamlessly without worry of privacy, select to share your Screen. If you have dual monitors it will present you with two screens instead of just the single monitor you see below. Select the monitor you want to share.
When sharing content, you have the ability to "Optimize for text and images" or "Optimize for video and motion". Choose the best option for the content being shared.
Note - When sharing content optimized for video and motion, you can share your computer audio so the attendees in your Webex Meeting can hear the video audio being played.
Record a Meeting
Your meetings are important. If your whole team can't be there, or if you want to remember what was said, record your meeting to share later. The recording includes the audio, video, and presentation.
While in your meeting, click Record  , and then Record to record right away. You and your participants see a red icon at the top right of your window when recording is in process.
When the meeting ends, you can find your recording on the Recordings > My Recorded Meetings page of your Webex site. If you recorded in the cloud, when the meeting ends, you receive an email with the recording link. Depending on file size and bandwidth, it can take up to 24 hours to receive your recording. Everyone has unlimited recording storage when recording in the cloud.
Calling
NOTES
- In order to place/receive phone calls using your campus phone number, you must have a Webex/Jabber Soft Phone Profile
- Request a Soft Phone Profile
- If you already have a Soft Phone Profile, click the blue "sign in" or "reconnect" option that appears in the bottom left corner of the Webex App
- Proceed through the Single Sign On prompt that appears
- You are now ready to place calls using your UW-Madison phone number with the Webex App
Call someone on Webex App using your Campus VoIP Line
Utilizing your UW-Madison phone number, you can place and receive calls from the Webex App. Navigate to the Calling tab in your Webex App and enter the phone number of the party you'd like to connect with.
- Follow the dial pattern to ensure you reach your intended party
Call someone on Webex App - VoIP Call
You can call anyone with a Webex account without any additional plans or services. If you’re connected to each other in the Webex App, you can call them on the Webex App. These are special types of calls that let you add guests to the call, share your whiteboard, and share your screens. You don't use their phone number; you just need to be connected to them in the app. Just look for the Audio  or Video
  icon.
icon.
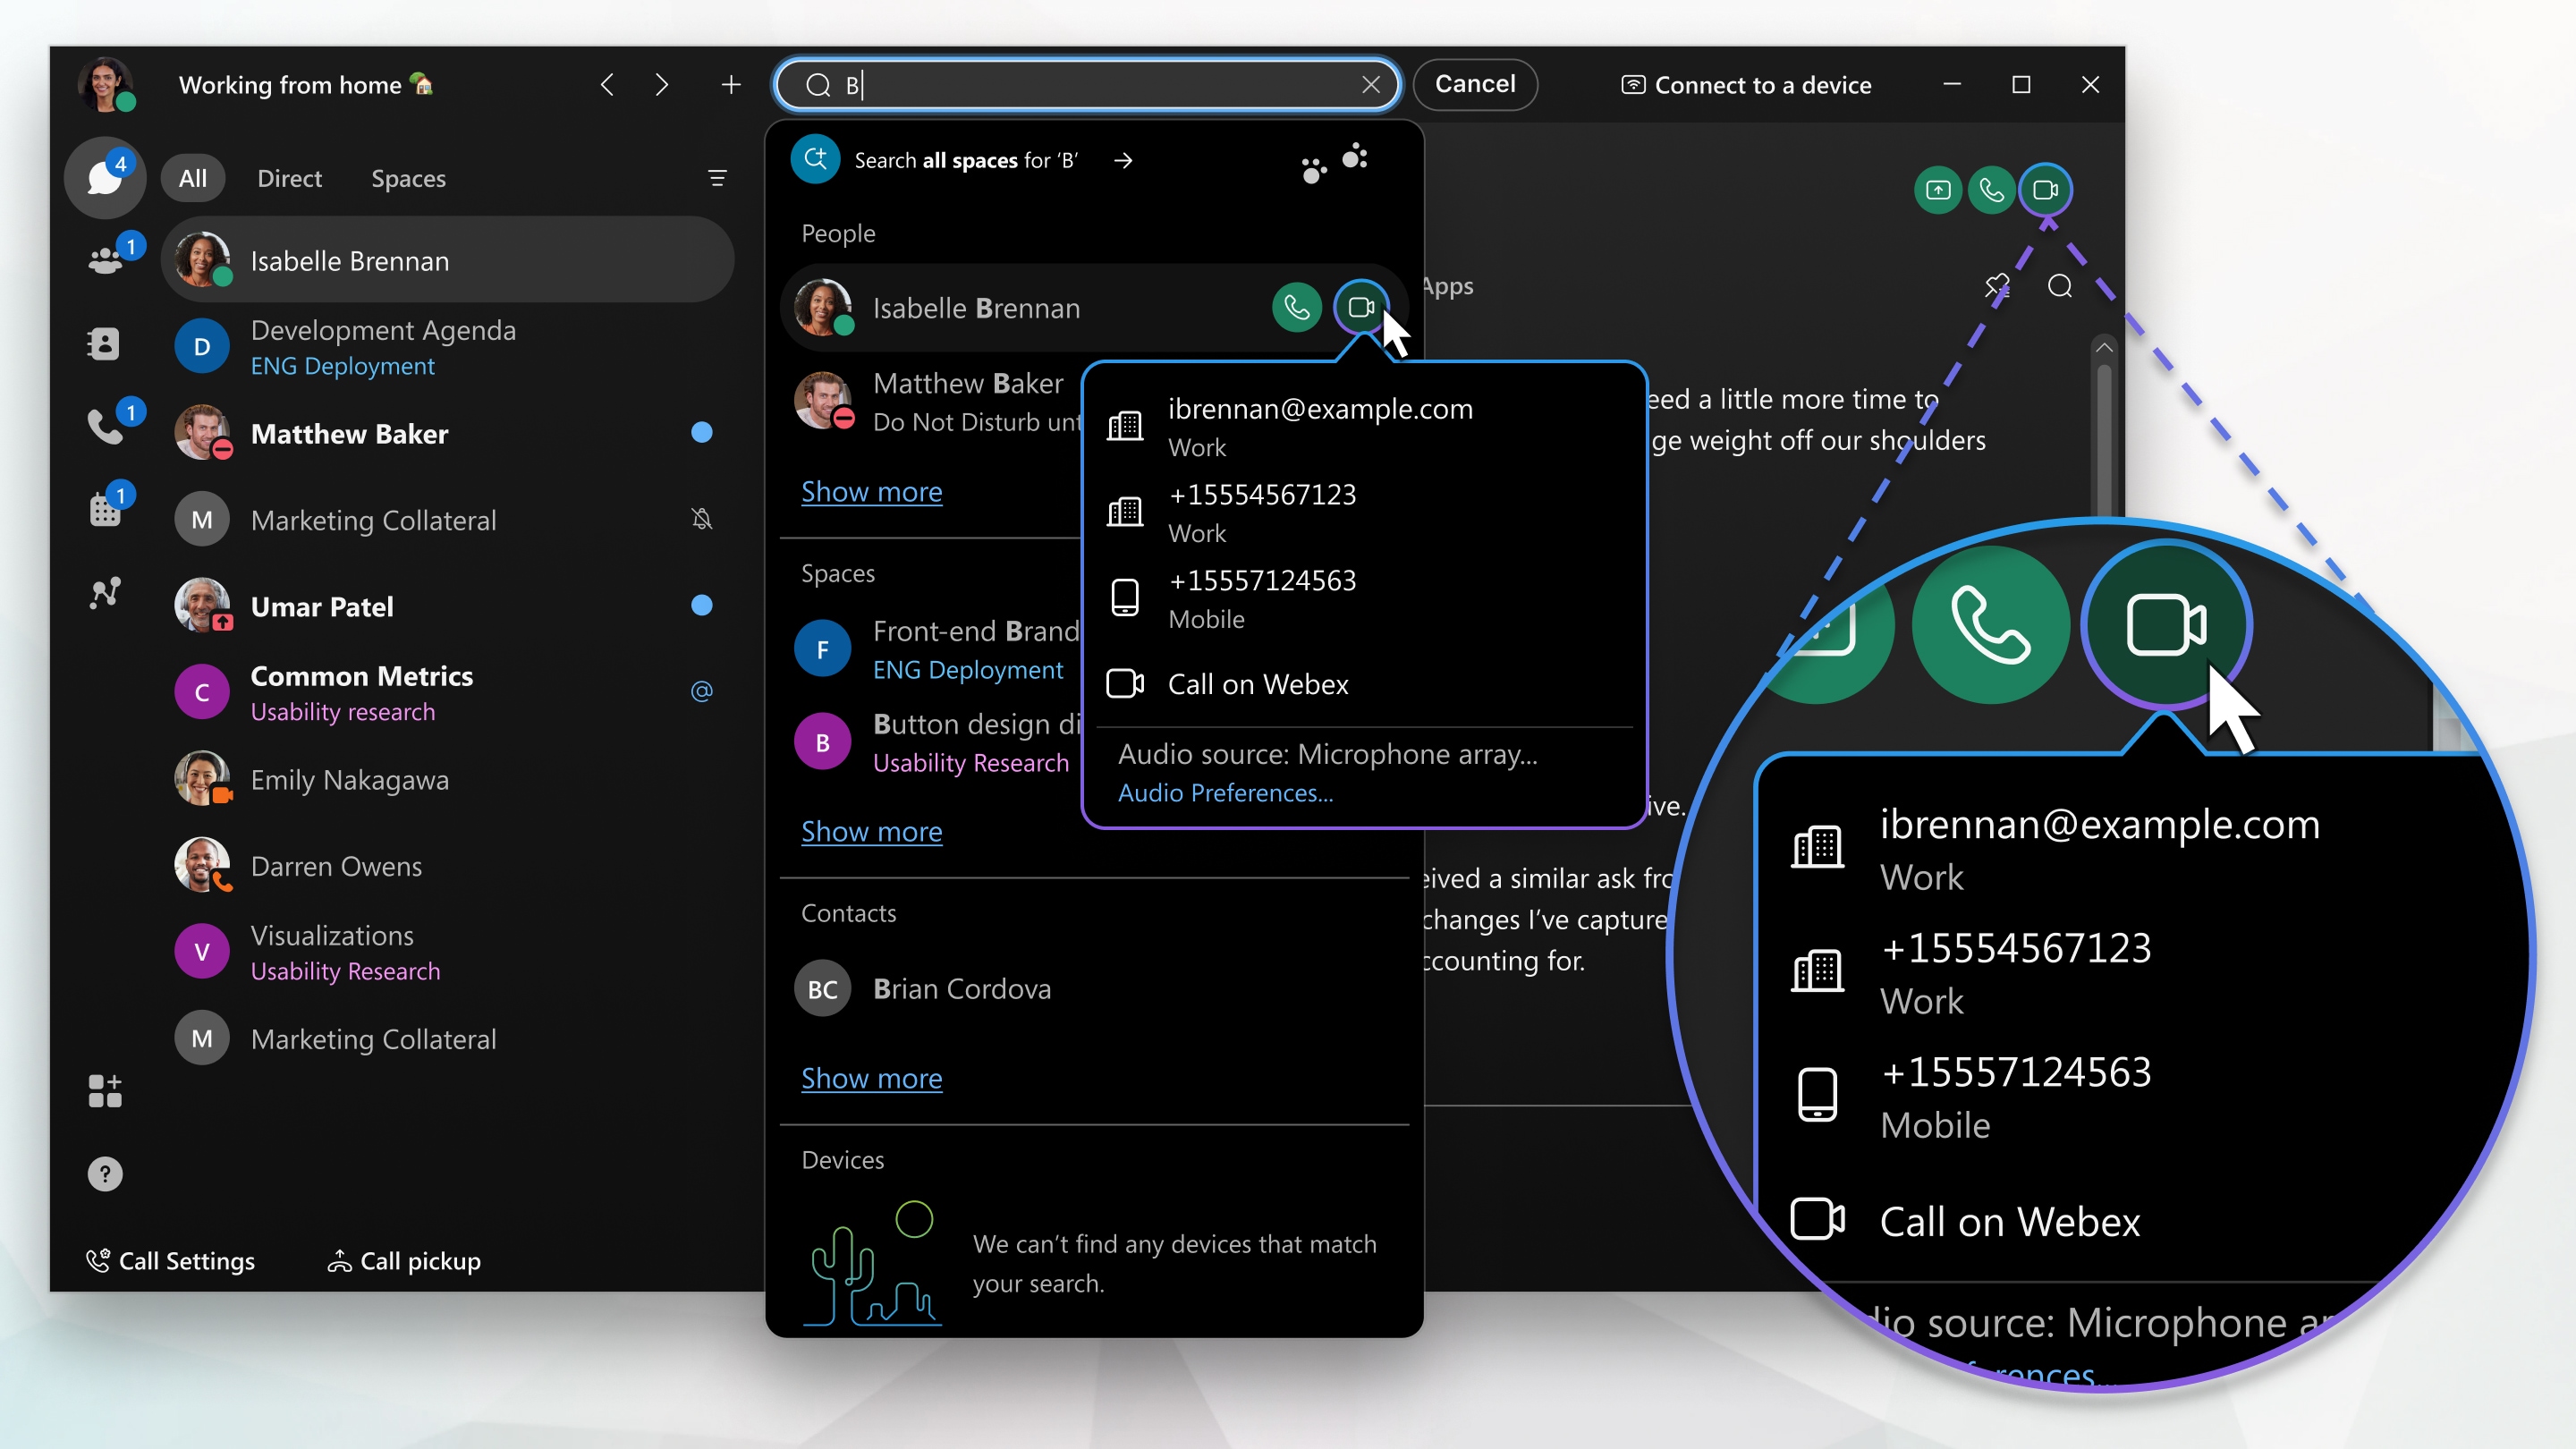
Customize your audio and video preferences
When you make or receive a call, the app automatically detects the audio and video devices you have connected to your computer, such as a headset. You can change your settings right before you make a call, like if you want your video on or you just want it to be an audio call only. You can also make some of these your default settings, if you'd like.
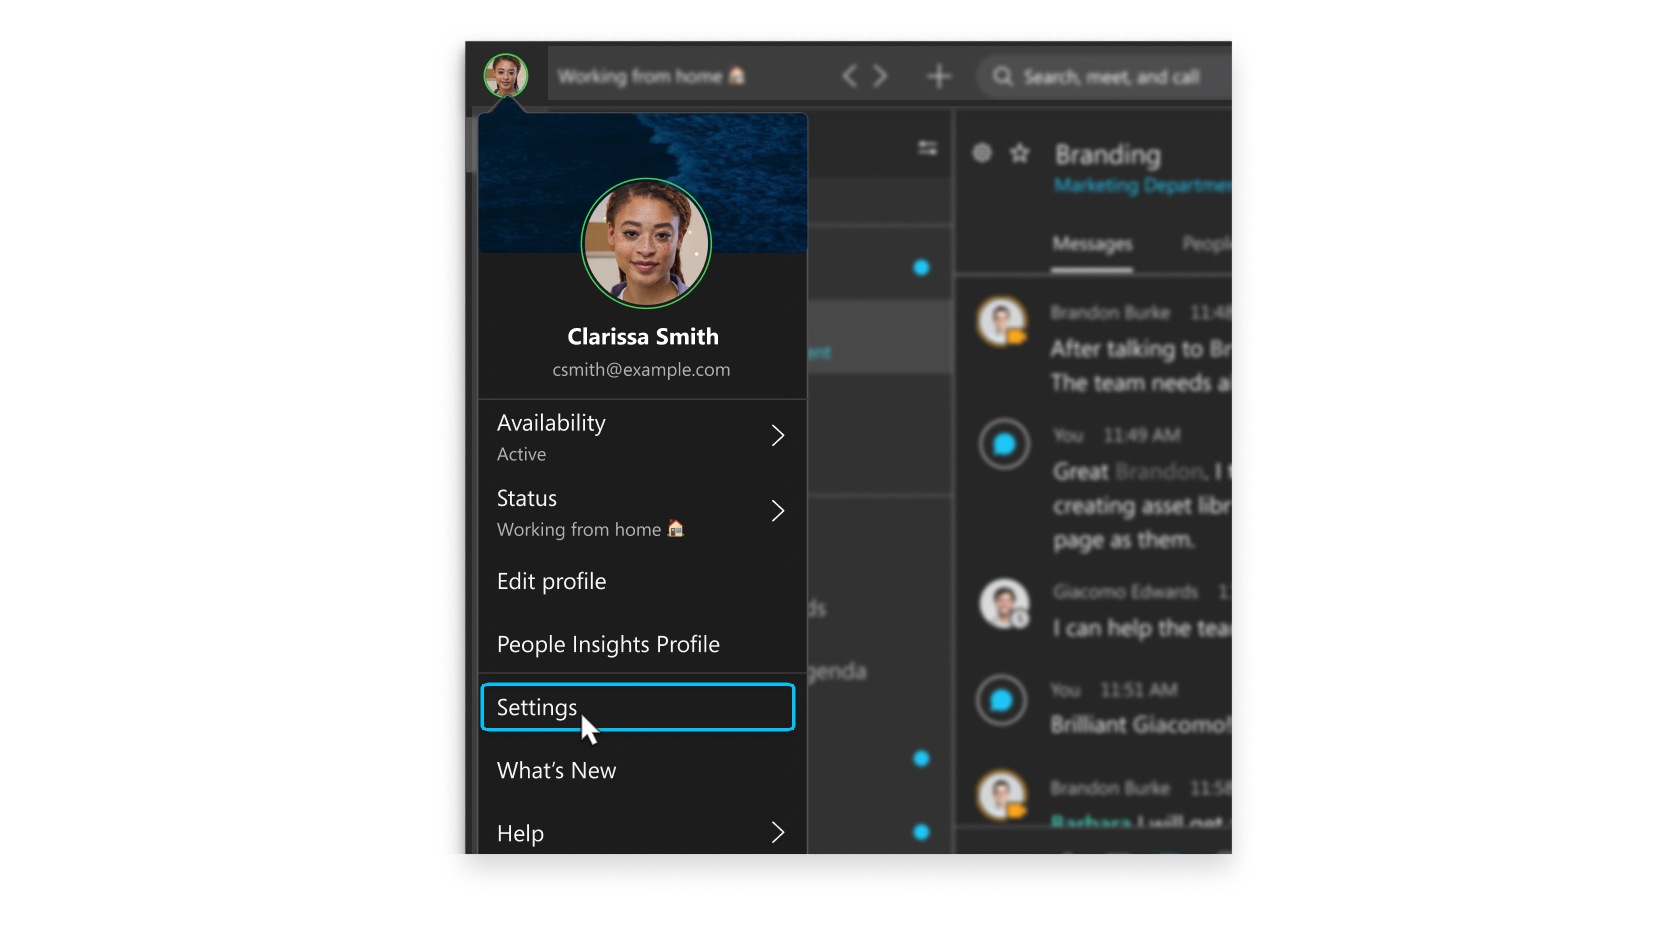
You can customize your video settings:
-
Choose what camera to use.
-
See yourself like you're looking in a mirror (Mirror my video).
-
Blur your background or use a preset or custom virtual background.
You can also personalize your audio settings:
-
Choose a headset, speaker, or microphone.
-
Reduce disruptions with background noise removal and speech enhancement.
Voicemail
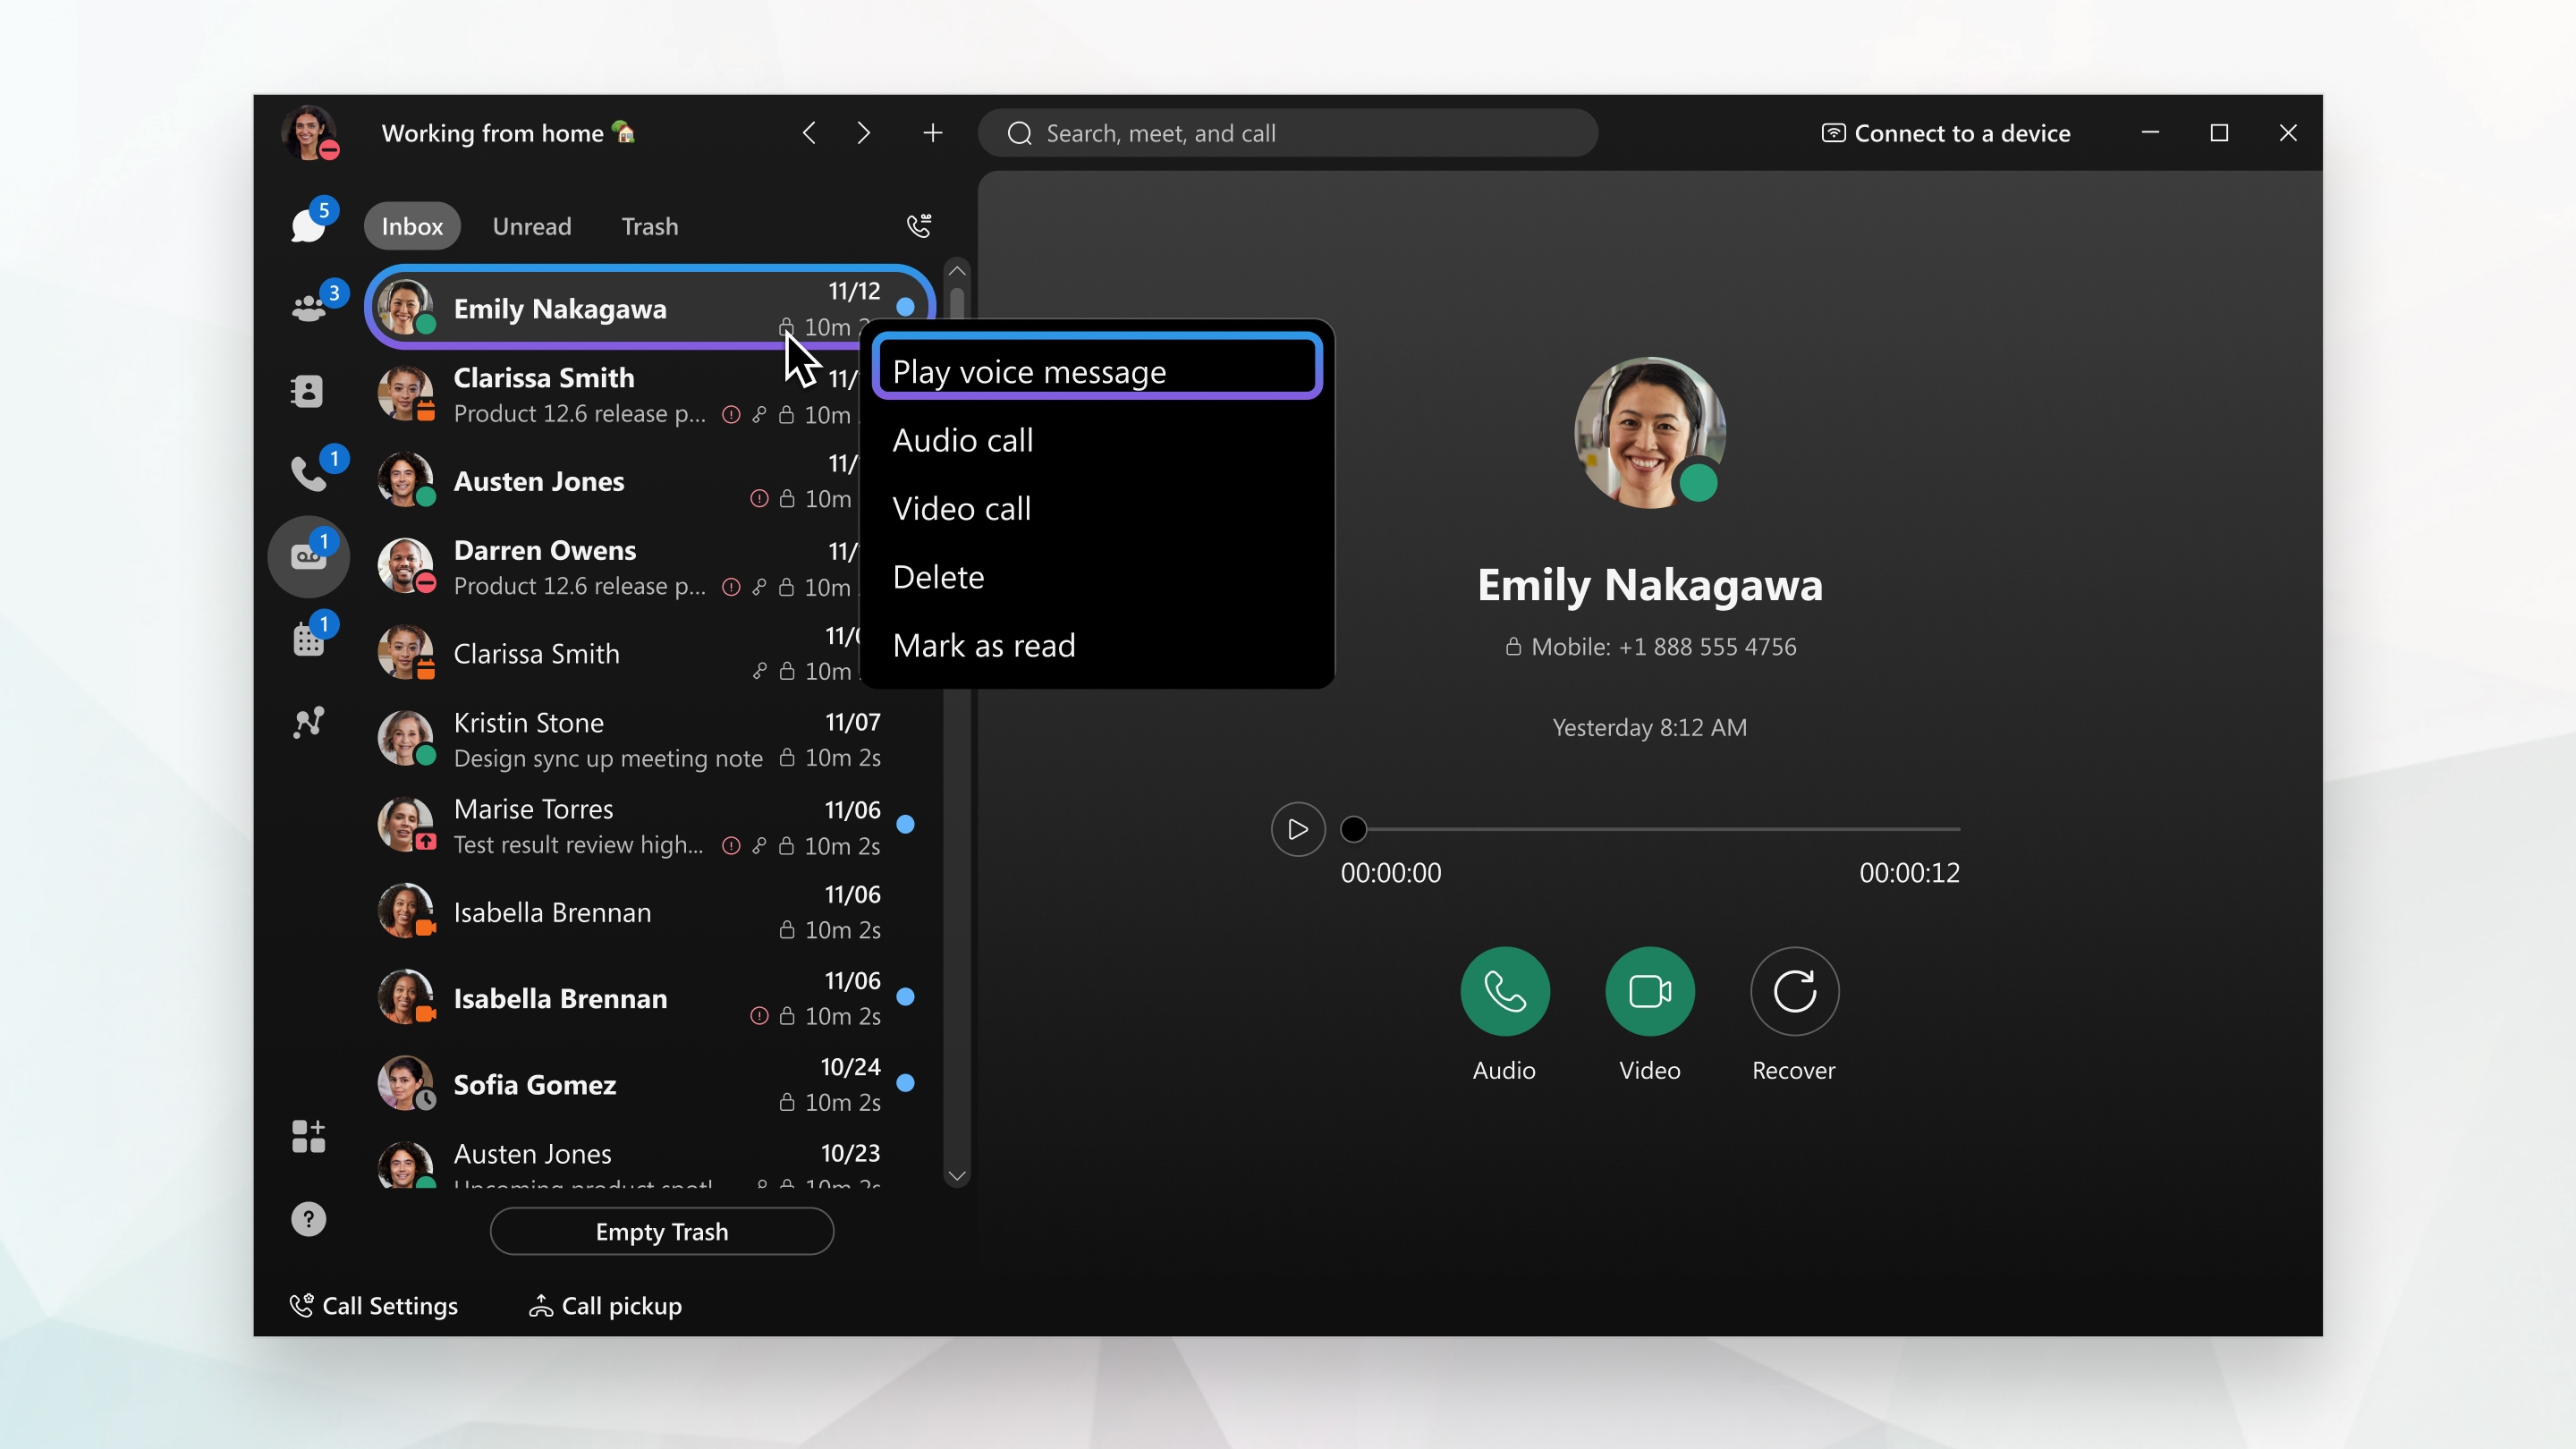
You can listen to your voice messages right from the app and what you do with them after that depends on your calling service.
NOTES
- You do not need your PIN to access voice messages directly in Webex App.
- The PIN is ONLY required when dialing into the voicemail box.
- Your NetID must be assigned to your mailbox in order to view your messages directly in the Webex App.
| 1 |
Go to Voicemail
You have a few other options at your fingertips: call the person back with audio or video, delete the message, or mark the message as read. Your voice messages may show one of these indicators:
|
| 2 |
After you listen to a message, you can send it to your Trash folder. Right-click the message and choose Delete. If you need to recover the message because you accidentally deleted it, go to your Trash folder, right-click the message, and then select Recover. |
|
If you don't see the Voicemail option in Webex App, it means that your netID hasn't been linked to your voicemail box. But, you can click Call Voicemail and follow the prompts to listen to your messages. You can also access more voicemail features, such as creating a personalized greeting, sending a message, and more. |
Listen to Voicemail Messages From Another Phone Number
- Go to Voicemail
 and select Call Voicemail
- Enter your ID (7 digit phone number of the mailbox you want to access) followed by #
- Enter your PIN followed by #
Delete your messages
You can delete your messages right from the app, but you can only delete one message at a time. This is the same for deleting messages from the Web Inbox.
Calling Troubleshooting
Trouble Questions & Solutions
Question 1 - Why can't I make/receive a phone call using my campus phone number?
Solution 1 - In order to place/receive phone calls using your campus phone number, you must have a Webex/Jabber Soft Phone Profile
Question 2 - I have a soft phone already, but why can't I still place/receive phone calls using my campus number?
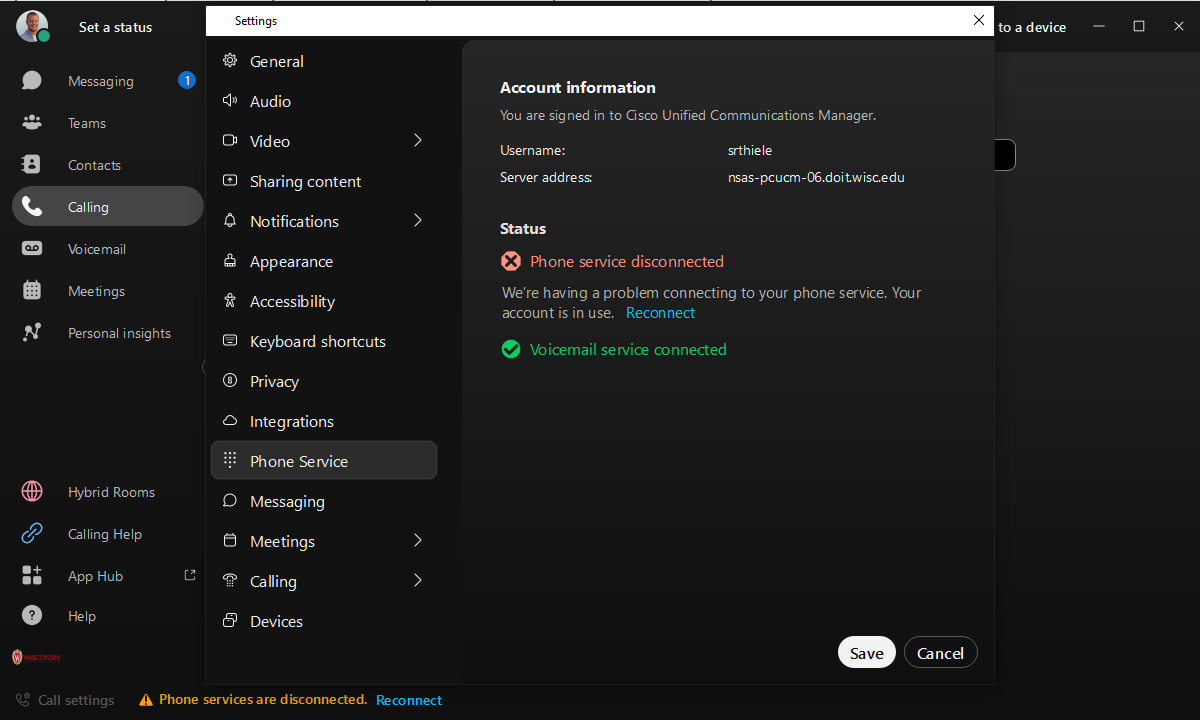
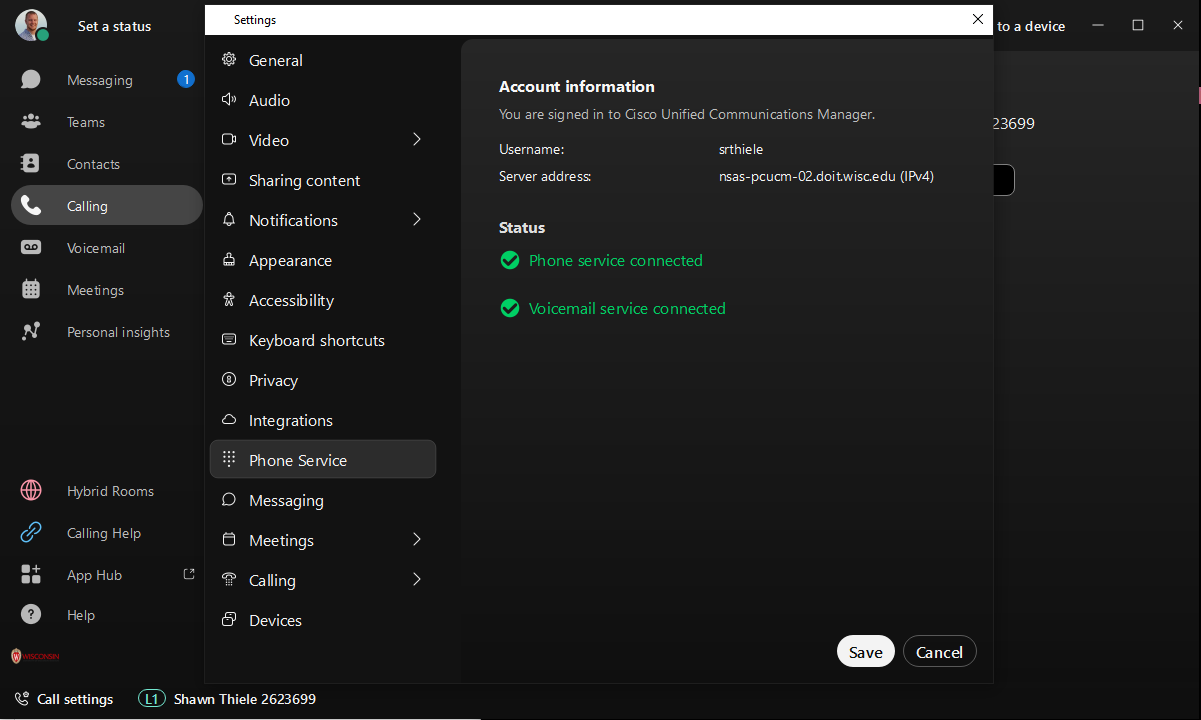
Solution 2 - Make sure you are signed into the phone service in your Webex App.
Select the "Reconnect" or "Sign in" link options that appear.
Note - Reconnect will appear if you've signed in before. Sign in will appear if you haven't signed in before.
Notes
- Call Settings AND L1 (Line 1) will appear if you have more than one campus phone number assigned to your soft phone profile.
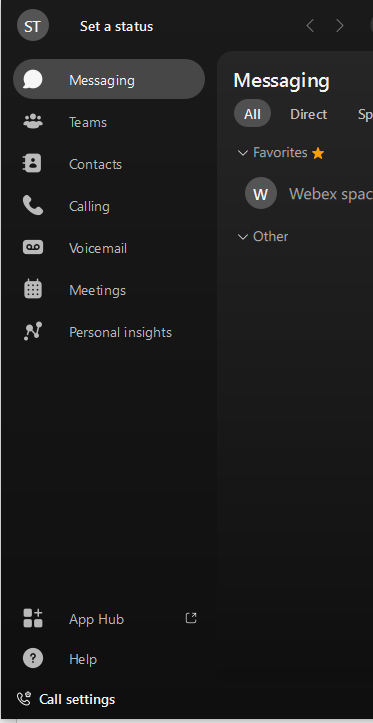
- Call Settings will only appear if you only have one campus phone number assigned to your soft phone profile.
Question 3
Why is my audio not working even though I have the correct settings?
Answer 3
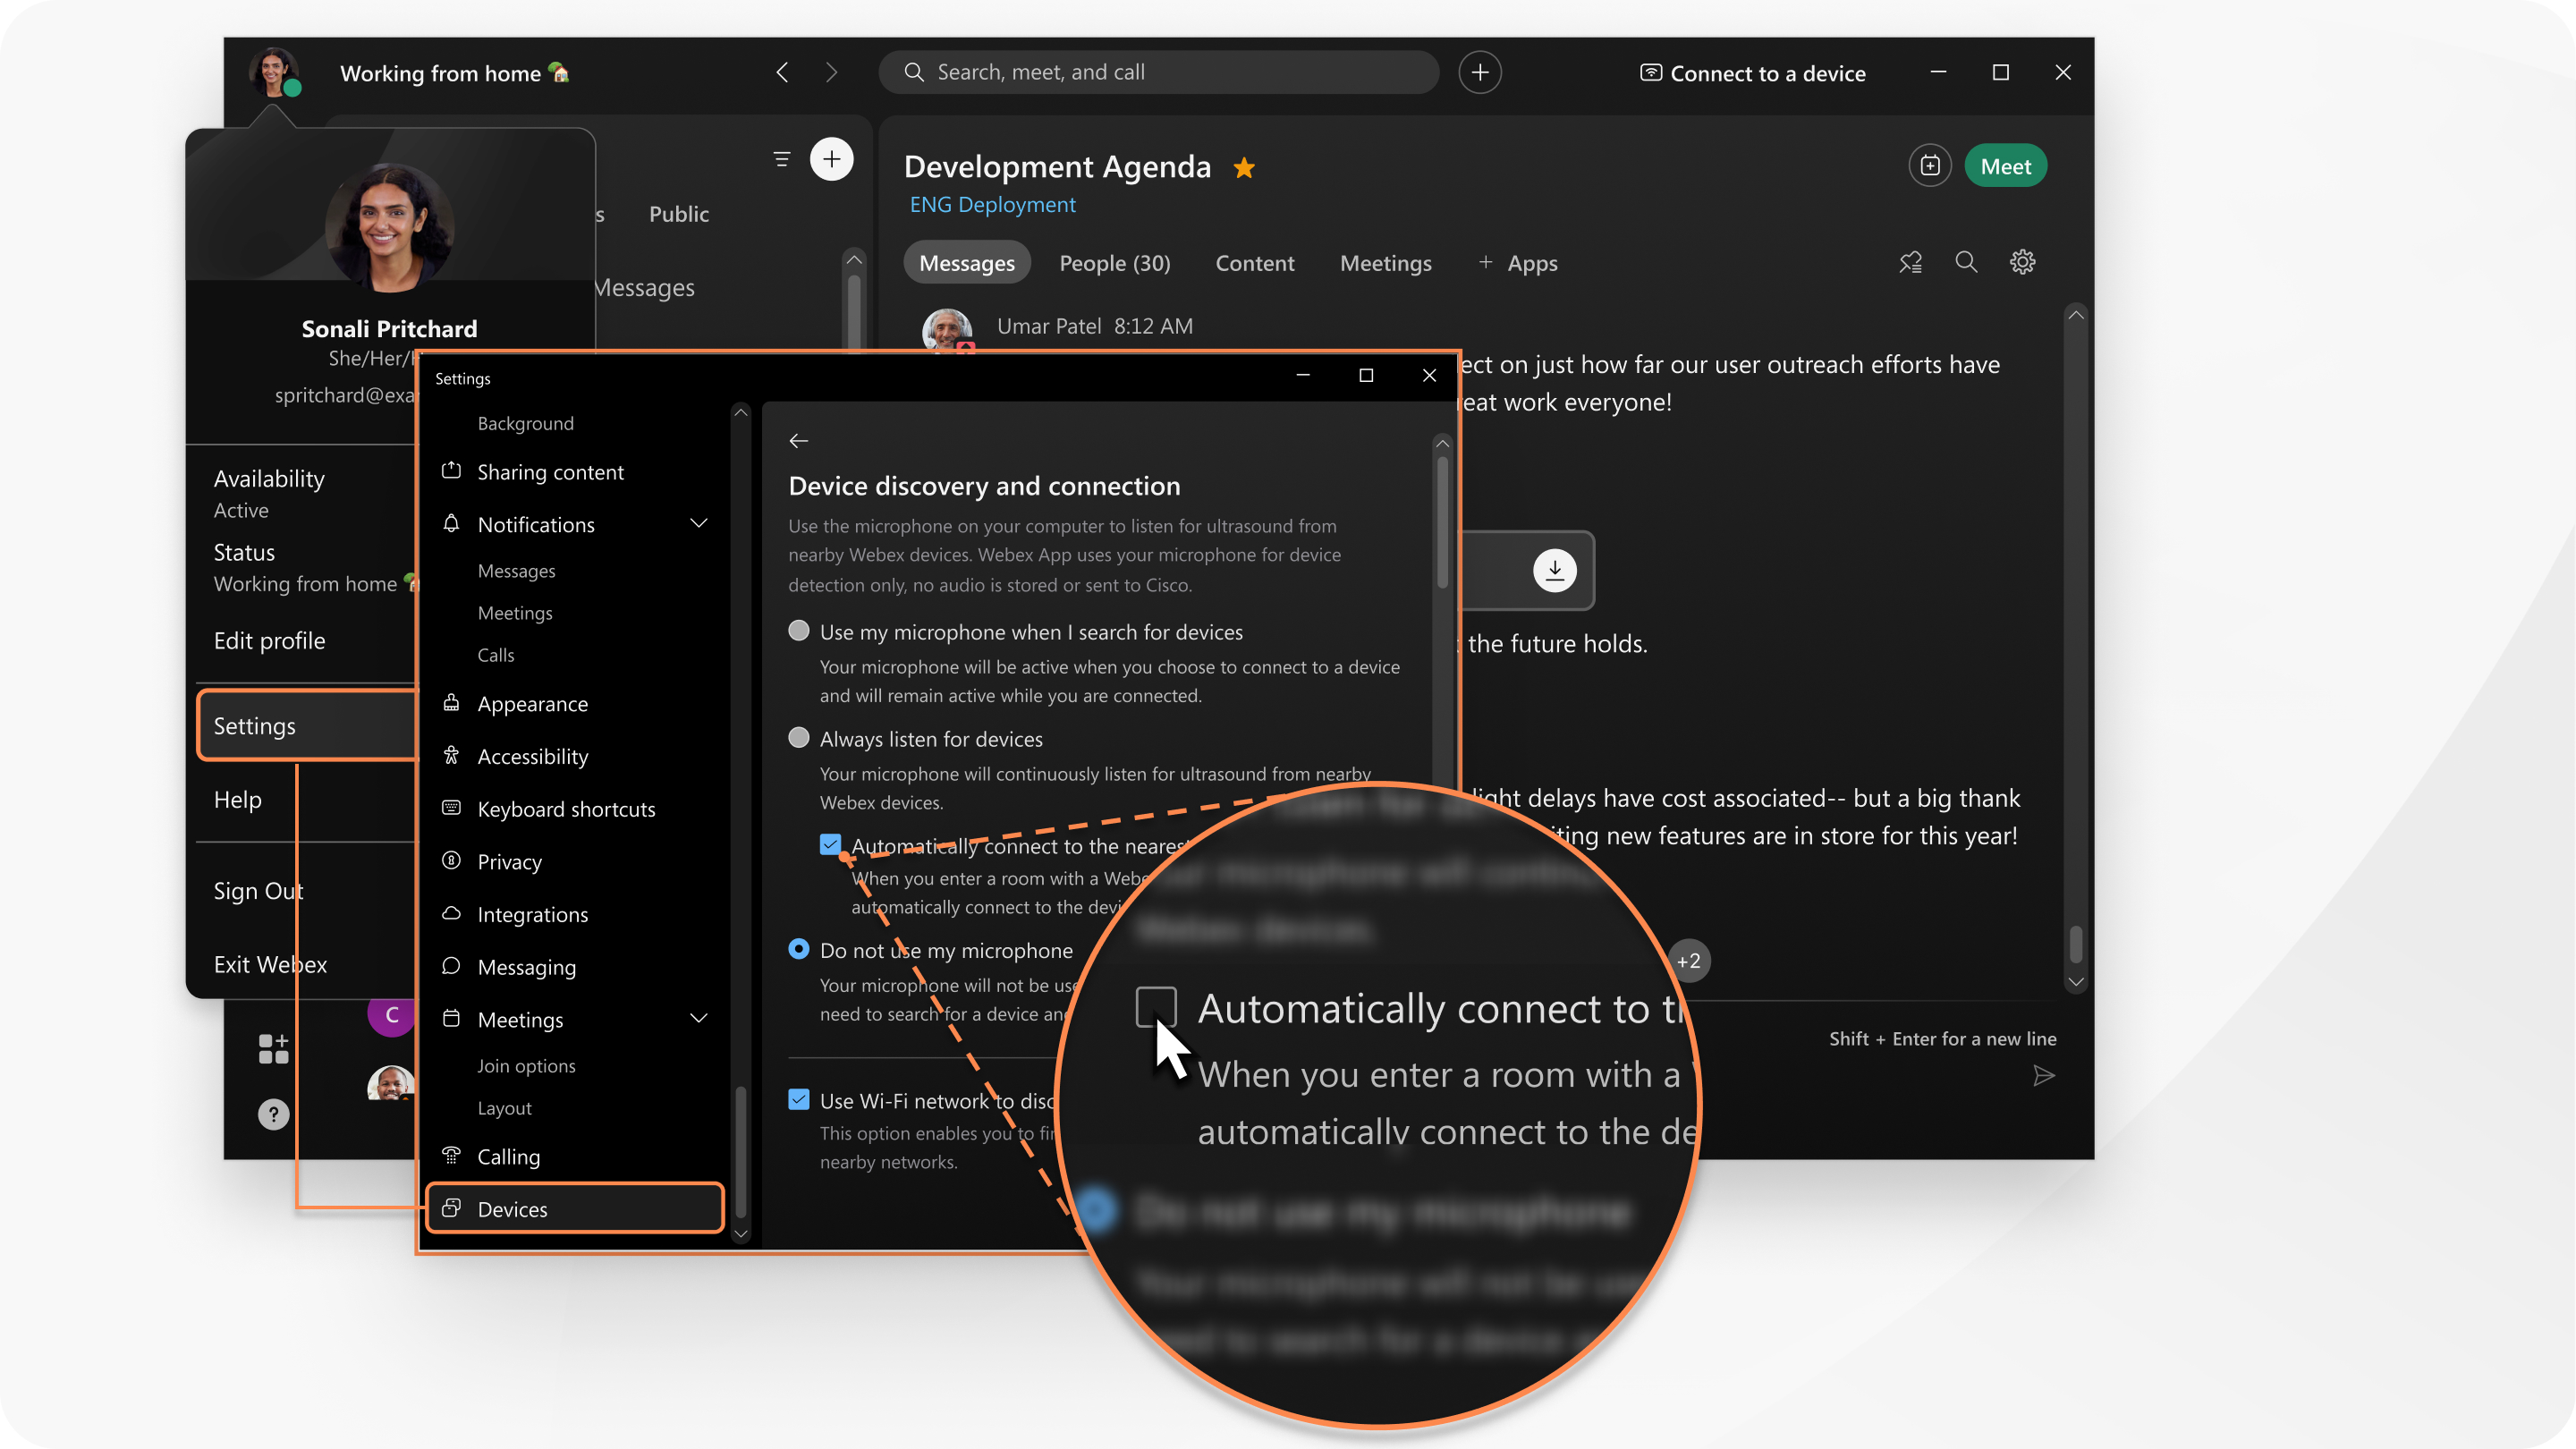
- Make sure your desk phone is not connected to your Webex App. If your desk phone is connected to your Webex App, you can disconnect by selecting the device in the top right corner of your application and choose Disconnect
- You can disable this by following the instructions shown below.
This is a Cisco product- for more information see https://help.webex.com

