Topics Map > User Guides
Topics Map > REDCap
REDCap: Data Resolution Workflow
Setting User Privileges |
Data Viewing Rights & Record Locking |
Verifying Data Fields |
Data Queries |
Data Quality |
Guidance for Monitors |
Overview
The Data Resolution Workflow allows users to open a workflow for documenting the process of resolving issues with data in the project (i.e. opening, responding to, and closing data queries). This functionality is helpful for projects that are working with monitors. An overview video is also available here: Data Resolution Workflow Overview.

Setting up the DRW is done in Project Setup > Enable optional modules and customizations > Additional customizations. Check the box next to the “Enable the Field Comment Log or Data Resolution Workflow (Data Queries)?” and then select “Data Resolution Workflow” from the drop-down.
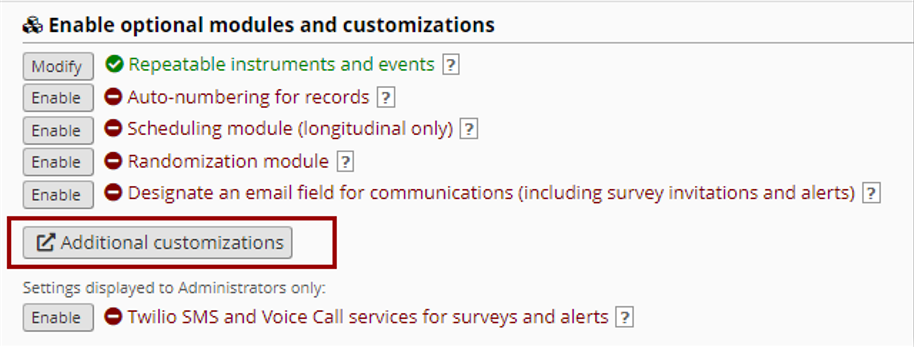

Once Data Resolution Workflow is selected, an additional checkbox will become available. This checkbox option offers to hide any closed or verified data queries from the Data Quality results. If queries are no longer being followed up on this can help for a cleaner experience with existing queries.

Setting User Privileges
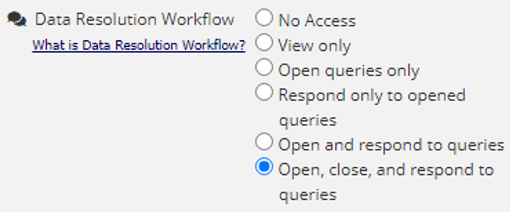
Before the users in your project can begin utilizing the Data Resolution Workflow, they must first be given user privileges to do so. Navigate to the User Rights page where you will see a new section of privileges specifically for the Data Resolution Workflow. You may give any user one of the following privileges: no access, view only, respond only, and open/close/respond to queries. All users will initially have 'no access' privileges.
Here are some example privileges based on common roles within a clinical project. If needed, they can be updated for each protocol.
Data Viewing Rights & Record Locking
While these next two areas are not specific to the DRW space, they are also recommended when working with a Monitor.
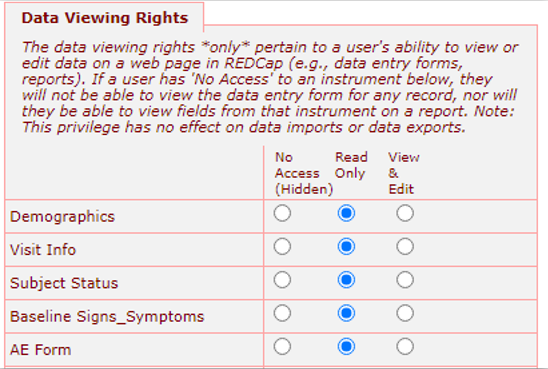
The Monitor role in a project should be set so that they only have ‘Read Only’ access to each instrument. This prevents them from changing a fields value.
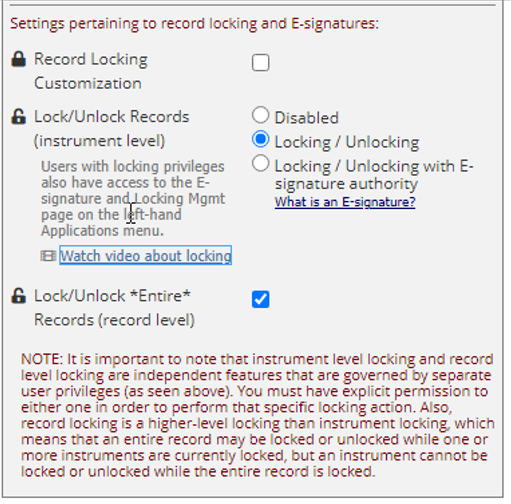
Additionally, the Monitor and Project Managers should be given the ability to lock/unlock instruments and records. This access allows them to prevent other users from making a change to instruments after they have been verified by a monitor.
There is currently no way to verify all fields on an instrument, so this must be done for each field (more on this in the next sections). Locking an instrument may be another option for the monitor to indicate all fields were ‘verified’.
Verifying Data Fields
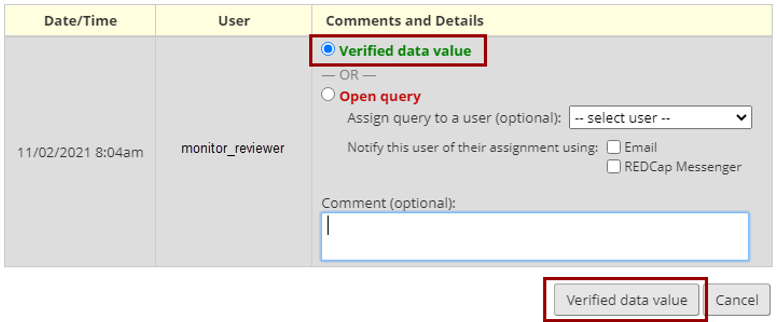
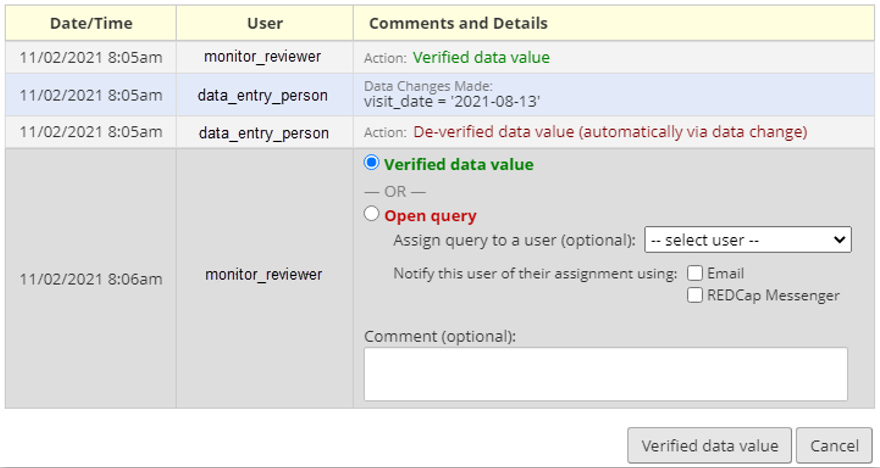
If you want to denote that an individual data value has been certified as correct, you can verify the field.
REMINDER: There is currently no way to verify an entire instrument (all fields). One option to indicate an entire instrument has been verified is to lock it (found at the bottom of the instrument). Locking it will not allow users to change any values unless it is unlocked by someone with appropriate access.

Opening Data Queries
An open data query implies that there is an issue with a data value that needs to be resolved. Opening the query initiates the process of investigating the issue and resolving it (i.e. closing the query). The most typical place to open a data query is on a field on a data entry instrument.
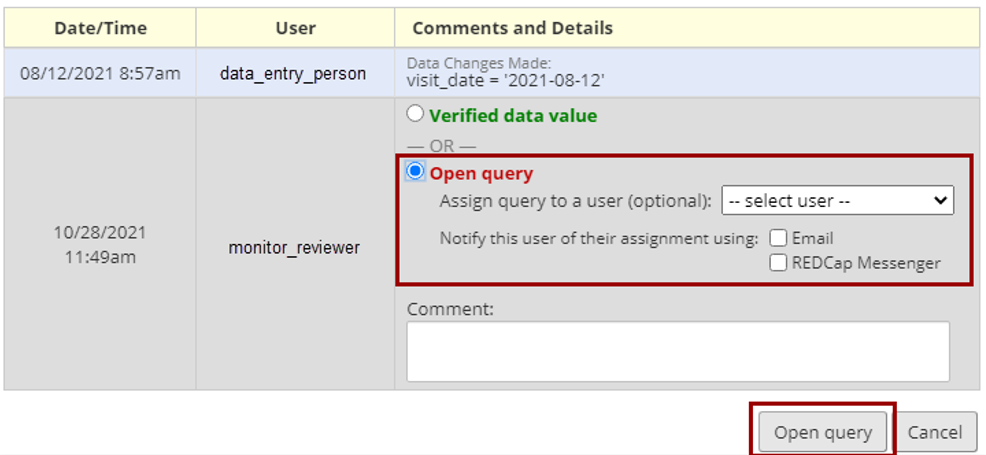
On the instrument, click the gray speech bubble next to the field to open the Data Resolution Workflow pop-up.

This will allow you to open a new query or to verify a data value. You must leave a comment (required) along and you have the option to assign that particular data query to a specific user (optional).
Responding to Data Queries
Any user with 'respond' privileges will be able to respond to an open query (even if it is assigned to a specific user). On the instrument, a speech bubble with a red circle and white exclamation point will indicate when a field has an opened query. Click on that icon to open the Data Resolution pop-up and view or respond to the query.

The user may select a response type (e.g., typographical error) and must provide a comment (required). They also have the option to also attach a file.
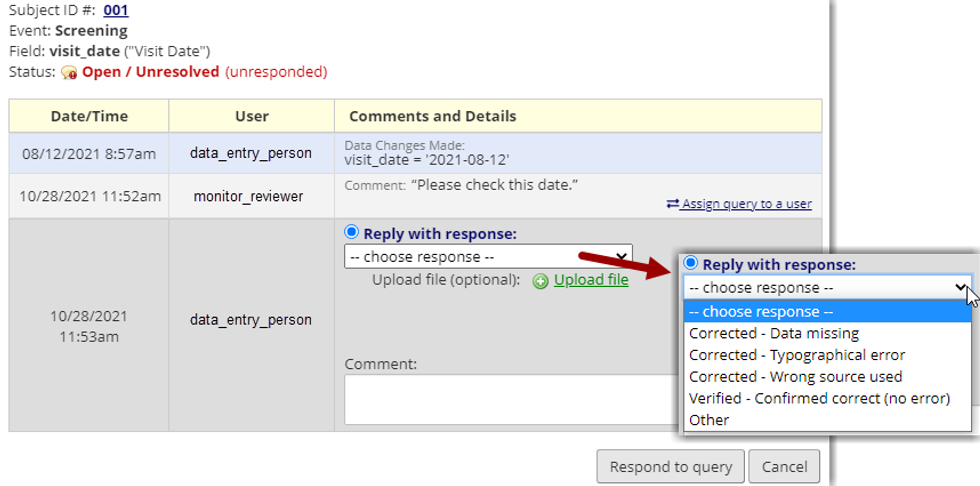
A user must also remember to update the data value in the field if they haven’t already. They can either access the field within the record status dashboard or select the hyperlinked subject ID number found at the top of the Data Resolution Workflow pop-up. Selecting the hyperlinked subject ID number will take them straight to the field in question.
Clicking on a field that has an open query will also result in a pop-up button allowing the user to “Save and then open the Data Resolution Pop-up”.

Closing Data Queries
Once a query has been responded to, a user with 'close' privileges may close the query, after which it will be considered resolved.
A query that has been responded to will appear with a speech bubble with a white circle and a blue exclamation point.

Click on that icon to open the Data Resolution pop-up and view or respond to the query.
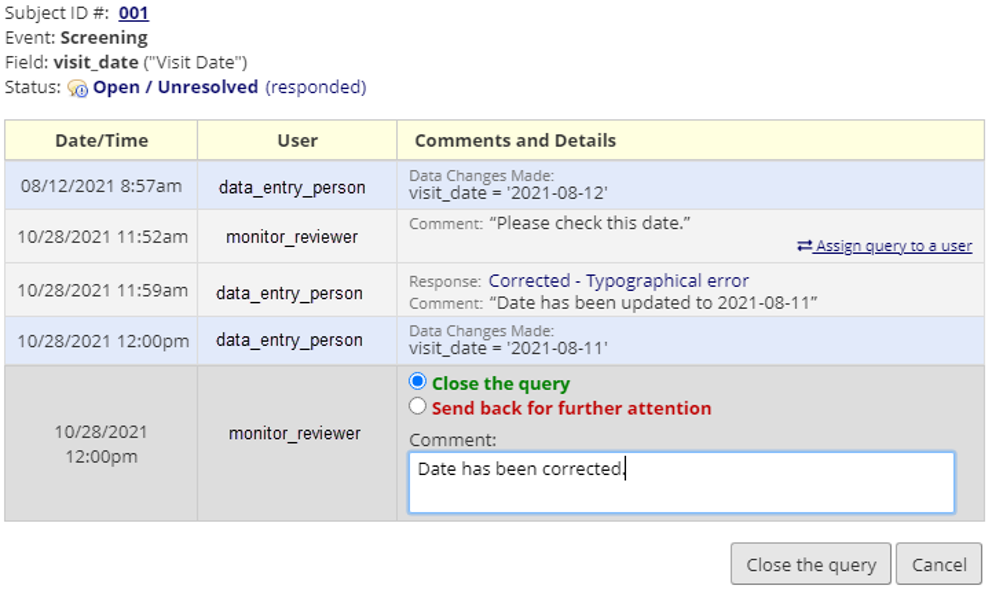
A query that has been closed will appear with the speech bubble and a green circle and a white checkmark.

Data Quality and Resolve Issues Section
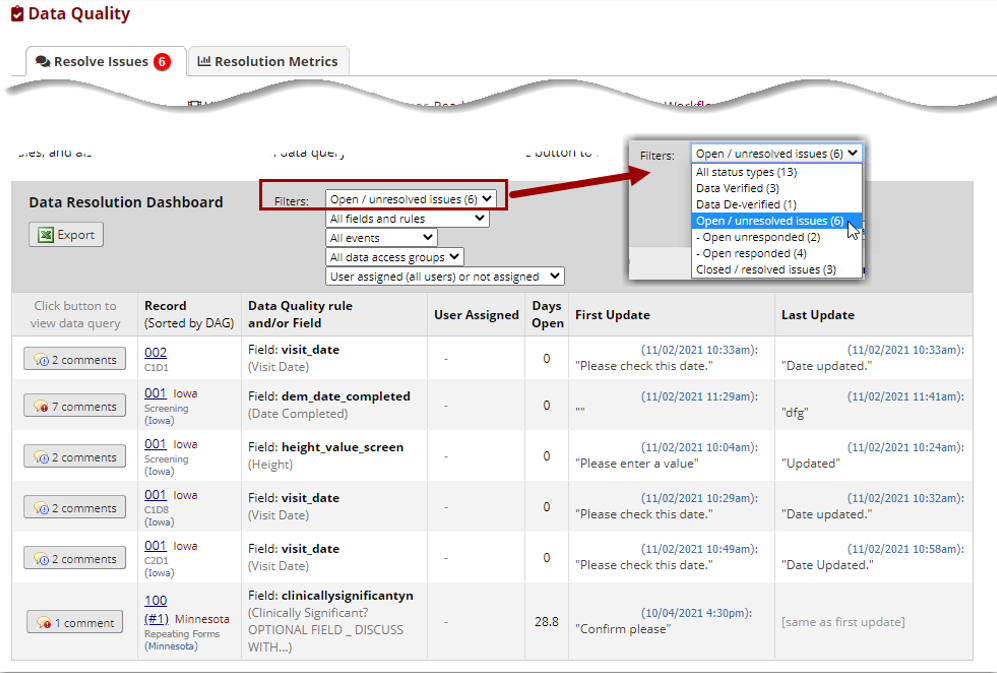
While data queries will be opened either on a data entry instrument or via the results of a Data Quality rule, users will most likely respond to and close queries on the 'Resolve Issues' page (seen on left-hand menu under applications). NOTE: Depending on your user rights, you may have different access to the applications shown in this screenshot.
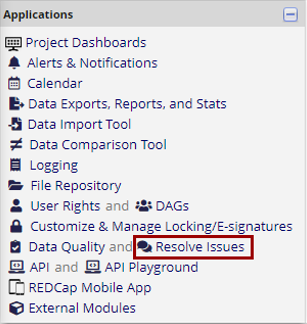
This page will serve as a dashboard that will neatly organize all queries (both open and closed) so that they may be reviewed and so that any open queries may be easily responded to and closed. This page can serve as a nice to-do list for addressing all open queries. Filters also allow users to easily review different types of queries, queries on specific events or for specific sites (if DAGs are being used).
Within the Resolve Issues page there is a tab for “Resolution Metrics”. It can sometimes be useful to view metrics with regard to your data queries, such as a count of how many queries are open or closed, the average time that users respond to an open query, the top 5 most queried fields, or the average time to query resolution. This page will provide some useful statistics and including helpful bar charts for viewing progress and activity. If your project utilizes Data Access Groups, it provides even more useful charts to compare the progress of the different groups and to stratify their activity.
Data Quality Page
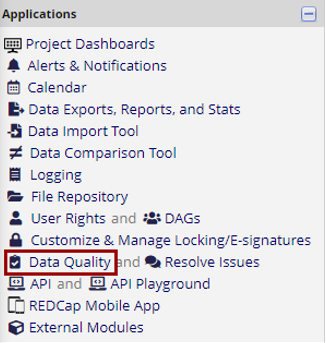
Some users may additionally have access to the Data Quality application. When used with the Data Resolution Workflow, queries can be opened when viewing the results of an executed Data Quality rule. You can also create your own rules to look at specific things within your project, like certain ranges for lab values, or ensuring eligibility.
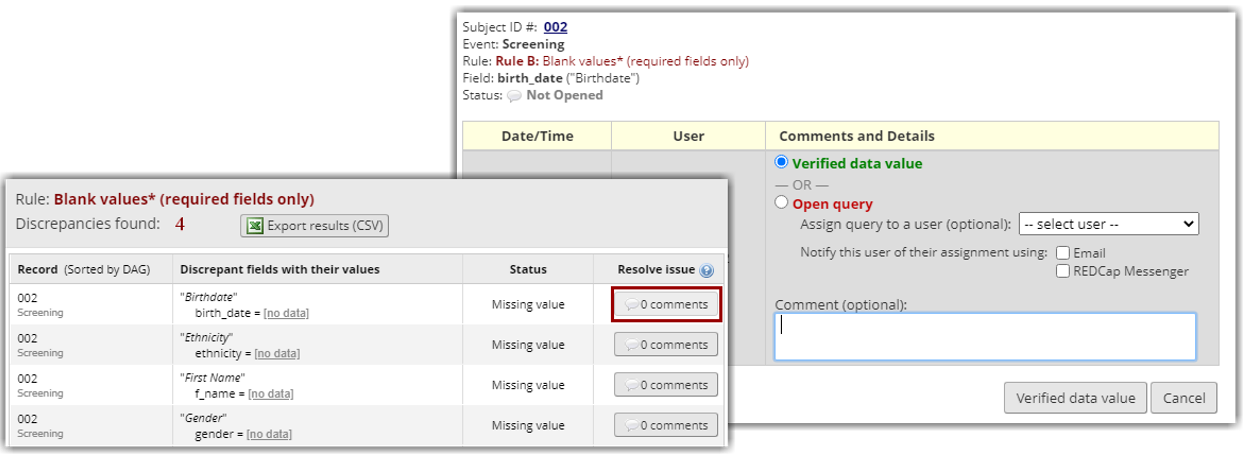
In this example below, rule B (Blank values – required fields) was run and shows 4 fields in need of addressing. Select the comments button to open the Data Resolution Workflow pop-up.
Users with access can then respond to queries here or use the hyperlinked subject ID within the pop-up to take them straight to the field in question.
Recommended Access for Study Monitors
Many studies rely on a study monitor that will need to access and review data entered into REDCap. The study monitor will need to have a REDCap account with specific permissions assigned within a project that will allow them to access the Data Resolution Workflow.
Recommended DRW Permissions for Monitors:
- Open Queries
- Close Queries
- Respond to Queries

Recommended Data Access Permissions for Monitors:
- Read Only Data Viewing Rights
- No Access to Data Export (unless there is a study specific reason for the monitor needing exports)


