WiscIT - Closing Duplicate Incidents / Reassigning Journals
On occassion, duplicate incidents will be created. Depending on the situation, duplicate tickets can be reassigned to an existing incident so that information appears in the same spot, or individual journals can be reassigned if needed.
All of these methods are one-steps which can be accessed and run as described below.
Updates to Reassign Journals
Starting on March 6th, 2020, an internal WiscIT process will be enabled allowing emails to route better through duplicate incidents. This requires using the new "Reassign Journals and Close Duplicate Incident" one-step which can be added with the below steps.
Reassign Journals and Close Duplicate Incident
Accessing the One-Step
If you do not already have the one-step added in a Toolbar on your WiscIT client, it can be accessed in the global one-step folder.
- Open the duplicate ticket in WiscIT.
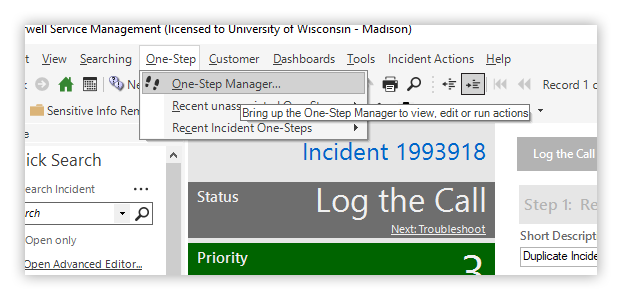
- Click "One-Step" at the top of your WiscIT window.
- Select "One-Step Manager" in the list of options that appears.
-
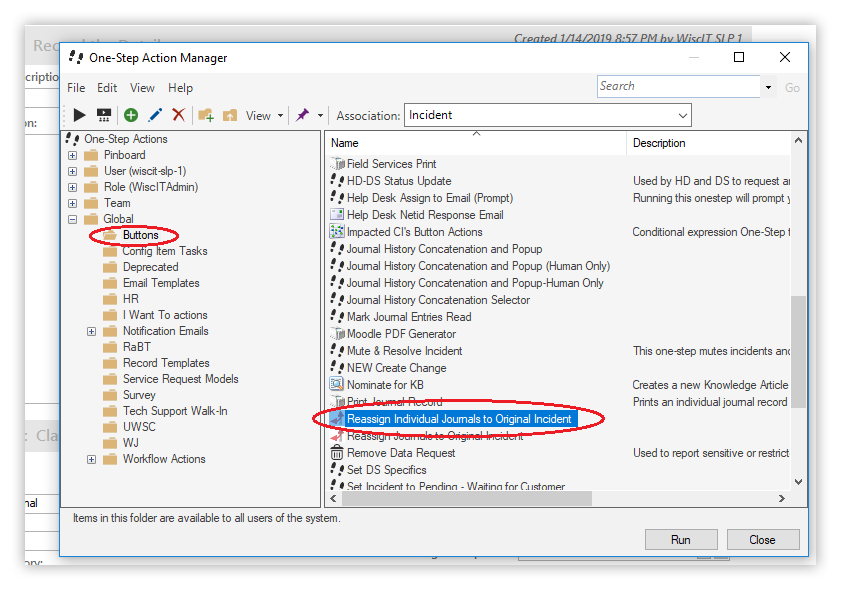
Select the "Global" folder on the left side of the pop-up window, and then select the "Buttons" folder. Make sure that the Association dropdown is set to "Incident"

- Look for the One-Step titled "Resolve Duplicate Ticket and Reassign Journals". You can double click on this run the One-Step, or add it to a toolbar using these steps: WiscIT - Adding a One-Step to a Toolbar

Using the One-Step
- Write down or copy the original ticket number
- Go to the duplicate ticket, and run the "Reassign Journals to Original Incident" one-step.
-
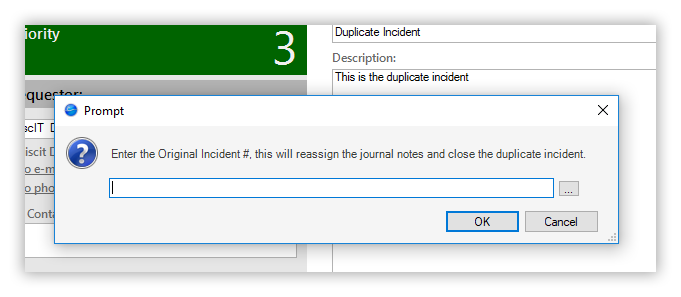
In the pop-up window that appears, paste or enter the original ticket number.
NOTE: This will reassign the journals of the case you are currently viewing to the case number that you enter.
- Click "OK".

WiscIT will take you to the original incident. The duplicate case has been closed, and the journals have been reassigned to the original incident. The original incident's "Important" flag is also enabled.
Close A Duplicate Ticket
Accessing the One-Step
If you do not already have the one-step added in a Toolbar on your WiscIT client, it can be accessed in the global one-step folder.
- Open the duplicate ticket in WiscIT.
- Click "One-Step" at the top of your WiscIT window.
- Select "One-Step Manager" in the list of options that appears.
-
Select the "Global" folder on the left side of the pop-up window, and then select the "Buttons" folder.

- Look for the One-Step titled "Close A Duplicate Ticket". You can double click on this run the One-Step, or add it to a toolbar using these steps: WiscIT - Adding a One-Step to a Toolbar

Using the One-Step
- Go to the duplicate ticket.
- Run the "Close A Duplicate Ticket" One-Step.
- You will be prompted if you would like to close the ticket. Click "OK".
- The duplicate ticket will be closed, and any attachments or journal notes will be removed from the incident.

Reassign Individual Journals to Original Incident
Accessing the One-Step
If you do not already have the one-step added in a Toolbar on your WiscIT client, it can be accessed in the global one-step folder.
- Open the duplicate ticket in WiscIT.
- Click "One-Step" at the top of your WiscIT window.
- Select "One-Step Manager" in the list of options that appears.
-
Select the "Global" folder on the left side of the pop-up window, and then select the "Buttons" folder.
- Look for the One-Step titled "Reassign Individual Journals to Original Incident". You can double click on this run the One-Step, or add it to a toolbar using these steps: WiscIT - Adding a One-Step to a Toolbar

Using the One-Step
- Write down the case number that you would like the journal reassigned to.
- Open the incident that has the journal that you would like to reassign to a different incident.
- Click the journal note that you would like reassigned (It will then appear to be highlighted).
- Run the "Reassign Individual Journals to Original Incident" One-Step.
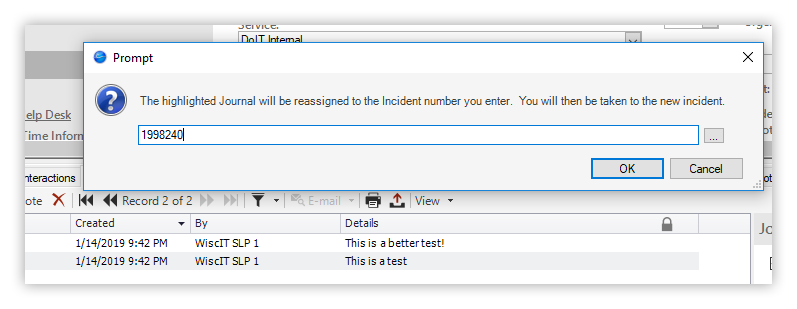
- You will be prompted for the original incident number. Enter the number that you have written down.
- Press "OK". The journal will be reassigned to the original incident. The incident that it was reassigned to has it's "Important" flag set to true.


