
REDCap: User Rights Management
REDCap Accounts versus Project Users:
REDCap Account: When a person is set up with a REDCap account, they are given access to the overall REDCap system. They can create their own projects or their account can be added to projects.
Project Users: Each REDCap project has users. These are the specific users with REDCap accounts that can access the project. In order for someone to be a added as a user to a project, they first need a REDCap account. When a user account is added to a project, the user must be assigned a role or given a set of custom permissions. The role or permissions given to a user account is determined at the project-level settings, and determines a user's access to data and ability to make changes in that specific project. For a detailed review of the user rights settings that can be granted or restricted, please see: REDCap: User Rights Definitions
User Roles: Each project can have pre-defined user roles. Then individual users can be assigned to a role. This is helpful, for instance, if a project will have a number of data entry staff who only need access to certain parts of the project, or a statistician who may need to export data but not enter data. By setting up a pre-defined user role, it streamlines the process for adding new users to a project. Please see: REDCap: Recommended User Roles for recommended access based on a role.
User Rights Management: User rights management is the responsibility of the project owner (the person who creates the project) and/or the users they add to the project with User Rights access. User roles and individual user access rights should be set appropriately and reviewed periodically.
Summary of Best Practices for User Rights Management in REDCap:
- ONLY provide needed access rights: Only provide user rights that a person actually needs. DO NOT just check all possible options in the User Rights section in REDCap. This is especially important for the high level roles of "Project Design & Setup" and "User Rights". Additionally, DO NOT select "REDCap Mobile App" rights if you are not using the Mobile App as this complicates changes to your project.
- Set expiration dates for users: If you are adding a user to a project who you know will need access to the project for a limited amount of time, set an expiration date for their access at the time you add them to the project.
- Review your User Access Dashboard periodically: The User Access Dashboard will show all of the users for each project you have User Rights access on. Review it every month to ensure that all users have the appropriate level of access to the projects they are on. Set an expiration date for any users that have left/are leaving your project.
- Create and utilize User Roles in your project: A User Role has a pre-defined level of access. For instance, you might create a user role for Data Entry, that allows a user to enter data but not change project settings or delete records.
- Consolidate sensitive information in one instrument: If there are users who should not see identifiable information in the project, the best solution is to keep all of the sensitive information on one instrument and restrict read access to it.
- Make use of Data Access Groups (DAGs) (for multi-site projects): Data Access Groups allow users to be assigned to a group (for instance, a study site) and then only have access to records from that particular DAG. Please see: REDCap: Data Access Groups (DAGS) for more information.
- Have a process for when study team members leave their role: If you have a study team member who is departing, make sure their access to your REDCap project is expired. It is also important to ensure that their account is not tied to any project settings (for instance, API tokens or automated survey invitations) that will need to be transferred over to another study team member.
Requesting a REDCap Account
To request a REDCap Account, please fill out the REDCap Account Request Form.
Requirements for gaining access to REDCap:
- Please note that in order to have a REDCap account created, all users must complete HIPAA training. This is UW-Madison Institutional Policy, because REDCap is a system that contains PHI.
- Global Health REDCap does not require HIPAA training for international collaborators. All US accounts in Global Health REDCap will need to provide HIPAA completion certificates.
- A valid UW email address, or a project sponsor with a valid UW email address.
- New User Training: When you submit a request for a new account, you will need to complete a brief interactive training module (10 minutes) which covers the basics of REDCap.
Once your account is granted, you will need to log in once in order to complete the account set-up. Once you have logged in for the first time, your account will be available to be added to a REDCap project.
| REDCap Account Creation Step by Step: | ||||
|---|---|---|---|---|
| 1. Submit account request | 2. Complete REDCap Interactive Training | 3. Complete/provide current HIPAA training (if not provided already) | 4. Wait to receive your account activation email | 5. Log in to your account for the first time |
*Steps for external collaborators that do not have a NetID can be found here: https://kb.wisc.edu/smph/informatics/128282
Add a New User to Your REDCap Project
Please be aware, in order to add a new user to your project, they must:
- Already have been granted a REDCap account.
- The user must have logged in at least once.
Please note: We are not able to provide group accounts for REDCap. Because we are required to confirm that all users have completed HIPAA and/or HSP training, we cannot allow accounts to be set up for groups of individuals (e.g. a "XYZ Lab" general account that multiple people will use.)
Adding a New User to Your Project
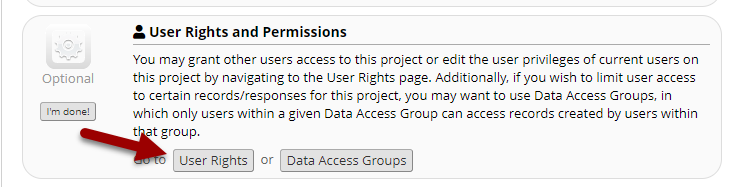
To access the User Rights module, you can navigate to it from the "Project Setup" tab or from the left-hand menu in your project.

To add a new user, you will start typing their name or REDCap log-in into the field next to "Add with Custom Rights" or "Assign to Role" buttons. IMPORTANT! You must select a user who already has a REDCap account. You will know that they already have a REDCap account because when you start typing their information in, they will show up in a drop-down. You MUST select their name from that dropdown list.
If they do not show up, then they will need to be set up with an REDCap account OR have their account re-activated before they can be added to your project. Re-activation of an account may be needed if their account has been suspended due to inactivity. In this case, please have the user send a ticket to REDCap support and request their account be re-activated.

Do not free-type a name or email address into these fields. If their name doesn't show up automatically, they do not have a REDCap account or their account is not active! Free-typing a name or email address into this field will not create access to your project. A user must first be set up with a REDCap account (and have an active account), which will cause their name to be available to add from the Add User fields. If you try to add users this way, they will not get access and you will need to remove these entries before your project is moved to Production.

When you add a new user, you will need to either select what rights they have (for definitions of all the user rights settings, please see: REDCap: User Rights Definitions) or assign them a User Role that you have pre-defined.
Adding User Roles to Your REDCap Project

This will bring up a pop-up with the permissions you can grant or restrict for the role. For a detailed review of the user rights settings that can be granted or restricted, please see: REDCap: User Rights Definitions. Please see REDCap: Recommended User Roles for recommendations on which rights to give various user roles in your project.
Automatic Account Suspension
Remove a User from Your REDCap Project or Set an Expiration Date
| Removing / Deleting a User | Setting Project Level Expiration Date |
|
|---|---|---|
| Project logging retains user's actions | ||
| Can immediately remove a user's access | (Enter today's date) |
|
| Set a future date for user to lose access | ||
| Project remains listed on user's Project Dashboard | ||
| User remains listed on project's User Rights page |
Setting an Expiration Date
An expiration date should be set when a user has left your project for a new position or role within your department as of a specific date. If the user should immediately lose access to the project and data, you can set an expiration date in the past and then save your changes. You can also update an expiration date if a user will continue with your project longer than initially planned. There are two options for adding or editing an expiration date. Both options begin with navigating to the User Rights Module and finding the user's name in your list of staff.
Option 1: Next to the username, click on the word 'never' (or the date if you've already entered an expiration date) in the Expiration column (picture A). In the "Change user expiration" field that appears, add or update a date and then Save (picture B).

Option 2: Click on the user's name and select the button "Edit User Privileges". (If they are assigned to a User Role, you will need to first un-assign them from the User Role before you can set an expiration date.) At the top of the "Edit existing user" page, enter an expiration date and then save your changes.

Removing a User
Removing a user should only be done if the user was added mistakenly or was added with a "non-account" (e.g. email address, misspelled username, etc.). Click on the user's name and select the button "Edit User Privileges". Then select the 'Remove User' button at the bottom of the screen and confirm your changes.

Modifying User Rights in Bulk

The User Access Dashboard
